Imagine you own a popular restaurant. On a normal day, one chef can handle all the orders. But what happens during lunch rush? Or worse, what if your chef calls in sick? This is exactly the problem Azure Load Balancers solve for websites and applications. In this guide, you’ll learn how to build a system that:
- Spreads traffic across multiple servers (like having multiple chefs)
- Keeps your website running even when one server fails
- Provides a single, stable entry point for all your users
Understanding the Key Concepts
Before we start building, let’s understand the building blocks:
1. Virtual Network (VNet)
Think of this as your private office building in the cloud. Only authorized people (or servers) can enter.
2. Network Security Group (NSG)
This is like a security guard at the entrance. It decides what type of traffic can enter or leave (for example, only allowing web traffic on port 80).
3. Availability Set
This ensures your servers are placed on different physical hardware. It’s like storing backup copies of important documents in different safes—if one fails, the others are safe.
4. Load Balancer
The traffic cop that distributes incoming requests evenly across your servers.
5. Health Probe
A constant health check that asks each server “Are you still working?” If a server doesn’t respond, the Load Balancer stops sending traffic to it.
Architecture Design
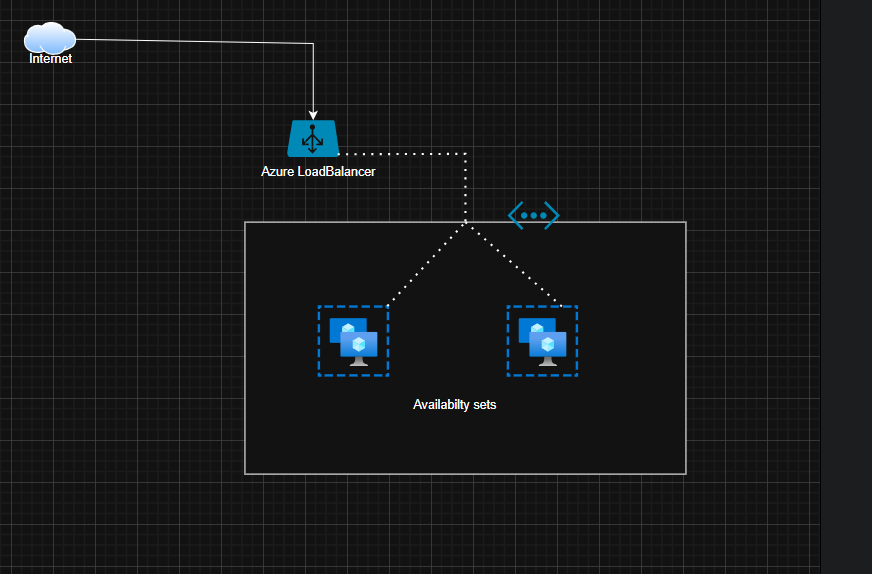
Step-by-Step Implementation
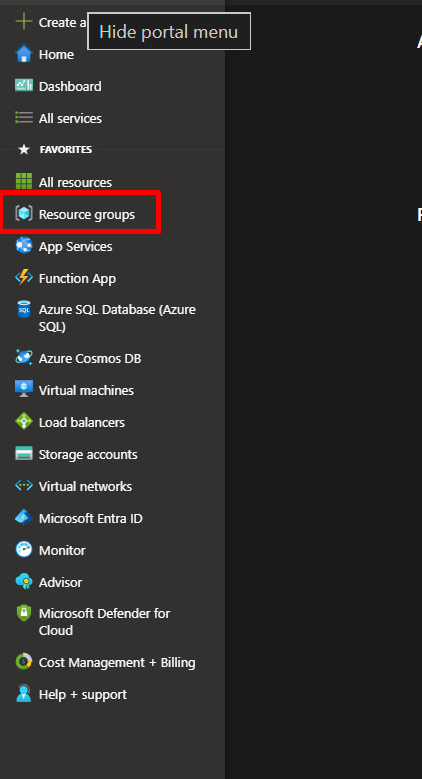
Step 1: Create a Resource Group
A Resource Group is like a project folder that keeps all related items organized.
- Log into the Azure Portal
- Search for “Resource groups” and click Create
- Name it:
RG-LB-Demoor your preferred name - Choose your preferred region (e.g., East US)
- Click Review + Create, then Create
This keeps all your project resources in one place for easy management and cleanup.
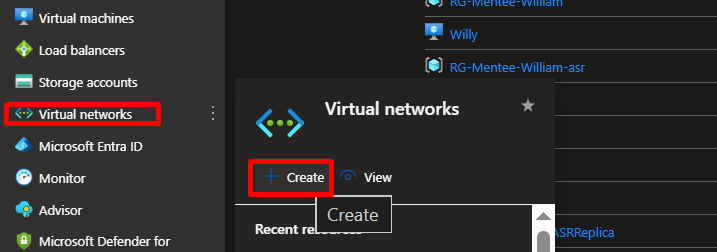
Step 2: Build Your Virtual Network
This creates your isolated network space where servers can communicate securely.
- Search for “Virtual networks” and click Create
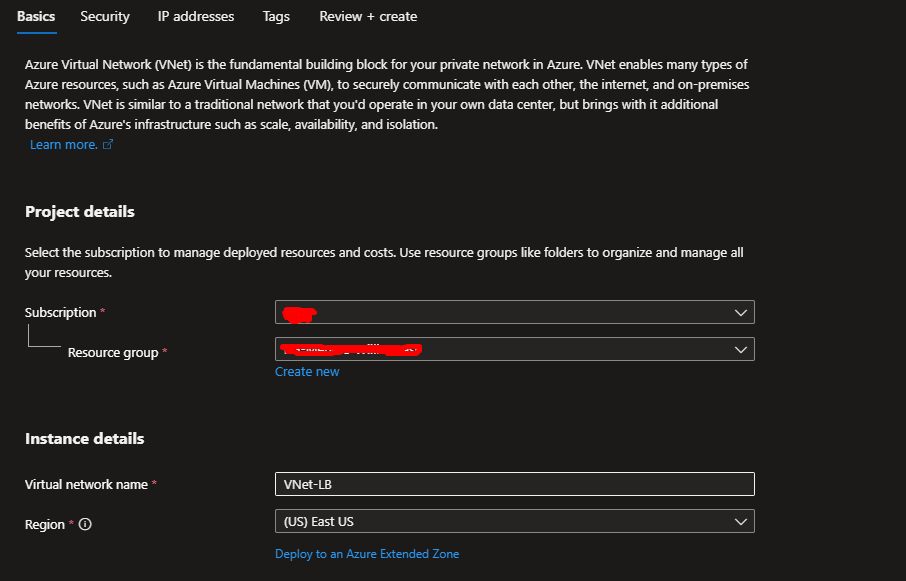
- Fill in these details:
- Resource group:
RG-LB-Demo - Name:
VNet-LB - Region: Same as your resource group
- Resource group:
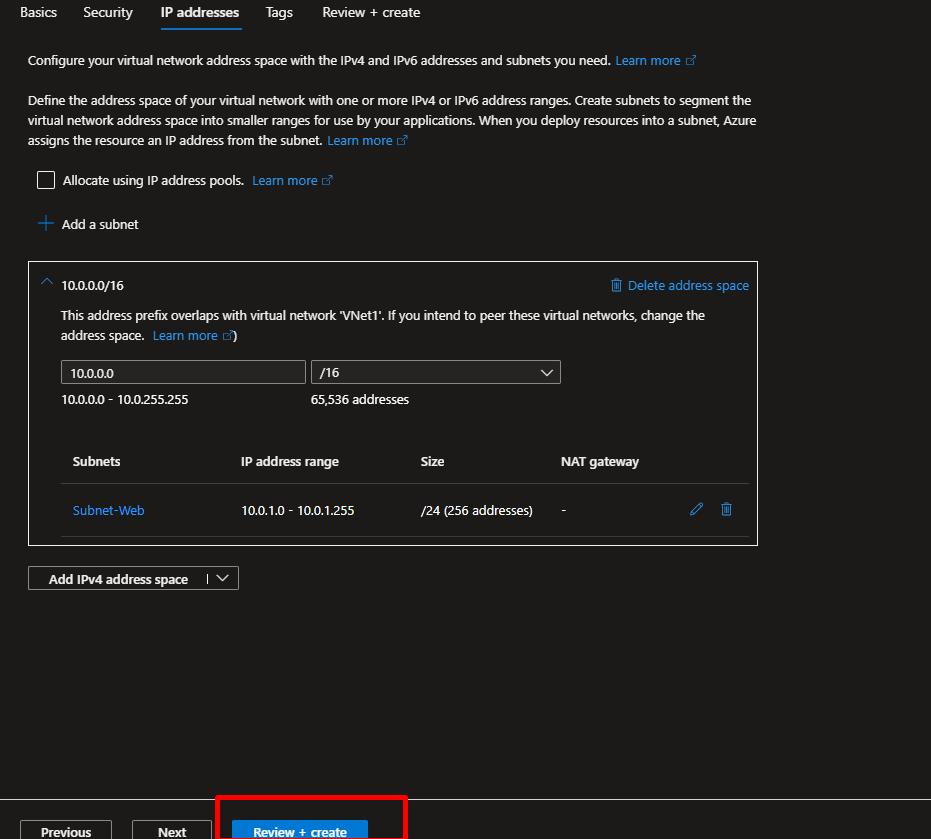
- On the IP Addresses tab:
- Keep the default address space (e.g., 10.0.0.0/16)
- Create a subnet named
Subnet-Web(e.g., 10.0.1.0/24)
- Click Review + Create, then Create
You just created a private neighborhood where your servers will live.
Step 3: Set Up Security Rules (NSG)
Control what traffic can reach your servers.
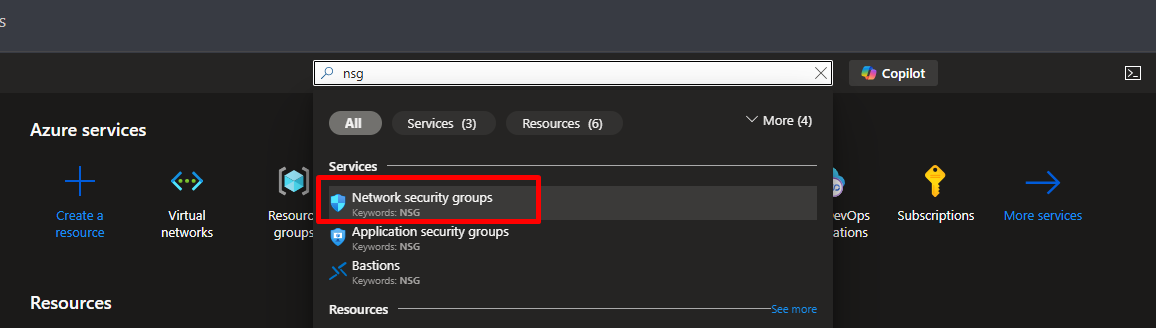
- Search for “Network security groups” and click Create
- Name it:
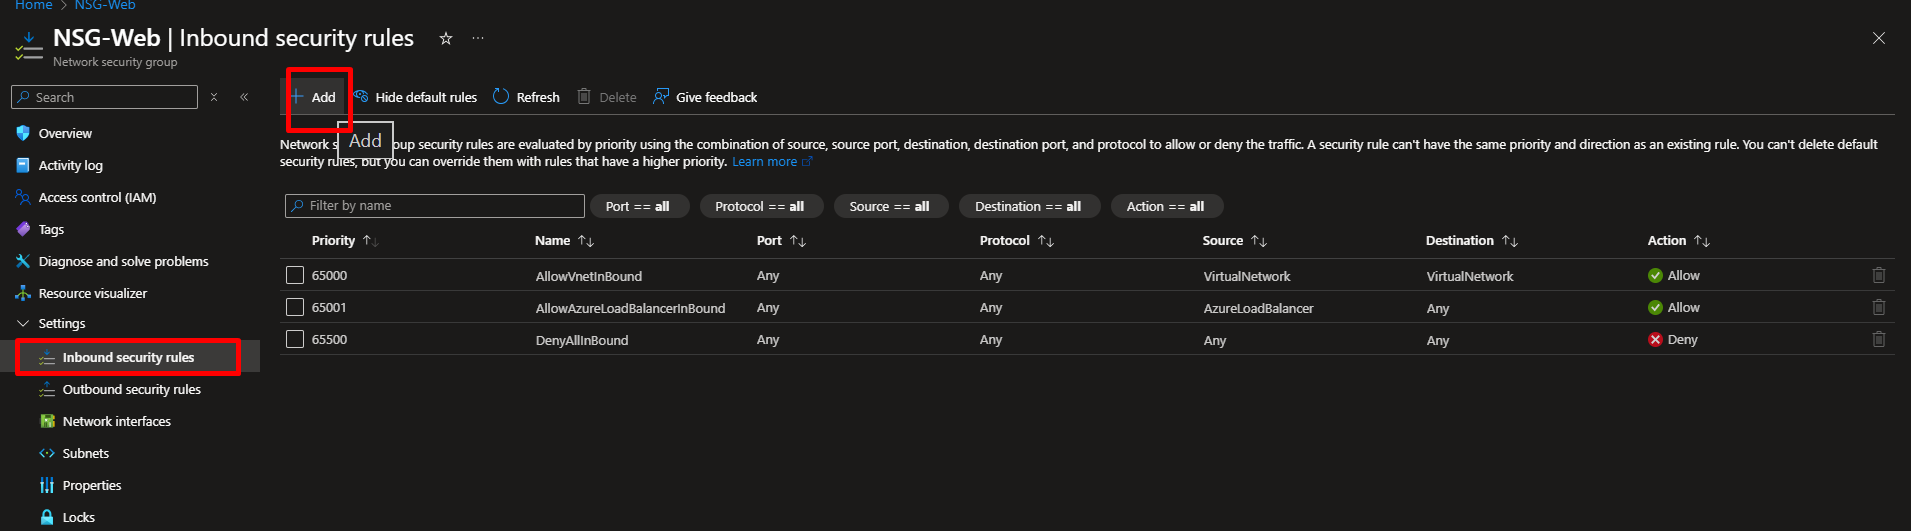
NSG-Web - After creation, go to the NSG and click Inbound security rules
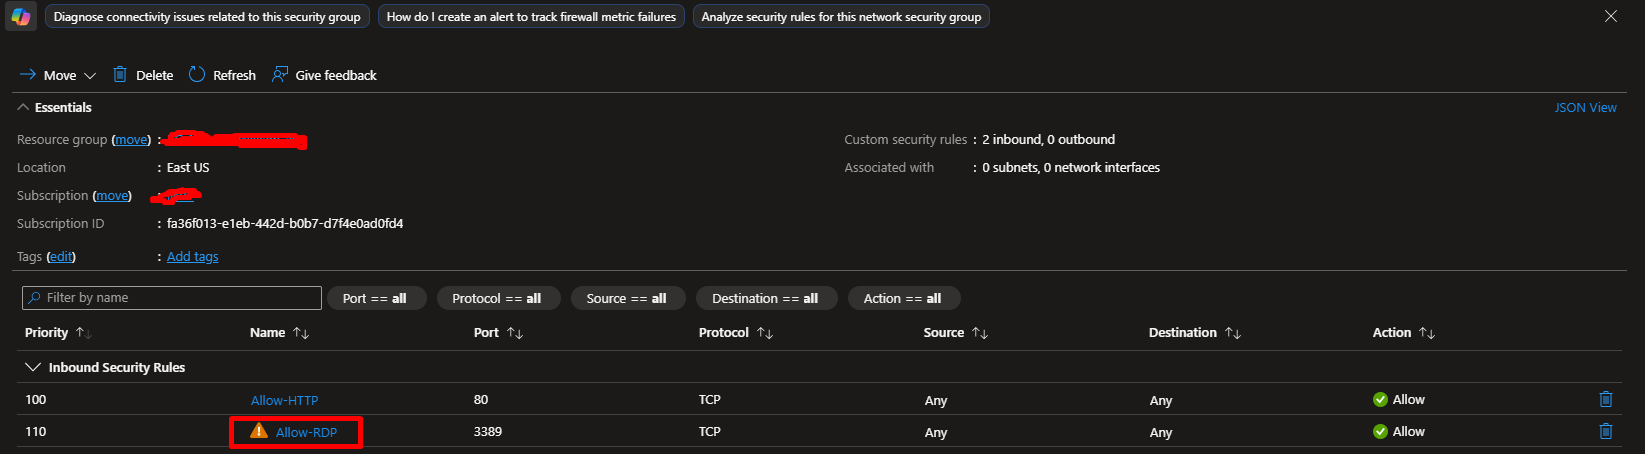
- Add two rules: Rule 1: Allow Web Traffic
- Source: AnyDestination port: 80Protocol: TCPAction: AllowPriority: 100Name:
Allow-HTTP
- Source: Any (in production, limit this to your IP!)
- Destination port: 3389
- Protocol: TCP
- Action: Allow
- Priority: 110
- Name:
Allow-RDP
- Source: AnyDestination port: 80Protocol: TCPAction: AllowPriority: 100Name:
In real production environments, you’d restrict RDP access to specific IP addresses only.
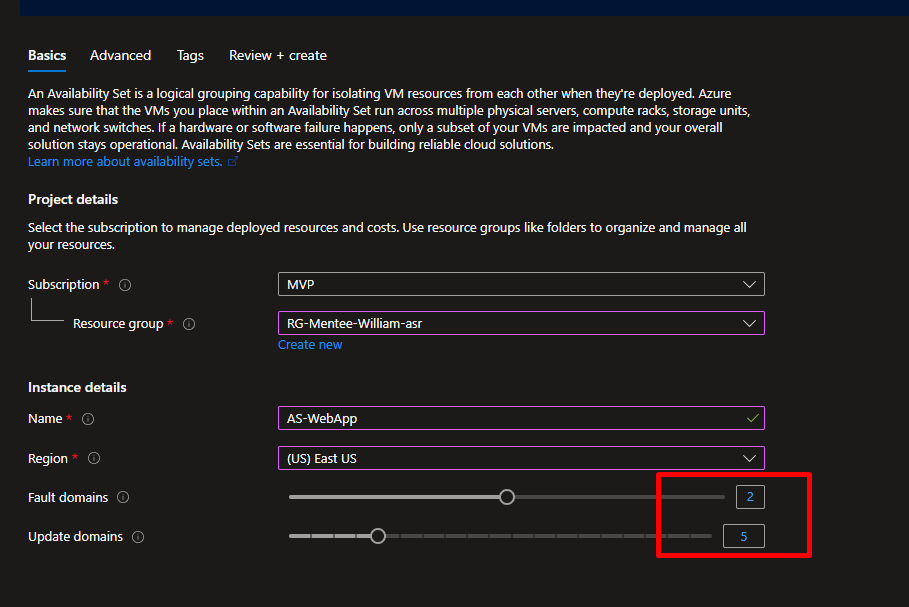
Step 4: Create an Availability Set
This ensures your servers are distributed across different physical hardware.
- Search for “Availability sets” and click Create
- Fill in:
- Resource group:
RG-LB-Demo - Name:
AS-WebApp - Fault domains: 2
- Update domains: 5
- Resource group:
- Click Create
What’s the difference?
- Fault domains: Different power sources and network switches (protects against hardware failures)
- Update domains: Ensures not all servers restart during maintenance at the same time
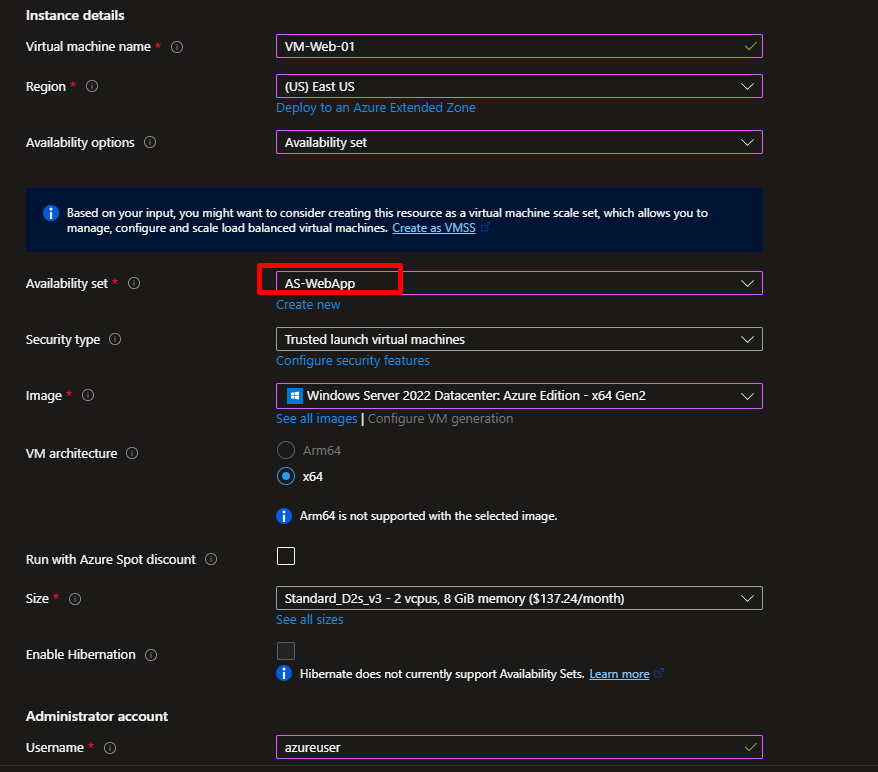
Step 5: Create Your First Virtual Machine
- Search for “Virtual machines” and click Create → Azure virtual machine
- Basics tab:
- Resource group:
RG-LB-Demo - Virtual machine name:
VM-Web-01 - Region: Same as before
- Availability options: Availability set → Select
AS-WebApp - Image: Windows Server 2022 Datacenter
- Size: Standard_B2s (affordable for testing)
- Username:
azureuser - Password: Create a strong password (save it!)
- Resource group:
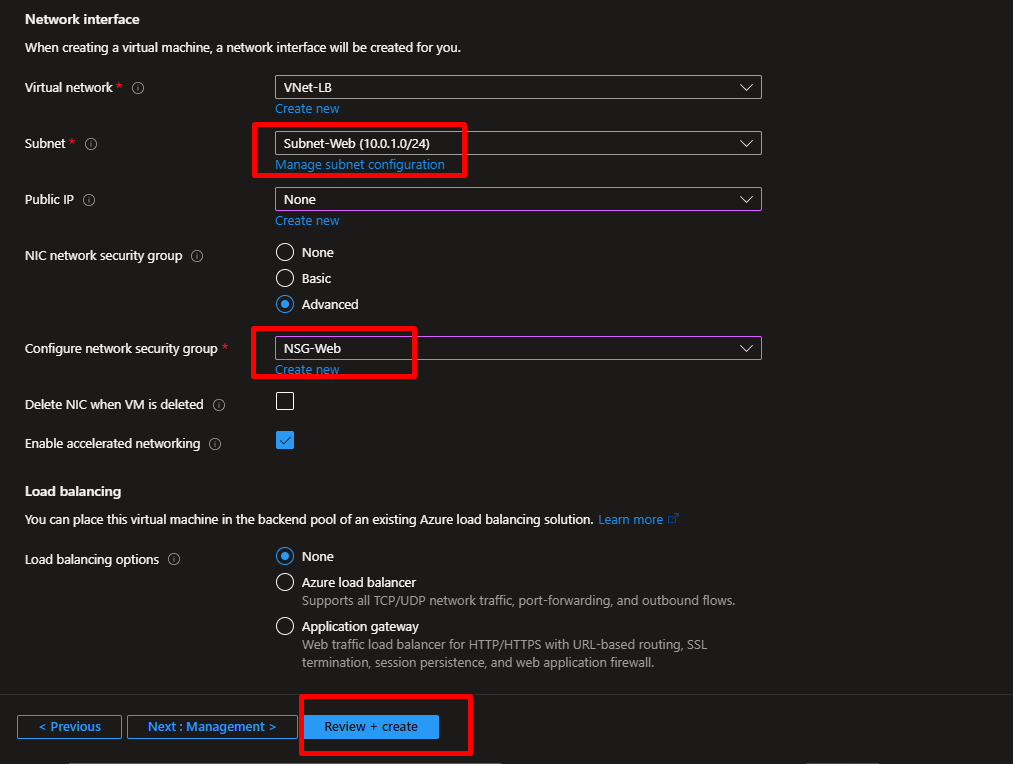
- Networking tab:
- Virtual network:
VNet-LB - Subnet:
Subnet-Web - Public IP: Create new (we’ll use this temporarily to set up IIS, then remove it)
- NIC network security group:
NSG-Web
- Virtual network:
- Click Review + Create, then Create
Wait 3-5 minutes for the VM to deploy.
Step 6: Create Your Second Virtual Machine
Repeat Step 5, but change:
- Virtual machine name:
VM-Web-02 - Everything else stays the same (same availability set, network, etc.)
Why two VMs? Redundancy! If one fails, the other keeps your website running.
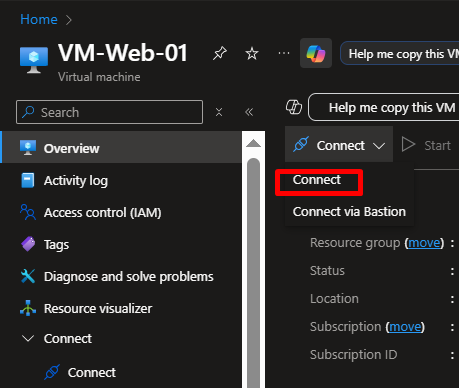
Step 7: Install Web Server Software (IIS)
For each VM, we’ll install Internet Information Services (IIS) to serve web pages.
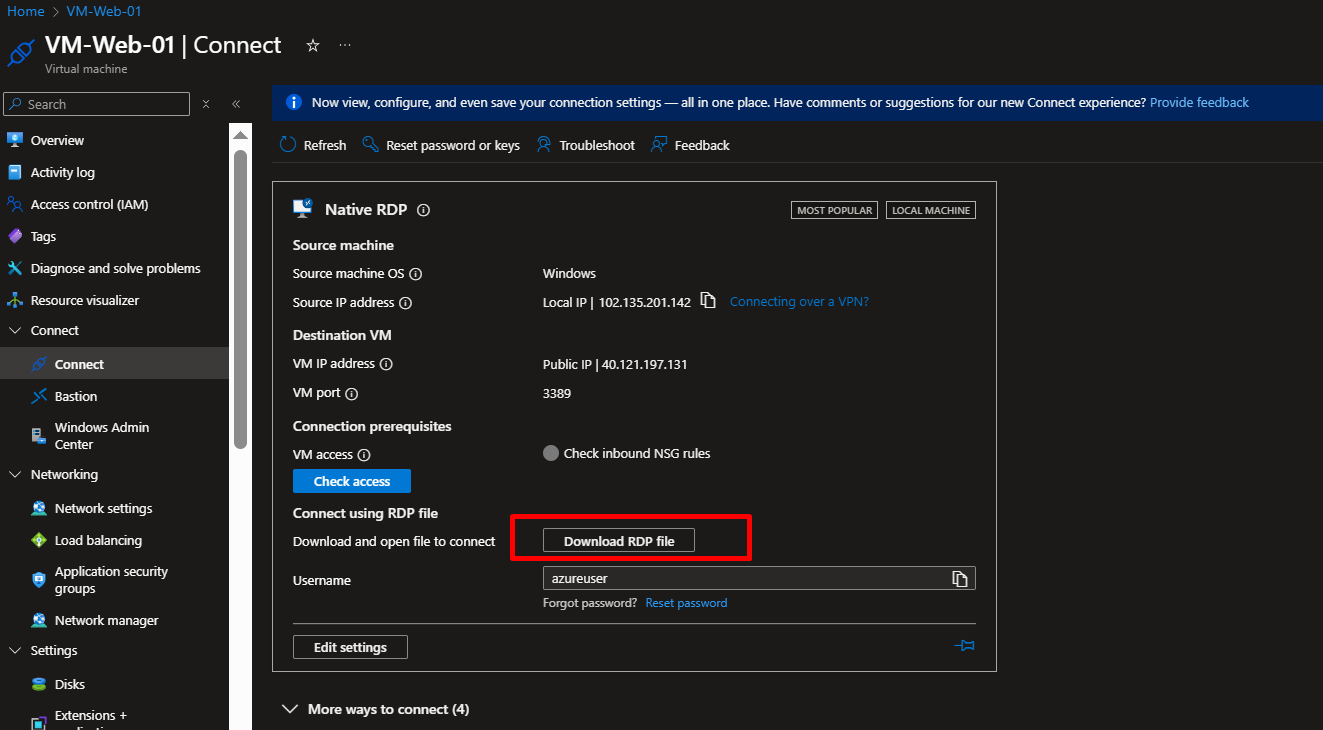
- Go to your first VM (
VM-Web-01) - Click Connect → RDP and download the RDP file
- Open the file and log in with your username and password
- Once inside the VM, open PowerShell as Administrator
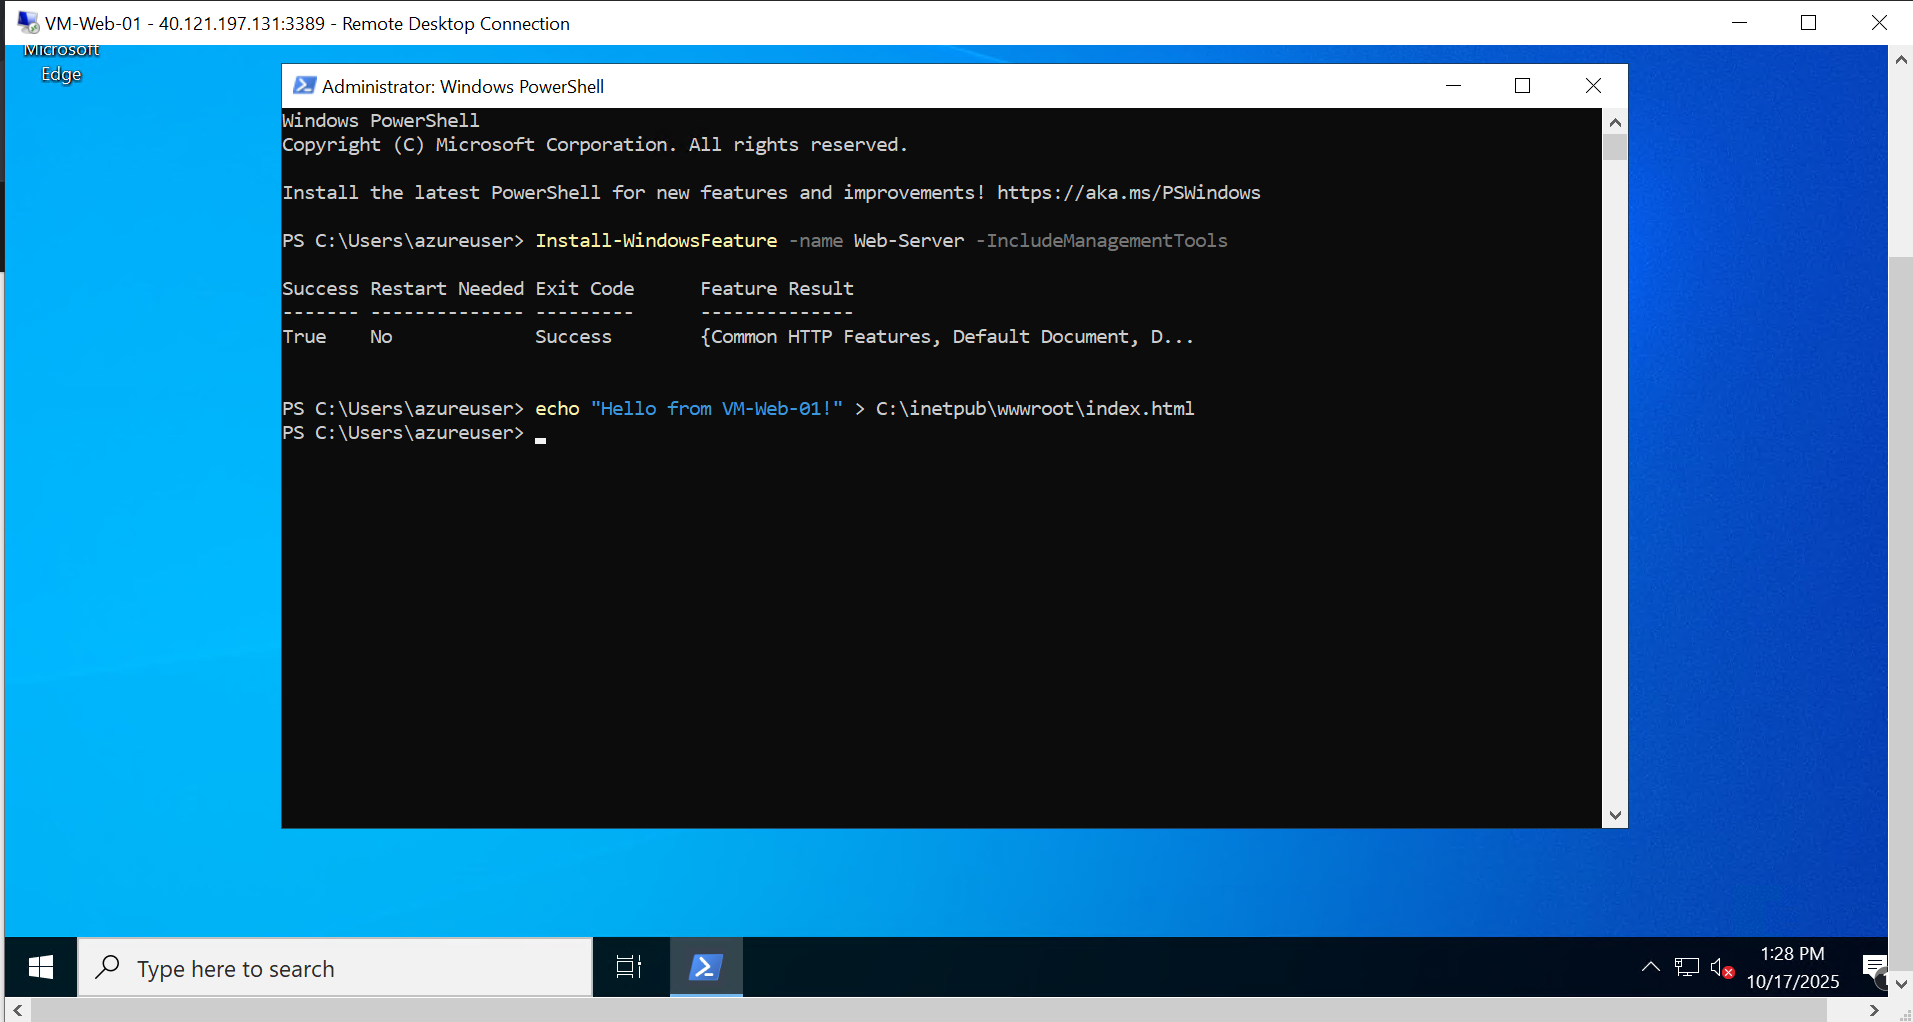
- Run these commands:
# Install IIS web server
Install-WindowsFeature -name Web-Server -IncludeManagementTools

# Create a custom homepage
echo "Hello from VM-Web-01!" > C:\inetpub\wwwroot\index.html
- Repeat for
VM-Web-02, but change the message to “Hello from VM-Web-02!”
We just turned these VMs into web servers that display custom messages.

Step 7b: Remove Public IPs (Security Best Practice)
Now that IIS is installed, we don’t need direct internet access to the VMs anymore. Let’s remove the public IPs:
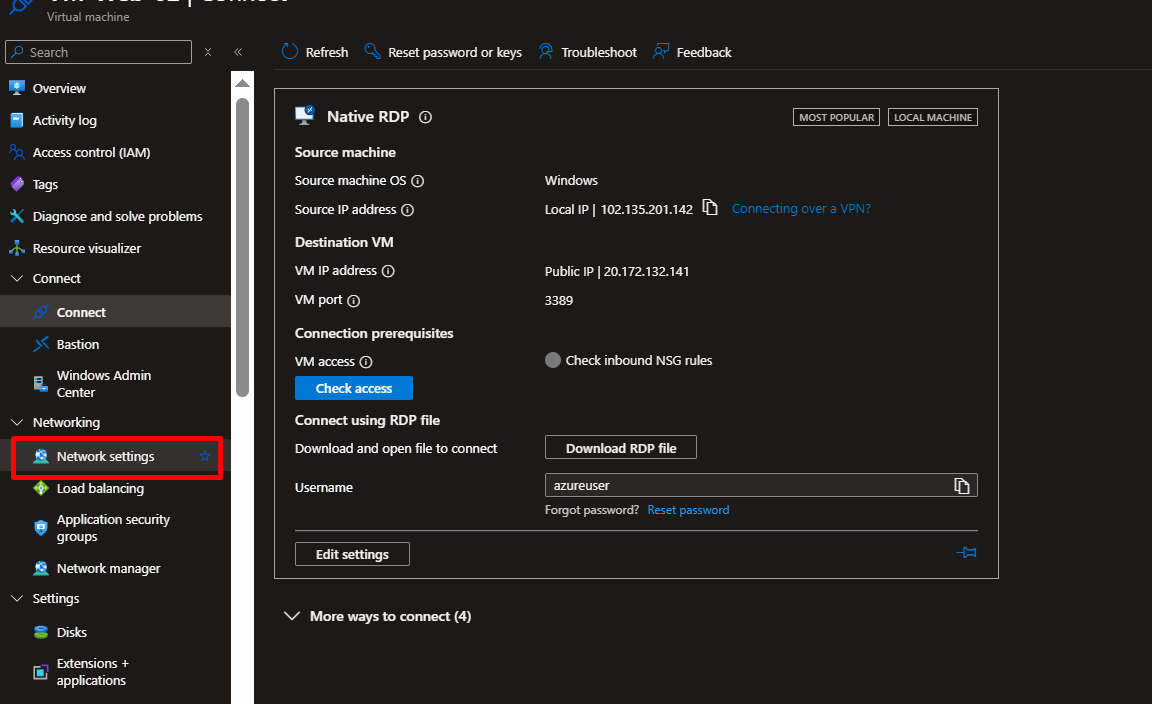
- Go to
VM-Web-01 - Under Settings, click Networking
- Click on the Network Interface name (e.g.,
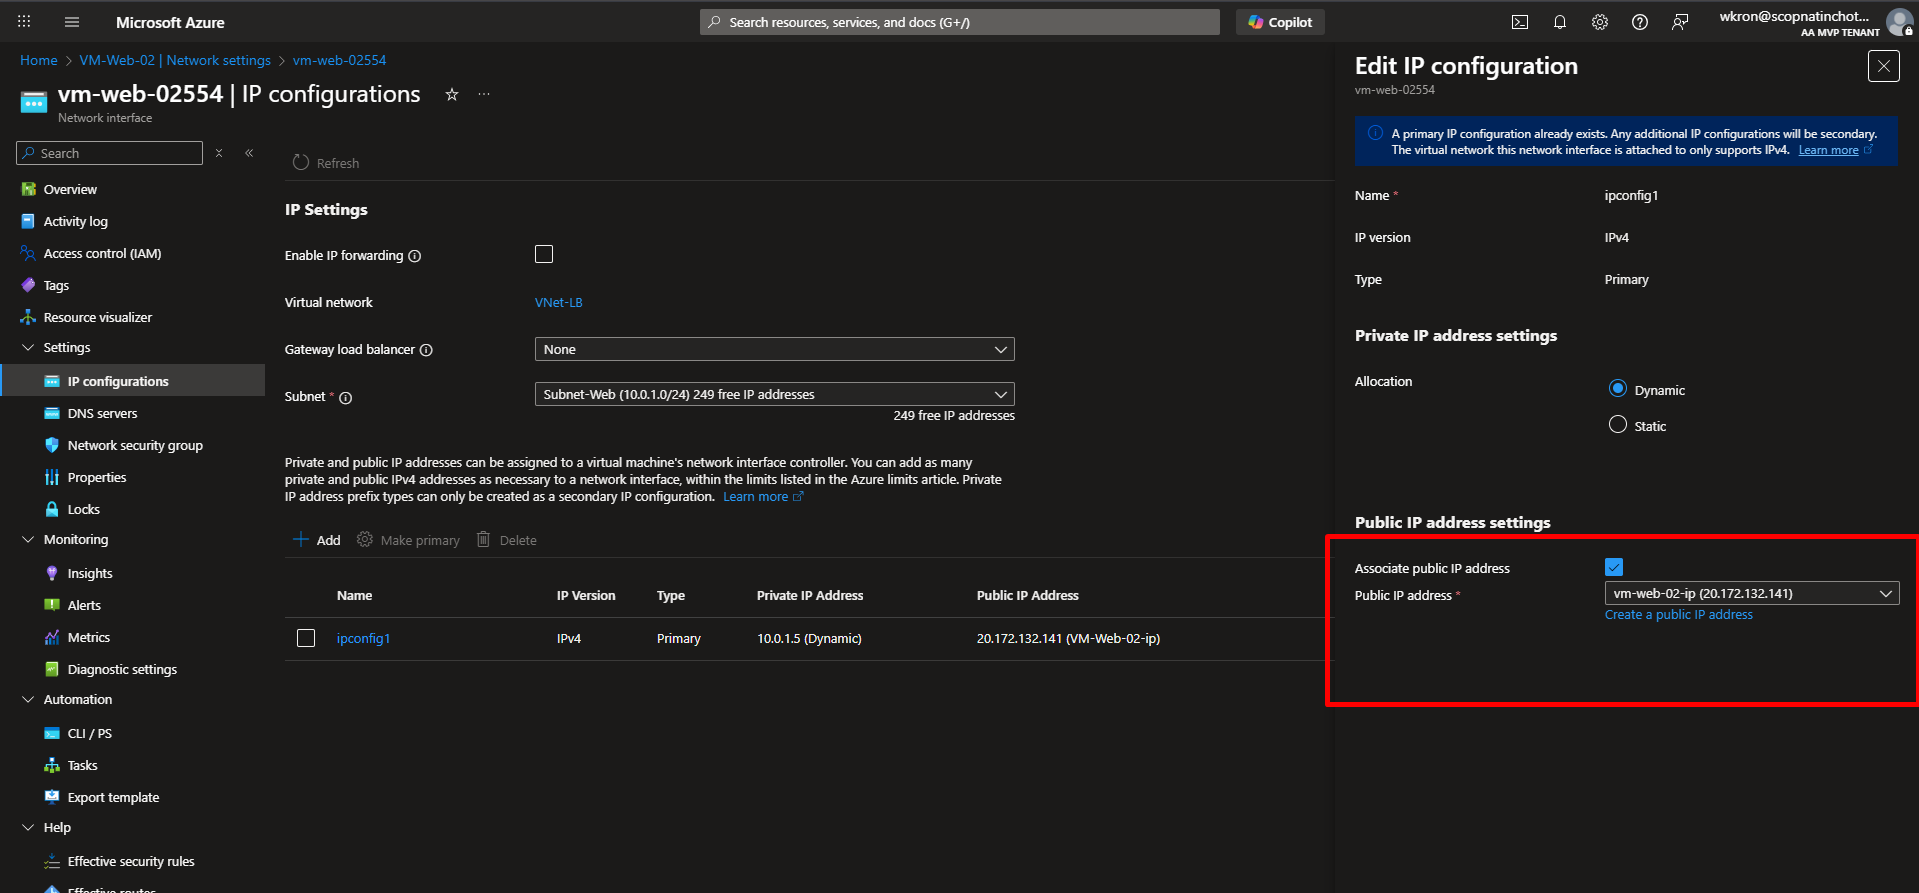
vm-web-01123) - Under Settings, click IP configurations
- Click on the IP configuration (usually named
ipconfig1) - Under Public IP address settings, uncheck the associate Public IP address box, will disassociate the public IP address from this network interface card ‘ipconfig1’.
- Click Save
- Go back and delete the now-unused public IP resource
- Repeat for
VM-Web-02
Why remove them?
- The Load Balancer is now the only public entry point
- VMs are protected behind the Load Balancer
- Reduces attack surface (security best practice)
- Saves on public IP costs
Note: If you need to access the VMs again later, you can:
- Use Azure Bastion (secure browser-based access)
- Temporarily re-attach a public IP
- Use a Jump Box VM
Step 8: Create the Load Balancer
- Search for “Load balancers” and click Create
- Basics tab:
- Resource group:
RG-LB-Demo - Name:
LB-WebApp - Region: Same as your VMs
- SKU: Standard (Basic is being retired)
- Type: Public
- Resource group:
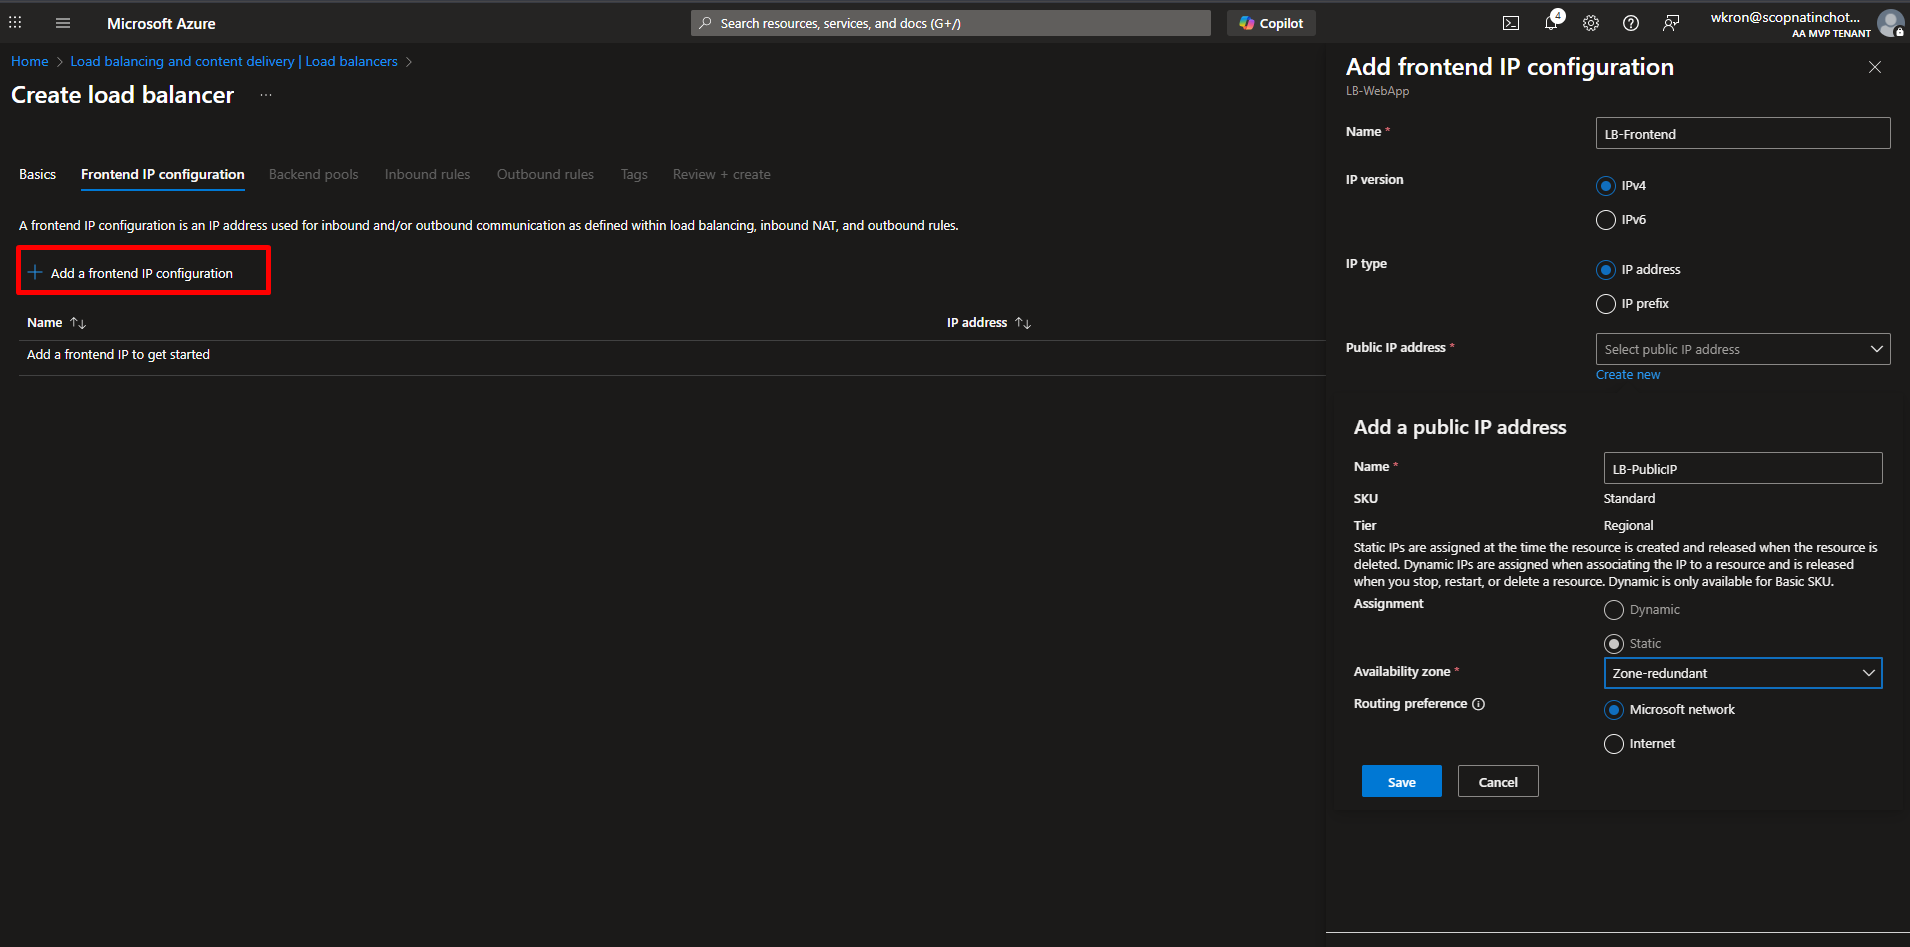
- Frontend IP configuration:
- Click Add a frontend IP
- Name:
LB-Frontend - Public IP address: Create new → Name it
LB-PublicIP
- Backend pools: (Skip for now, we’ll add this next)
- Click Review + Create, then Create

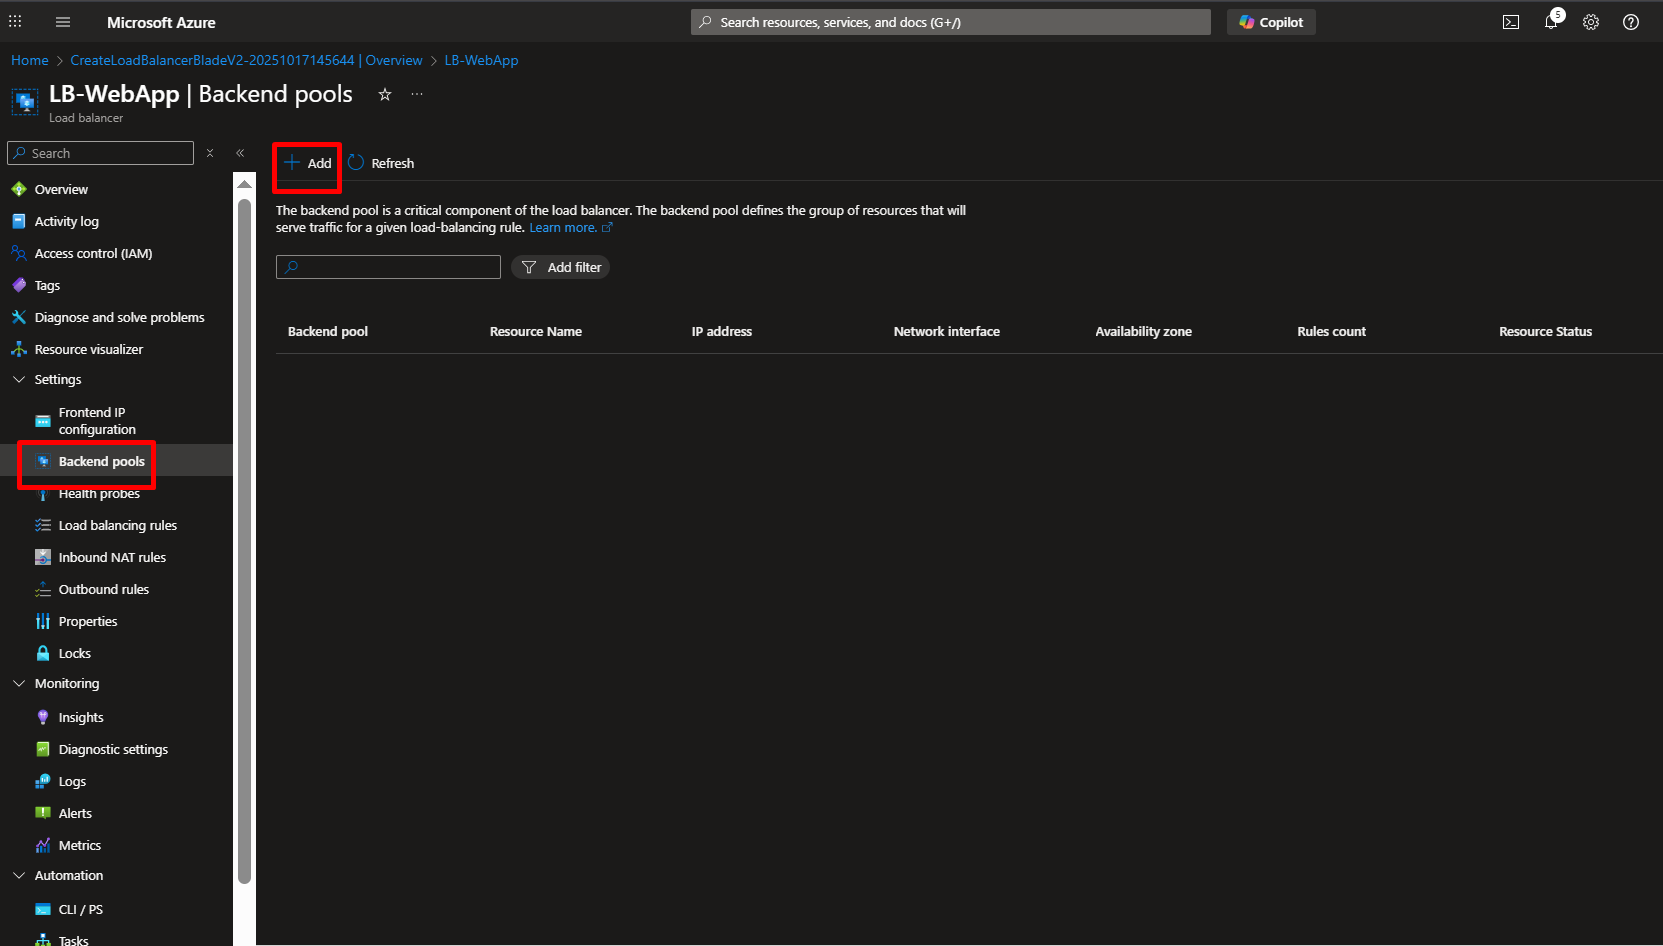
Step 9: Add Your VMs to the Backend Pool
- Go to your Load Balancer (
LB-WebApp) - Under Settings, click Backend pools
- Click Add
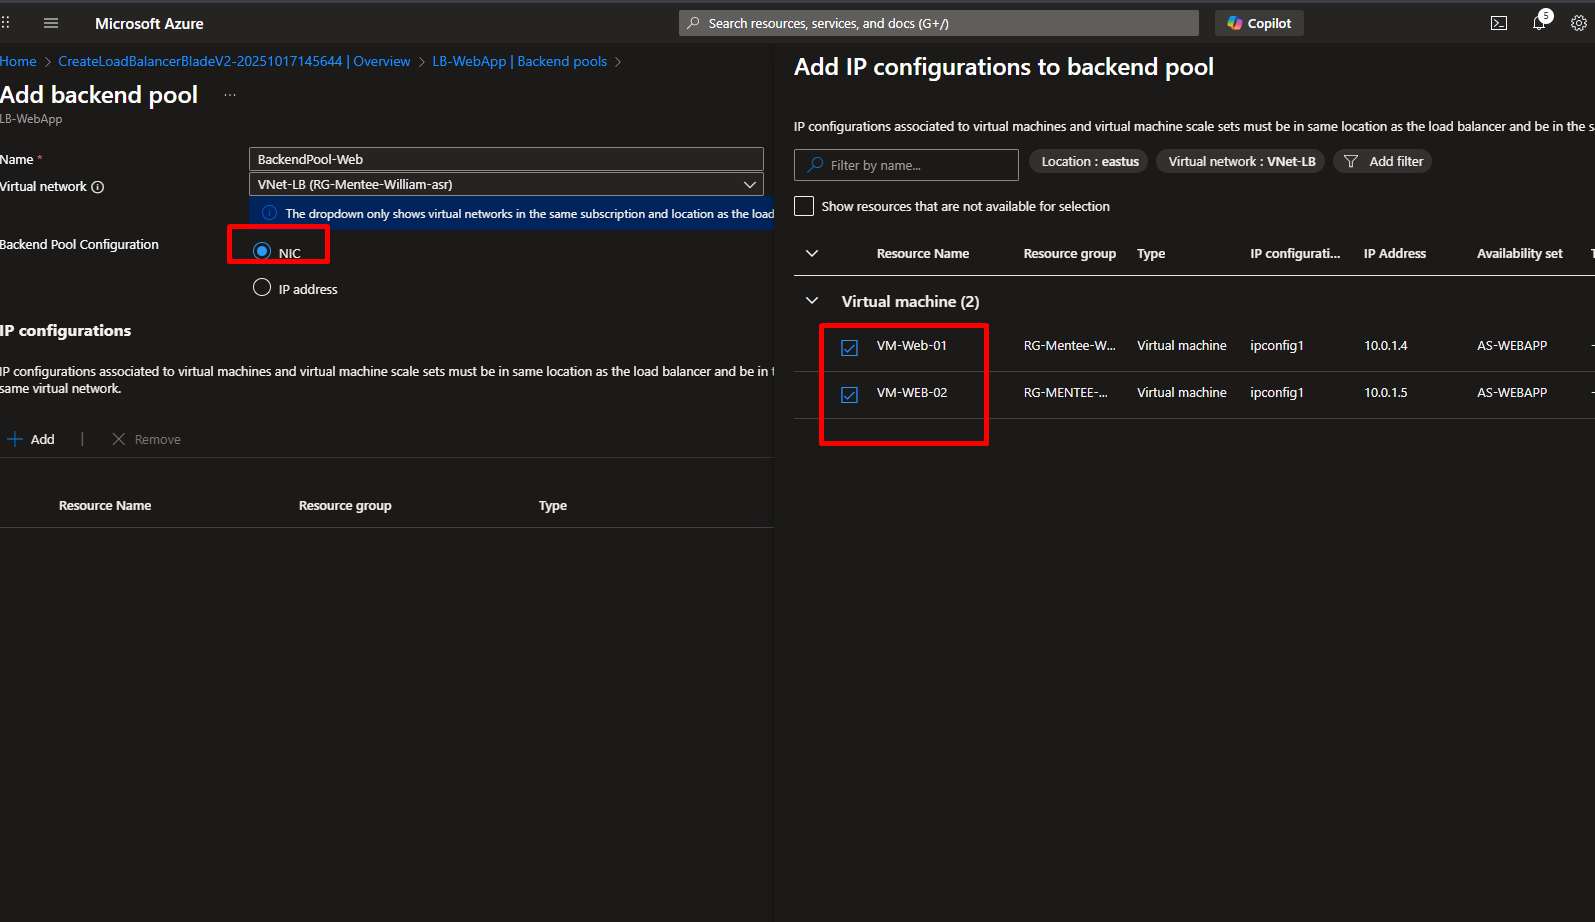
- Fill in:
- Name:
BackendPool-Web - Virtual network:
VNet-LB - Click Add and select both
VM-Web-01andVM-Web-02
- Name:
- Click Save
We just told the Load Balancer which servers should receive traffic.
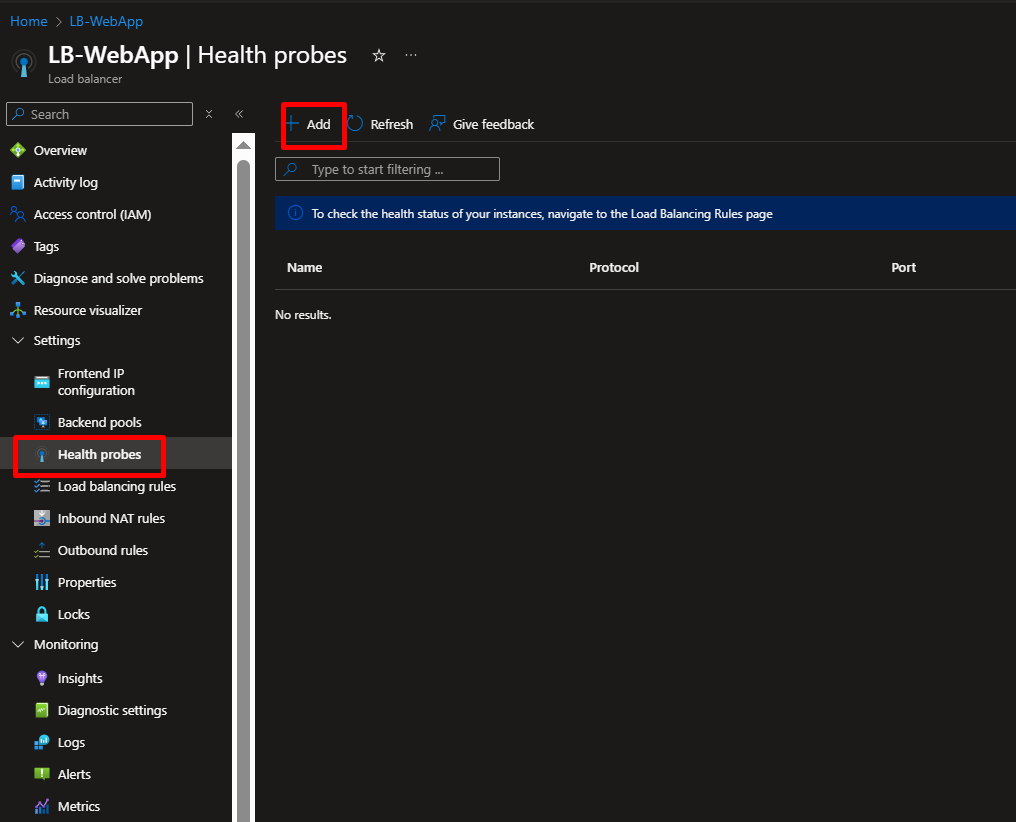
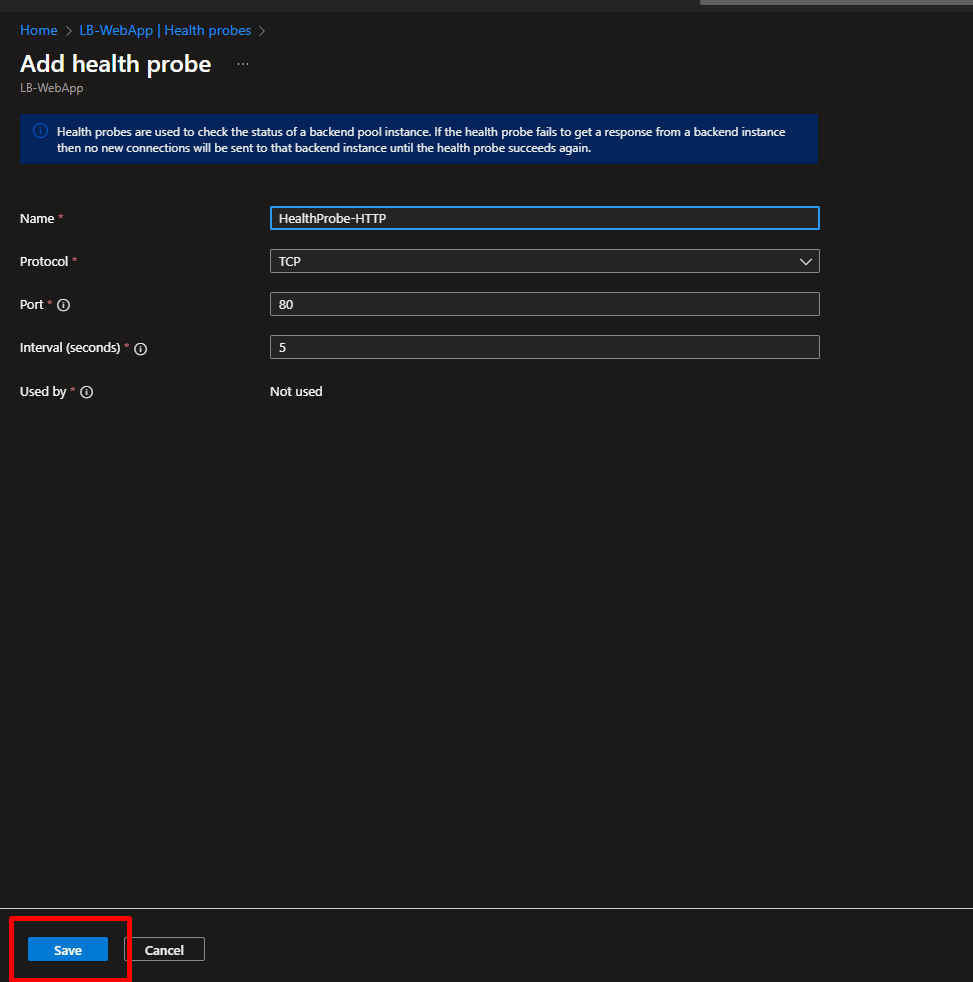
Step 10: Create a Health Probe
The health probe constantly checks if your servers are responding.
- In your Load Balancer, go to Health probes
- Click Add
- Fill in:
- Name:
HealthProbe-HTTP - Protocol: TCP
- Port: 80
- Interval: 5 (checks every 5 seconds)
- Name:
- Click OK
Every 5 seconds, the Load Balancer asks “Can you serve web traffic?” If a VM doesn’t respond, it’s temporarily removed from rotation.
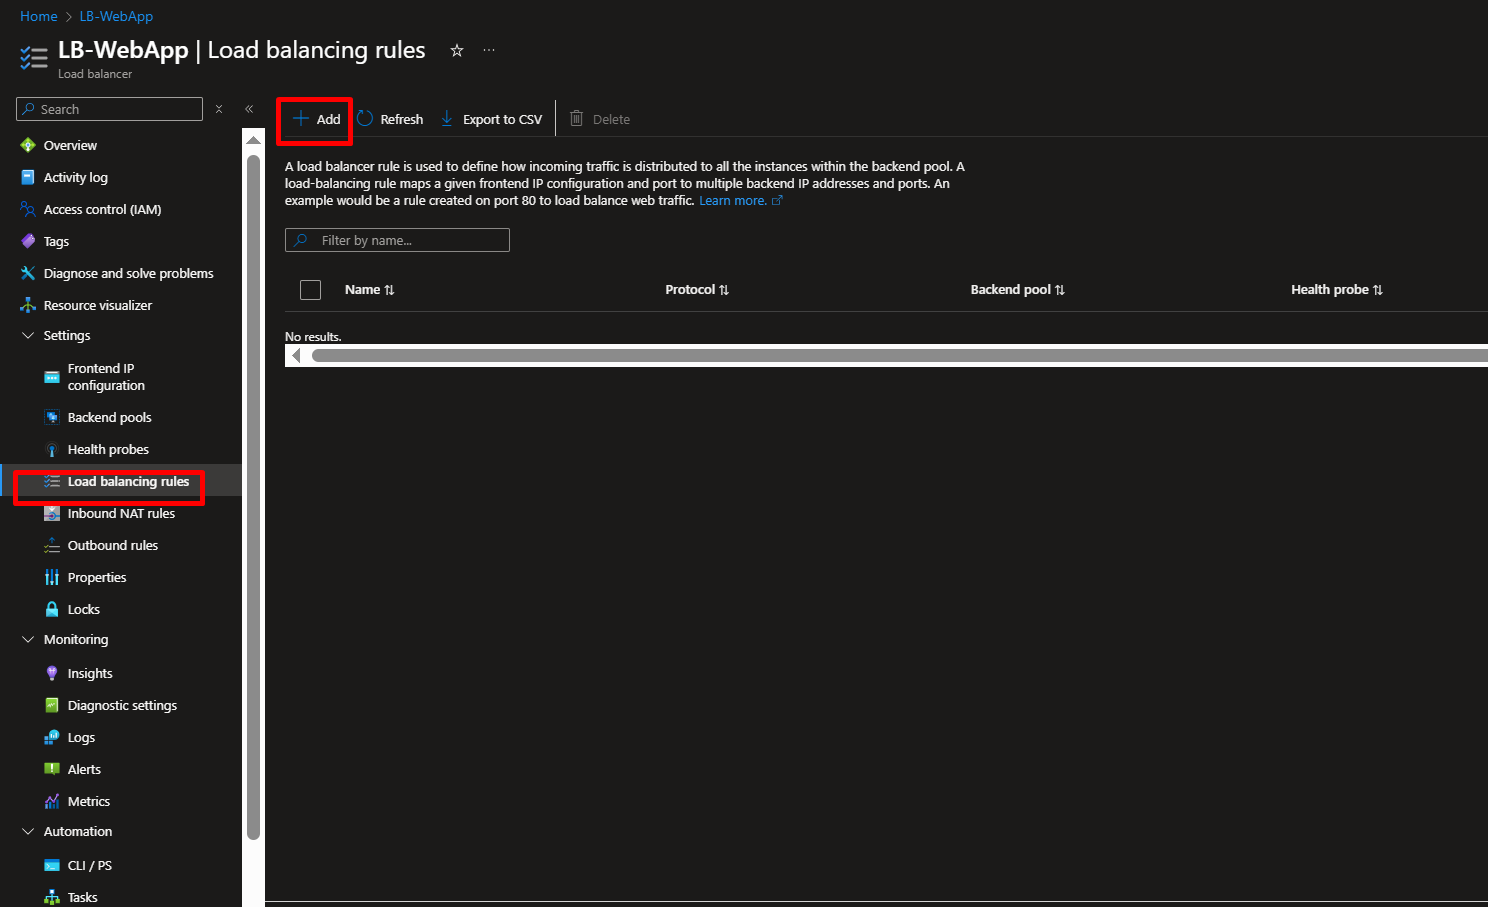
Step 11: Create Load Balancing Rules
This defines how traffic should be distributed.
- In your Load Balancer, go to Load balancing rules
- Click Add
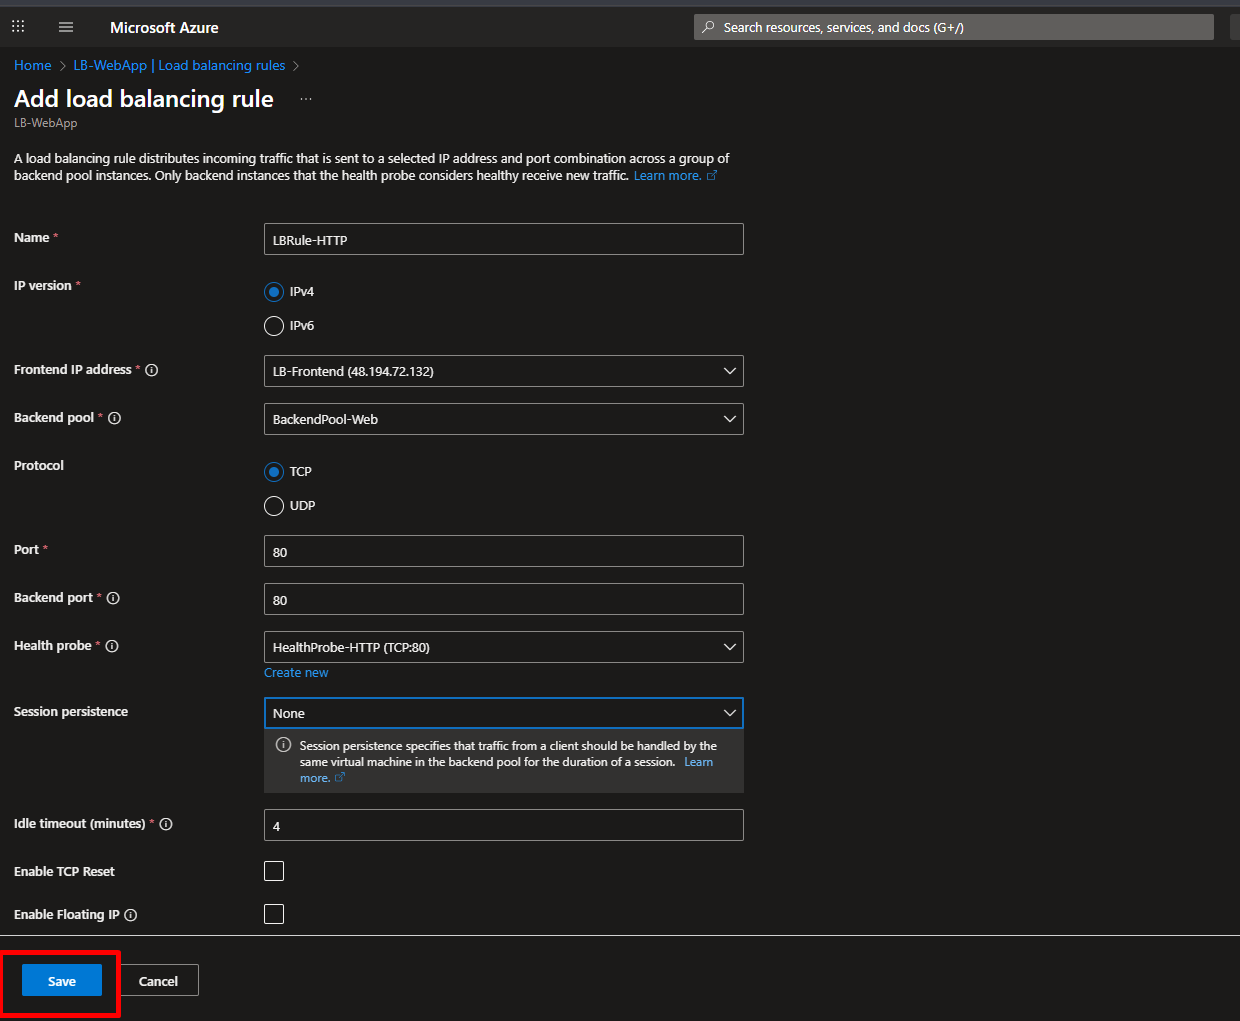
- Fill in:
- Name:
LBRule-HTTP - Frontend IP:
LB-Frontend - Backend pool:
BackendPool-Web - Protocol: TCP
- Port: 80
- Backend port: 80
- Health probe:
HealthProbe-HTTP - Session persistence: None (distributes evenly)
- Name:
- Click OK
Testing Your High-Availability Setup
Test 1: Basic Load Balancing
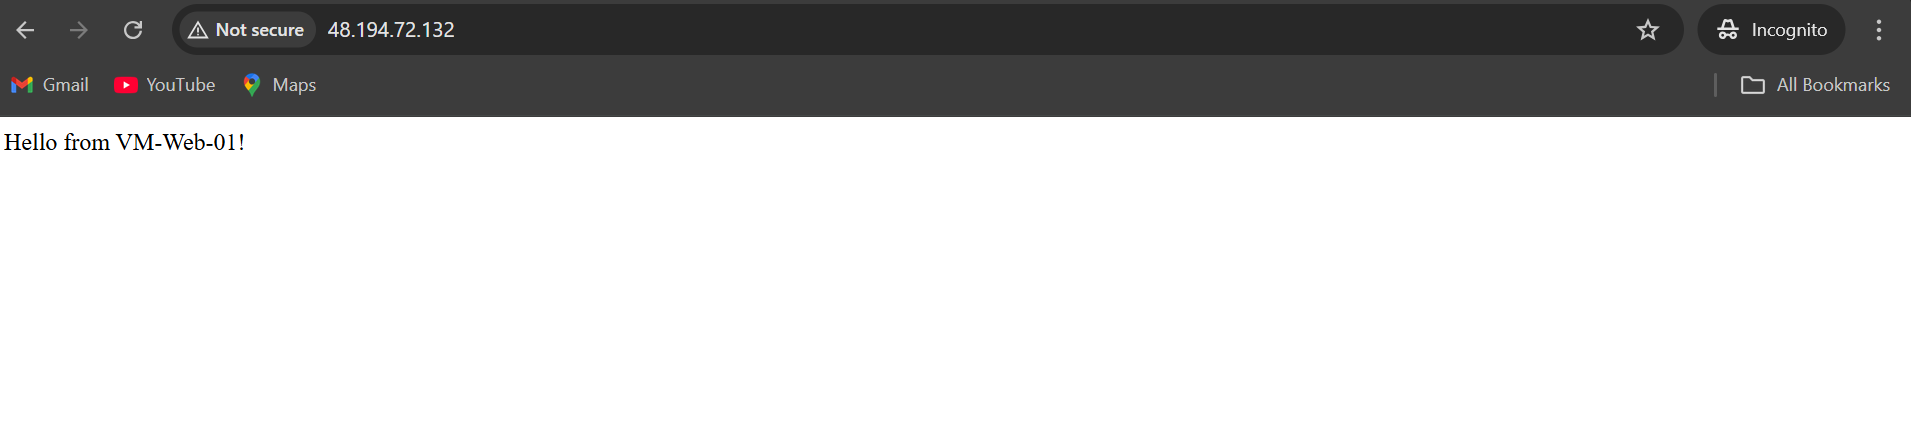
- Go to your Load Balancer
- Copy the Public IP address from the Overview page
- Open a web browser and paste the IP address
- Refresh the page multiple times
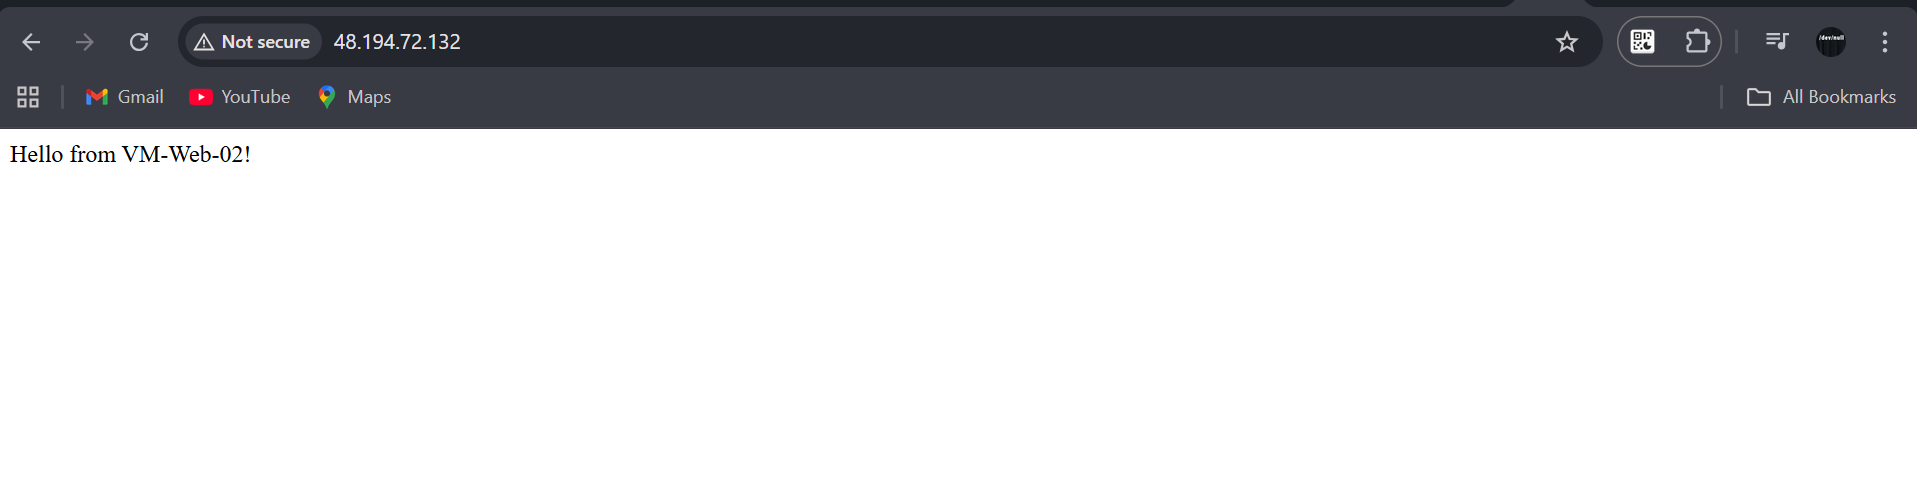
Expected Result: You should see “Hello from VM-Web-01!” and “Hello from VM-Web-02!” alternating. This proves traffic is being distributed!
Test 2: Failover (High Availability)
Let’s simulate a server failure:
- Go to
VM-Web-01and click Stop - Wait 1 minute for the health probe to detect the failure
- Go back to your browser and refresh the Load Balancer’s IP address
Expected Result: You should ONLY see “Hello from VM-Web-02!” now. The Load Balancer automatically stopped sending traffic to the failed server.
- Restart
VM-Web-01 - After a few minutes, refresh again
Expected Result: Both messages start appearing again, the VM has rejoined the pool!
Key Takeaways
Load Balancers distribute traffic and improve reliability
Availability Sets protect against hardware failures
Health Probes ensure only healthy servers receive traffic
This architecture is used in real production environments
You now have hands-on experience with enterprise-grade Azure infrastructure!
Conclusion
This project demonstrated how to deploy a redundant and load-balanced web tier using Azure Load Balancer and Availability Sets.
By completing it, you’ve simulated a fault-tolerant infrastructure, one of the most critical design concepts for both the AZ-104 exam and real-world Azure operations.


Leave a comment