
A DevSecOps Engineer’s Journey from Deployment to Security
Introduction: Why This Project Matters
After completing my first network and virtual machine deployment, I experienced a mix of excitement and concern. Yes, my infrastructure was running, but it wasn’t secure. I could SSH directly into my VM using a public IP address, a major security vulnerability that left my infrastructure exposed to potential threats.
In this comprehensive guide, I’ll walk you through transforming an insecure infrastructure into a hardened, production-ready environment using Azure Bastion, remote state management, SSH key authentication, and Role-Based Access Control (RBAC).
Understanding the Problem: Why Direct SSH is Dangerous
The Security Risks of Public IPs
When you expose SSH (port 22) directly to the internet via a public IP, you create several attack vectors:
- Brute Force Attacks: Automated bots constantly scan the internet for open SSH ports
- Zero-Day Exploits: Vulnerabilities in SSH implementations can be exploited
- Credential Theft: Compromised credentials provide direct access to your VM
- Lack of Audit Trail: It’s difficult to track who accessed what and when
The Traditional Solution: Jump Servers
Traditionally, organizations deployed “jump servers” or “bastion hosts”, dedicated VMs that act as secure entry points. However, these require:
- Manual setup and configuration
- Ongoing maintenance and patching
- Additional costs for the VM
- Complex networking rules
The Modern Solution: Azure Bastion
What is Azure Bastion?
Azure Bastion is a fully managed Platform-as-a-Service (PaaS) that provides secure RDP and SSH connectivity to virtual machines directly over TLS from the Azure portal, or via native SSH or RDP clients on your local computer.
Think of it as a managed jump server that Microsoft maintains for you—no VMs to patch, no public IPs on your target machines, and seamless integration with Azure Portal.
Key Benefits
- No Public IPs Required: Your VMs remain completely private
- TLS Encryption: All connections are encrypted over port 443
- No Client Software: Access VMs directly through your browser
- Integrated Security: Works with Network Security Groups and Azure Firewall
- Centralized Access Point: One Bastion can serve multiple VMs in peered networks
Prerequisites
Before starting, ensure you have:
- Azure Subscription: Create a free account
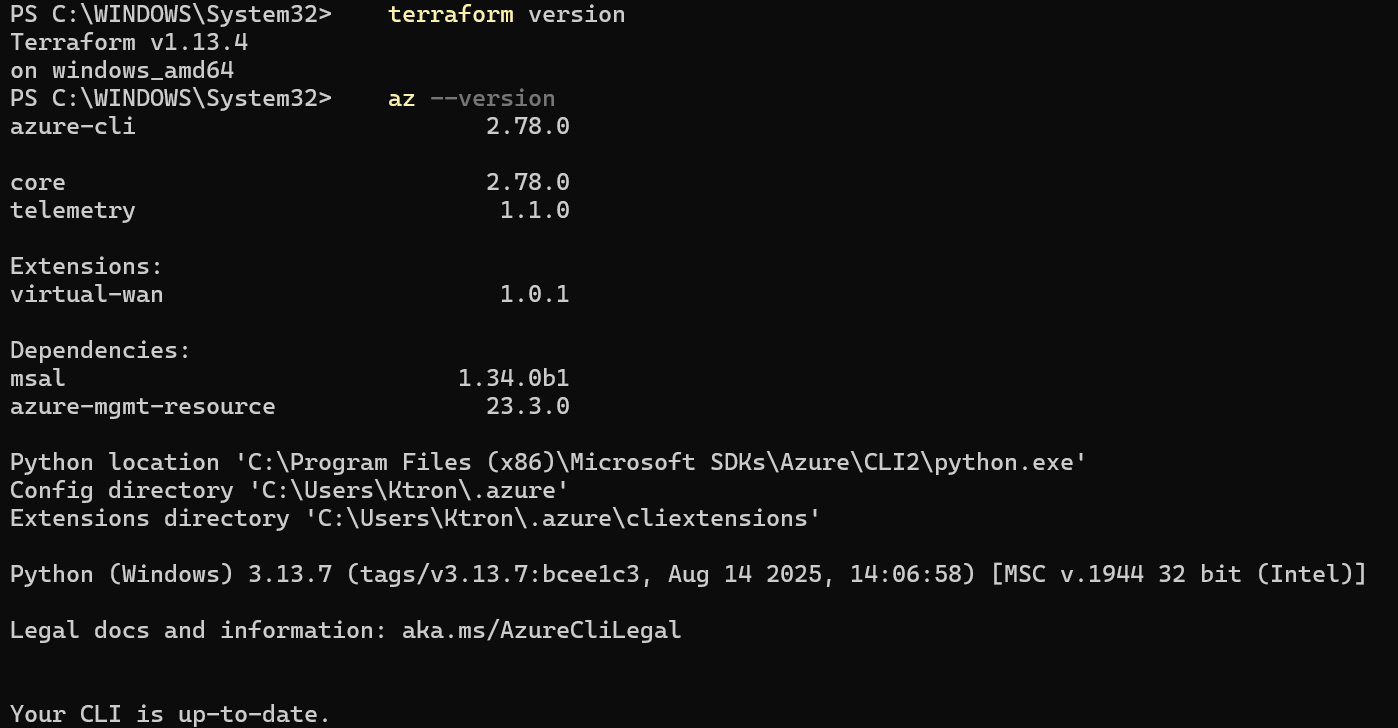
- Terraform Installed: Version 1.11.0 or later
terraform version
- Azure CLI Installed: For authentication
az --version
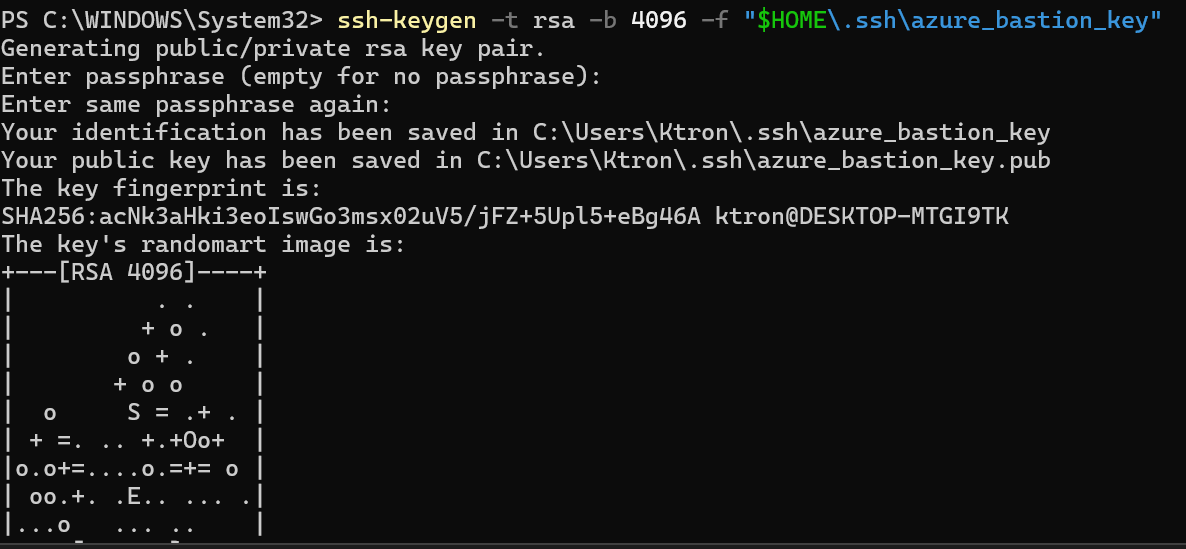
- SSH Key Pair: We’ll generate one if you don’t have it
ssh-keygen -t rsa -b 4096 -f "$HOME\.ssh\azure_bastion_key"
- Basic Understanding: Familiarity with Terraform and Azure concepts
Step 1: Setting Up Remote State Storage
Why Remote State Matters
Terraform tracks your infrastructure in a state file (terraform.tfstate). Storing this locally is problematic because:
- Team Collaboration: Multiple people need access to the same state
- CI/CD Pipelines: Automated deployments need consistent state
- State Locking: Prevents concurrent modifications that corrupt the state
- Security: State files contain sensitive information and should be encrypted
Azure Storage accounts provide state locking and consistency checking with Azure Blob Storage native capabilities.
Creating the Storage Account
First, let’s create the storage infrastructure to hold our Terraform state:
# backend-setup.tf
# This file creates the Azure Storage Account for Terraform state
# Run this FIRST, then configure the backend in main.tf
terraform {
required_providers {
azurerm = {
source = "hashicorp/azurerm"
version = "~> 4.0"
}
}
}
provider "azurerm" {
features {}
}
# Resource group for Terraform state
resource "azurerm_resource_group" "tfstate" {
name = "rg-terraform-state"
location = "East US"
tags = {
Environment = "Infrastructure"
ManagedBy = "Terraform"
Purpose = "State Storage"
}
}
# Storage account for state files
resource "azurerm_storage_account" "tfstate" {
name = "tfstate${random_string.unique.result}"
resource_group_name = azurerm_resource_group.tfstate.name
location = azurerm_resource_group.tfstate.location
account_tier = "Standard"
account_replication_type = "LRS" # Locally Redundant Storage
# Security settings
min_tls_version = "TLS1_2"
allow_nested_items_to_be_public = false
https_traffic_only_enabled = true
# Enable blob versioning for state file history
blob_properties {
versioning_enabled = true
}
tags = {
Environment = "Infrastructure"
Purpose = "Terraform State"
}
}
# Generate a random string for unique storage account name
resource "random_string" "unique" {
length = 8
special = false
upper = false
}
# Container for state files
resource "azurerm_storage_container" "tfstate" {
name = "tfstate"
storage_account_id = azurerm_storage_account.tfstate.id
container_access_type = "private"
}
# Output values we'll need for backend configuration
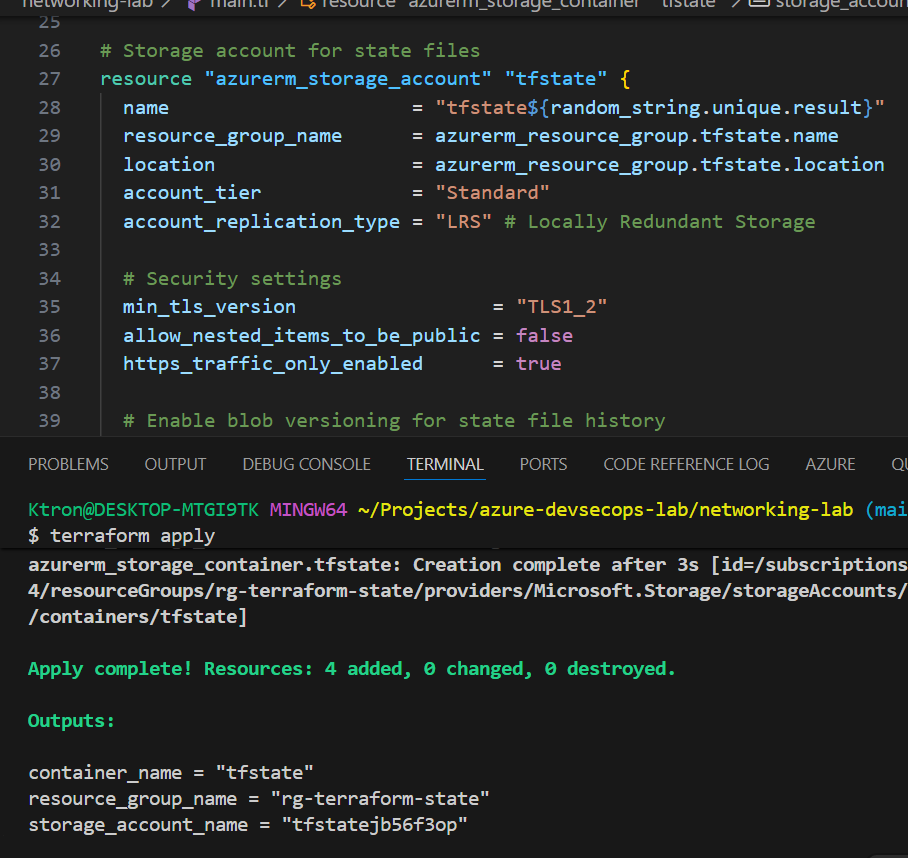
output "storage_account_name" {
value = azurerm_storage_account.tfstate.name
description = "Storage account name for backend configuration"
}
output "container_name" {
value = azurerm_storage_container.tfstate.name
description = "Container name for backend configuration"
}
output "resource_group_name" {
value = azurerm_resource_group.tfstate.name
description = "Resource group name for backend configuration"
}
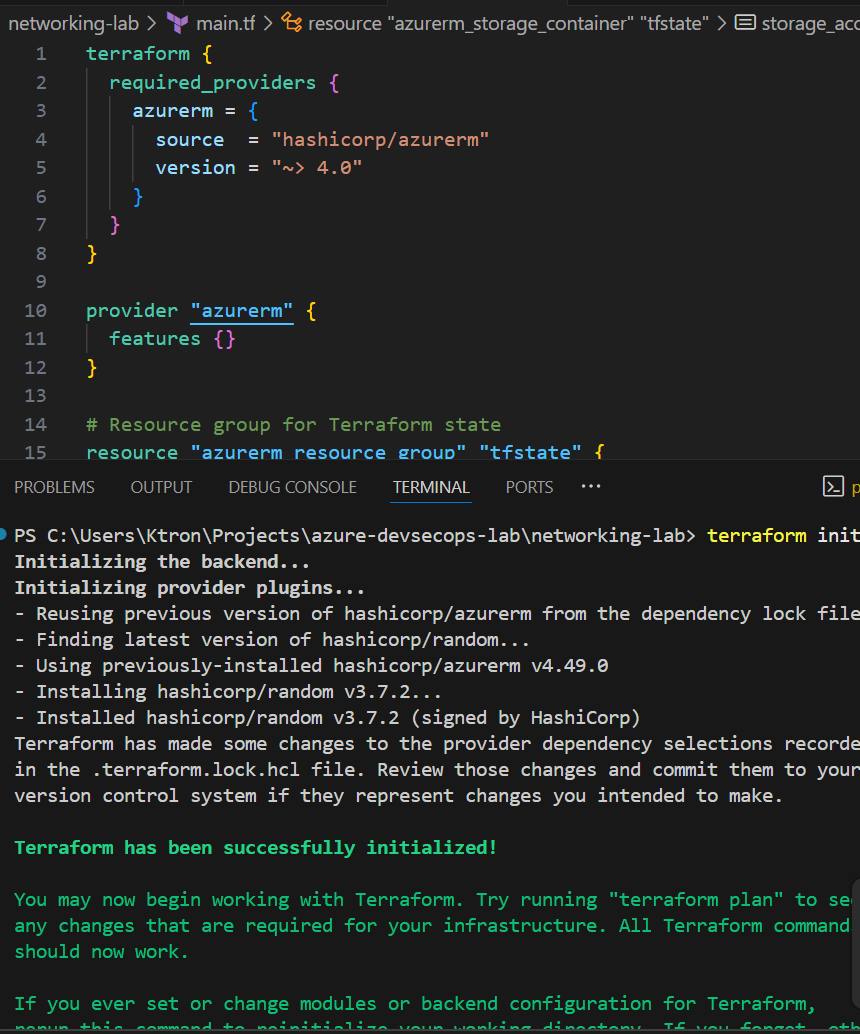
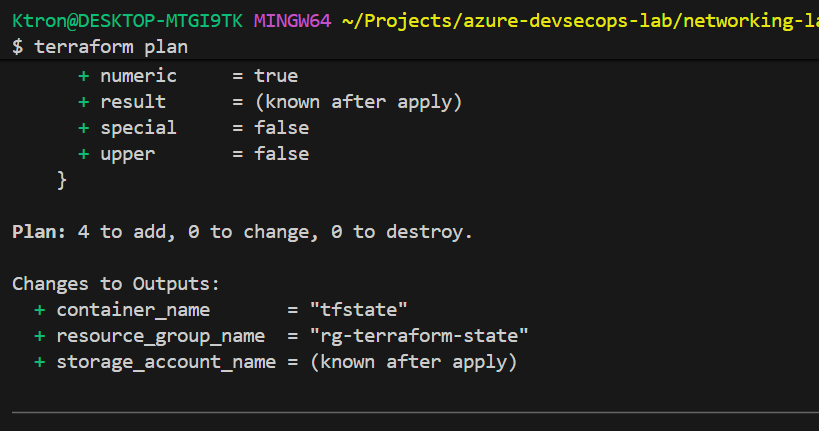
Deploy the State Storage
# Initialize and apply to create storage account
terraform init
terraform plan
terraform apply

# Save the output values - you'll need them!
terraform output
Important Notes:
- Storage account names must be globally unique, which is why we use a random string
- LRS (Locally Redundant Storage) is sufficient for development; use ZRS or GRS for production
- Versioning allows you to recover previous state versions if something goes wrong
Step 2: Configuring Terraform Backend
Now that we have storage, let’s configure Terraform to use it.
Backend Configuration
Create a new file for your main infrastructure:
# main.tf
terraform {

  # Backend configuration for remote state
  backend "azurerm" {
    resource_group_name  = "rg-terraform-state"
    storage_account_name = "tfstateXXXXXXXX"  # Replace with your output
    container_name       = "tfstate"
    key                  = "bastion-infrastructure.tfstate"
  }

  required_providers {
    azurerm = {
      source  = "hashicorp/azurerm"
      version = "~> 4.0"
    }
  }
}

provider "azurerm" {
  features {
    # Ensure we don't accidentally delete resources
    resource_group {
      prevent_deletion_if_contains_resources = true
    }
  }
}
Authenticating to Azure Storage
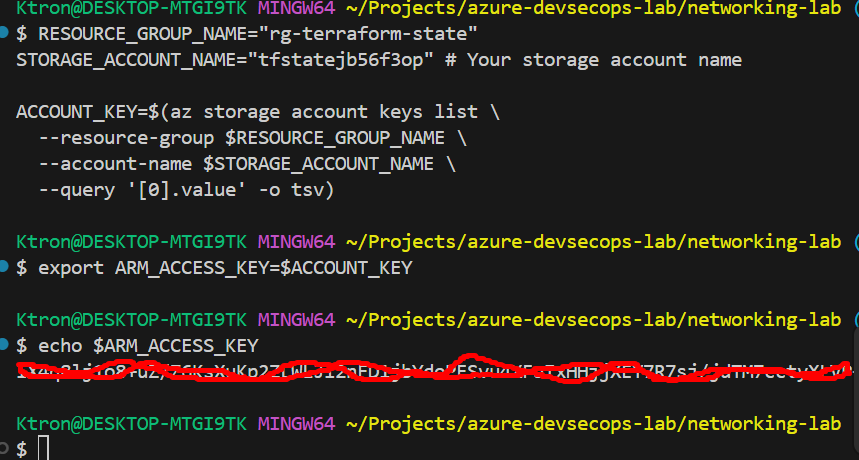
It’s recommended to use environment variables to prevent the access key from being written to disk:
# Get the storage account key
RESOURCE_GROUP_NAME="rg-terraform-state"
STORAGE_ACCOUNT_NAME="tfstateXXXXXXXX"  # Your storage account name

ACCOUNT_KEY=$(az storage account keys list \
  --resource-group $RESOURCE_GROUP_NAME \
  --account-name $STORAGE_ACCOUNT_NAME \
  --query '[0].value' -o tsv)

# Export as environment variable
export ARM_ACCESS_KEY=$ACCOUNT_KEY

# Verify it's set
echo "Access key configured successfully"
Better Practice – Use Azure CLI Authentication:
Instead of access keys, you can use Azure CLI credentials:
# Login to Azure
az login

# Terraform will automatically use your Azure CLI credentials
terraform init
Initialize Remote Backend
# Initialize with remote backend
terraform init

# Terraform will ask: "Do you want to copy existing state to the new backend?"
# Answer: yes

# Verify remote state is working
terraform state list

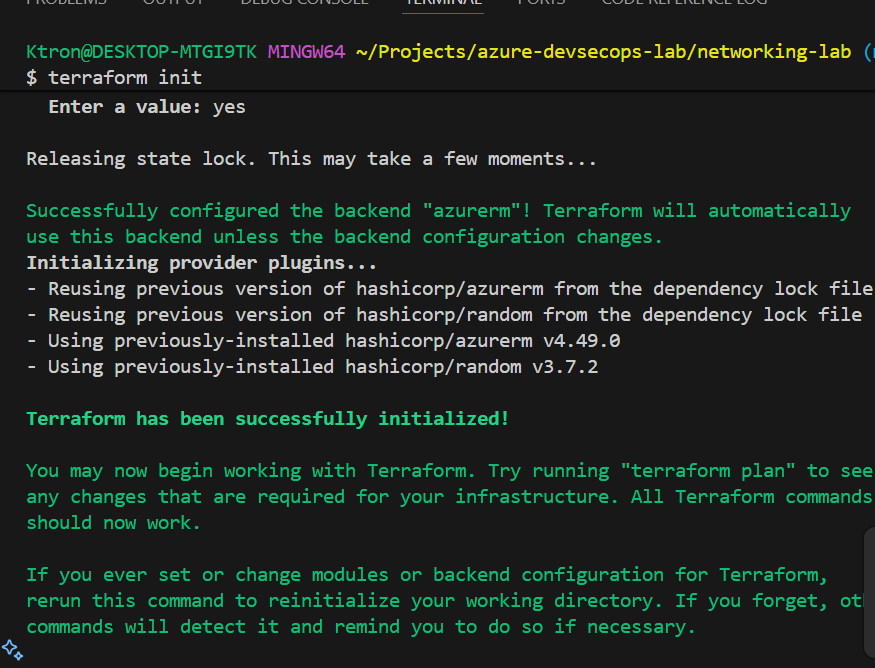
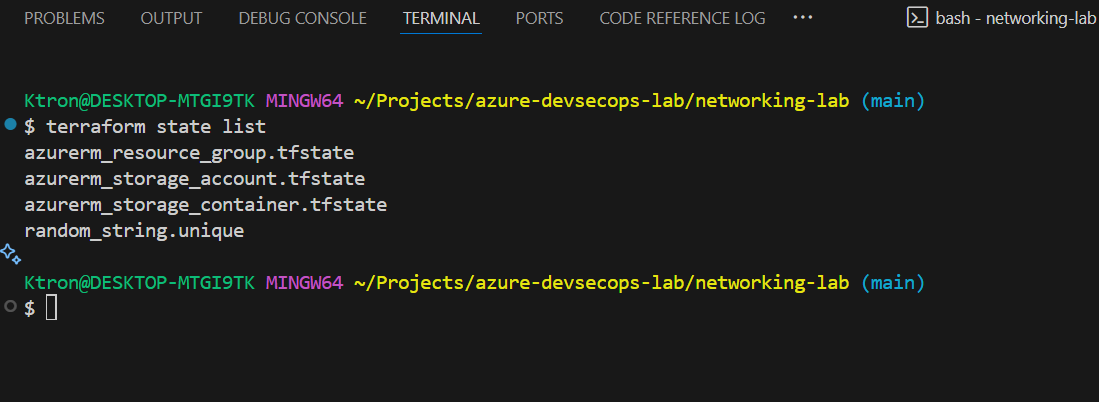
What Just Happened?
- Terraform migrated your local state to Azure Blob Storage
- The state file is now locked during operations (preventing conflicts)
- Multiple team members can now work on the same infrastructure
- Your state is encrypted at rest in Azure Storage
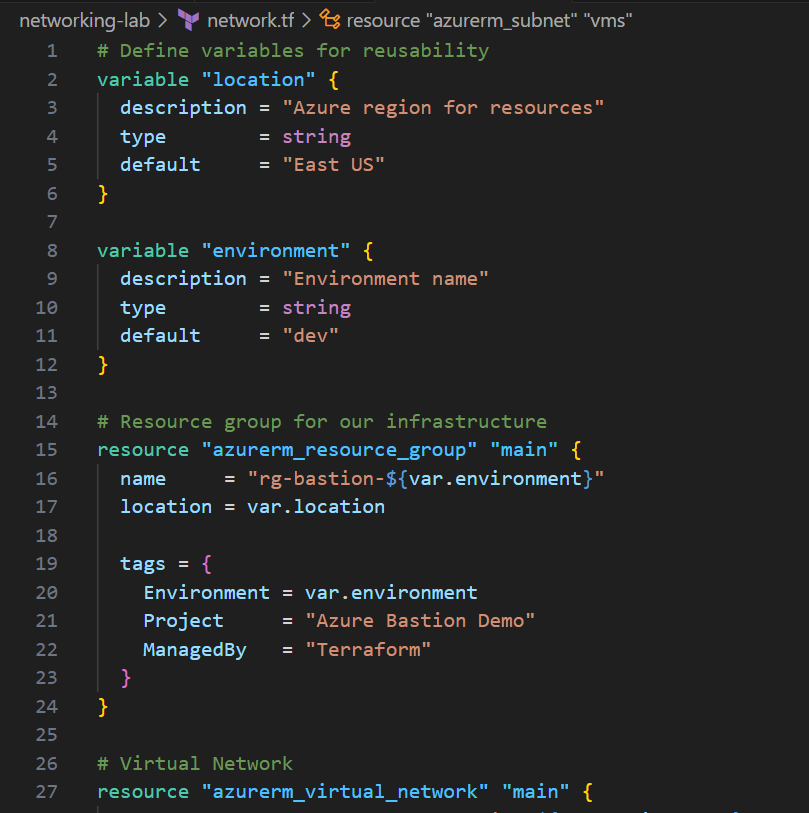
Step 3: Creating the Network Foundation
Before deploying Bastion, we need a properly configured virtual network.
Network Configuration
# network.tf
# Define variables for reusability
variable "location" {
  description = "Azure region for resources"
  type        = string
  default     = "East US"
}

variable "environment" {
  description = "Environment name"
  type        = string
  default     = "dev"
}

# Resource group for our infrastructure
resource "azurerm_resource_group" "main" {
  name     = "rg-bastion-${var.environment}"
  location = var.location

  tags = {
    Environment = var.environment
    Project     = "Azure Bastion Demo"
    ManagedBy   = "Terraform"
  }
}

# Virtual Network
resource "azurerm_virtual_network" "main" {
  name                = "vnet-bastion-${var.environment}"
  address_space       = ["10.0.0.0/16"]
  location            = azurerm_resource_group.main.location
  resource_group_name = azurerm_resource_group.main.name

  tags = {
    Environment = var.environment
  }
}

# Subnet for Azure Bastion
# CRITICAL: Must be named exactly "AzureBastionSubnet"
resource "azurerm_subnet" "bastion" {
  name                 = "AzureBastionSubnet"
  resource_group_name  = azurerm_resource_group.main.name
  virtual_network_name = azurerm_virtual_network.main.name
  address_prefixes     = ["10.0.1.0/26"]

  # No service endpoints needed for Bastion
}

# Subnet for Virtual Machines
resource "azurerm_subnet" "vms" {
  name                 = "snet-vms-${var.environment}"
  resource_group_name  = azurerm_resource_group.main.name
  virtual_network_name = azurerm_virtual_network.main.name
  address_prefixes     = ["10.0.2.0/24"]
}
Important Subnet Notes:
- The Bastion subnet must be named exactly “AzureBastionSubnet”
- Minimum subnet size is /26 (64 IPs) as of November 2, 2021
- The
/26size allows for future scaling (up to 50 scale units) - VMs go in a separate subnet with private IPs only
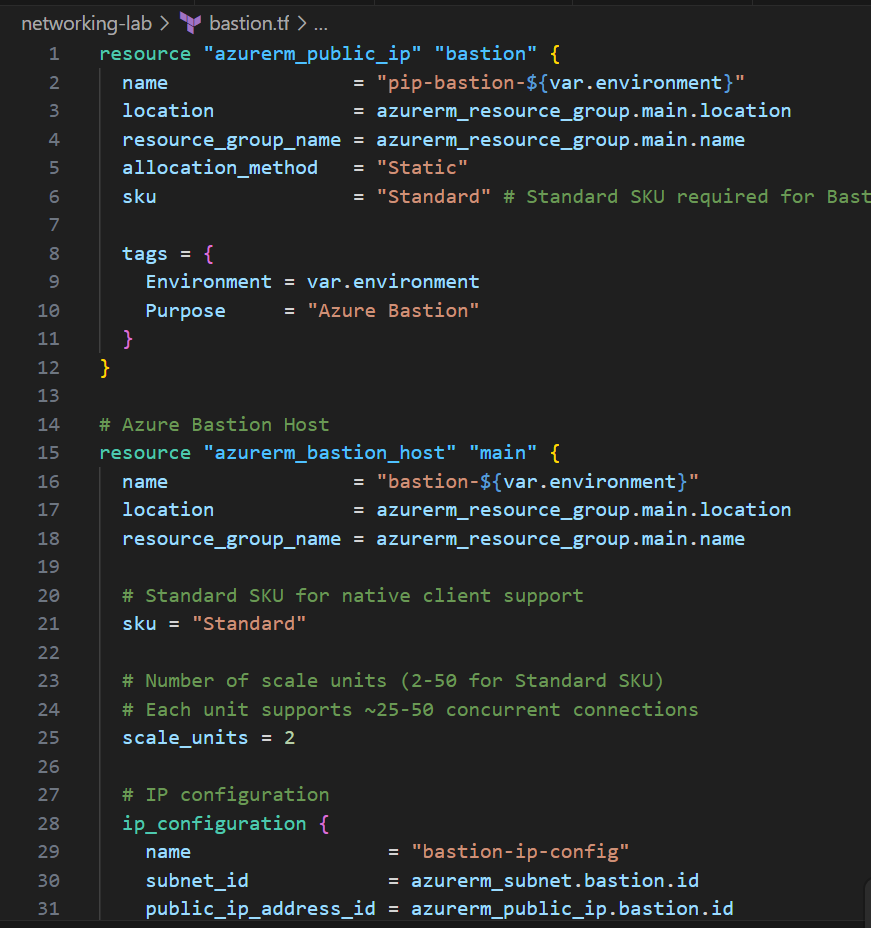
Step 4: Deploying Azure Bastion
Now for the main event—deploying Azure Bastion itself.
Bastion Resources
# bastion.tf

# Public IP for Azure Bastion
# This is the ONLY public IP in our infrastructure
resource "azurerm_public_ip" "bastion" {
  name                = "pip-bastion-${var.environment}"
  location            = azurerm_resource_group.main.location
  resource_group_name = azurerm_resource_group.main.name
  allocation_method   = "Static"
  sku                 = "Standard"  # Standard SKU required for Bastion

  tags = {
    Environment = var.environment
    Purpose     = "Azure Bastion"
  }
}

# Azure Bastion Host
resource "azurerm_bastion_host" "main" {
  name                = "bastion-${var.environment}"
  location            = azurerm_resource_group.main.location
  resource_group_name = azurerm_resource_group.main.name

  # Standard SKU for native client support
  sku = "Standard"

  # Number of scale units (2-50 for Standard SKU)
  # Each unit supports ~25-50 concurrent connections
  scale_units = 2

  # IP configuration
  ip_configuration {
    name                 = "bastion-ip-config"
    subnet_id            = azurerm_subnet.bastion.id
    public_ip_address_id = azurerm_public_ip.bastion.id
  }

  # Enable native client support for SSH/RDP from terminal
  tunneling_enabled = true

  # Enable IP-based connection (connect using private IP)
  ip_connect_enabled = true

  # Enable shareable links (optional - for external users)
  shareable_link_enabled = false

  # Enable file copy via Bastion
  file_copy_enabled = true

  tags = {
    Environment = var.environment
    Purpose     = "Secure VM Access"
  }
}

# Network Security Group for Bastion Subnet
resource "azurerm_network_security_group" "bastion" {
  name                = "nsg-bastion-${var.environment}"
  location            = azurerm_resource_group.main.location
  resource_group_name = azurerm_resource_group.main.name

  tags = {
    Environment = var.environment
  }
}

# Required NSG Rules for Azure Bastion
# Ingress Rules

# Allow HTTPS from Internet (required for Azure Portal connectivity)
resource "azurerm_network_security_rule" "bastion_allow_https_inbound" {
  name                        = "AllowHttpsInbound"
  priority                    = 100
  direction                   = "Inbound"
  access                      = "Allow"
  protocol                    = "Tcp"
  source_port_range           = "*"
  destination_port_range      = "443"
  source_address_prefix       = "Internet"
  destination_address_prefix  = "*"
  resource_group_name         = azurerm_resource_group.main.name
  network_security_group_name = azurerm_network_security_group.bastion.name
}

# Allow Gateway Manager (Azure control plane)
resource "azurerm_network_security_rule" "bastion_allow_gateway_manager_inbound" {
  name                        = "AllowGatewayManagerInbound"
  priority                    = 110
  direction                   = "Inbound"
  access                      = "Allow"
  protocol                    = "Tcp"
  source_port_range           = "*"
  destination_port_range      = "443"
  source_address_prefix       = "GatewayManager"
  destination_address_prefix  = "*"
  resource_group_name         = azurerm_resource_group.main.name
  network_security_group_name = azurerm_network_security_group.bastion.name
}

# Allow Azure Load Balancer
resource "azurerm_network_security_rule" "bastion_allow_load_balancer_inbound" {
  name                        = "AllowAzureLoadBalancerInbound"
  priority                    = 120
  direction                   = "Inbound"
  access                      = "Allow"
  protocol                    = "Tcp"
  source_port_range           = "*"
  destination_port_range      = "443"
  source_address_prefix       = "AzureLoadBalancer"
  destination_address_prefix  = "*"
  resource_group_name         = azurerm_resource_group.main.name
  network_security_group_name = azurerm_network_security_group.bastion.name
}

# Allow Bastion Host Communication (data plane)
resource "azurerm_network_security_rule" "bastion_allow_bastion_host_communication" {
  name                        = "AllowBastionHostCommunication"
  priority                    = 130
  direction                   = "Inbound"
  access                      = "Allow"
  protocol                    = "*"
  source_port_range           = "*"
  destination_port_ranges     = ["8080", "5701"]
  source_address_prefix       = "VirtualNetwork"
  destination_address_prefix  = "VirtualNetwork"
  resource_group_name         = azurerm_resource_group.main.name
  network_security_group_name = azurerm_network_security_group.bastion.name
}

# Egress Rules

# Allow SSH to VMs
resource "azurerm_network_security_rule" "bastion_allow_ssh_rdp_outbound" {
  name                        = "AllowSshRdpOutbound"
  priority                    = 100
  direction                   = "Outbound"
  access                      = "Allow"
  protocol                    = "*"
  source_port_range           = "*"
  destination_port_ranges     = ["22", "3389"]
  source_address_prefix       = "*"
  destination_address_prefix  = "VirtualNetwork"
  resource_group_name         = azurerm_resource_group.main.name
  network_security_group_name = azurerm_network_security_group.bastion.name
}

# Allow Azure Cloud communication
resource "azurerm_network_security_rule" "bastion_allow_azure_cloud_outbound" {
  name                        = "AllowAzureCloudOutbound"
  priority                    = 110
  direction                   = "Outbound"
  access                      = "Allow"
  protocol                    = "Tcp"
  source_port_range           = "*"
  destination_port_range      = "443"
  source_address_prefix       = "*"
  destination_address_prefix  = "AzureCloud"
  resource_group_name         = azurerm_resource_group.main.name
  network_security_group_name = azurerm_network_security_group.bastion.name
}

# Allow Bastion Host Communication outbound
resource "azurerm_network_security_rule" "bastion_allow_bastion_communication_outbound" {
  name                        = "AllowBastionCommunication"
  priority                    = 120
  direction                   = "Outbound"
  access                      = "Allow"
  protocol                    = "*"
  source_port_range           = "*"
  destination_port_ranges     = ["8080", "5701"]
  source_address_prefix       = "VirtualNetwork"
  destination_address_prefix  = "VirtualNetwork"
  resource_group_name         = azurerm_resource_group.main.name
  network_security_group_name = azurerm_network_security_group.bastion.name
}

# Allow Get Session Information
resource "azurerm_network_security_rule" "bastion_allow_get_session_information_outbound" {
  name                        = "AllowGetSessionInformation"
  priority                    = 130
  direction                   = "Outbound"
  access                      = "Allow"
  protocol                    = "*"
  source_port_range           = "*"
  destination_port_range      = "80"
  source_address_prefix       = "*"
  destination_address_prefix  = "Internet"
  resource_group_name         = azurerm_resource_group.main.name
  network_security_group_name = azurerm_network_security_group.bastion.name
}

# Associate NSG with Bastion Subnet
resource "azurerm_subnet_network_security_group_association" "bastion" {
  subnet_id                 = azurerm_subnet.bastion.id
  network_security_group_id = azurerm_network_security_group.bastion.id
}
Key Configuration Choices:
- Standard SKU: Provides native client support for connecting via
az network bastion ssh - Scale Units = 2: Minimum for Standard; each unit adds capacity
- Tunneling Enabled: Allows SSH from your local terminal, not just browser
- IP Connect: Connect to VMs using private IP addresses directly
- NSG Rules: These are required by Microsoft and documented in their official guide
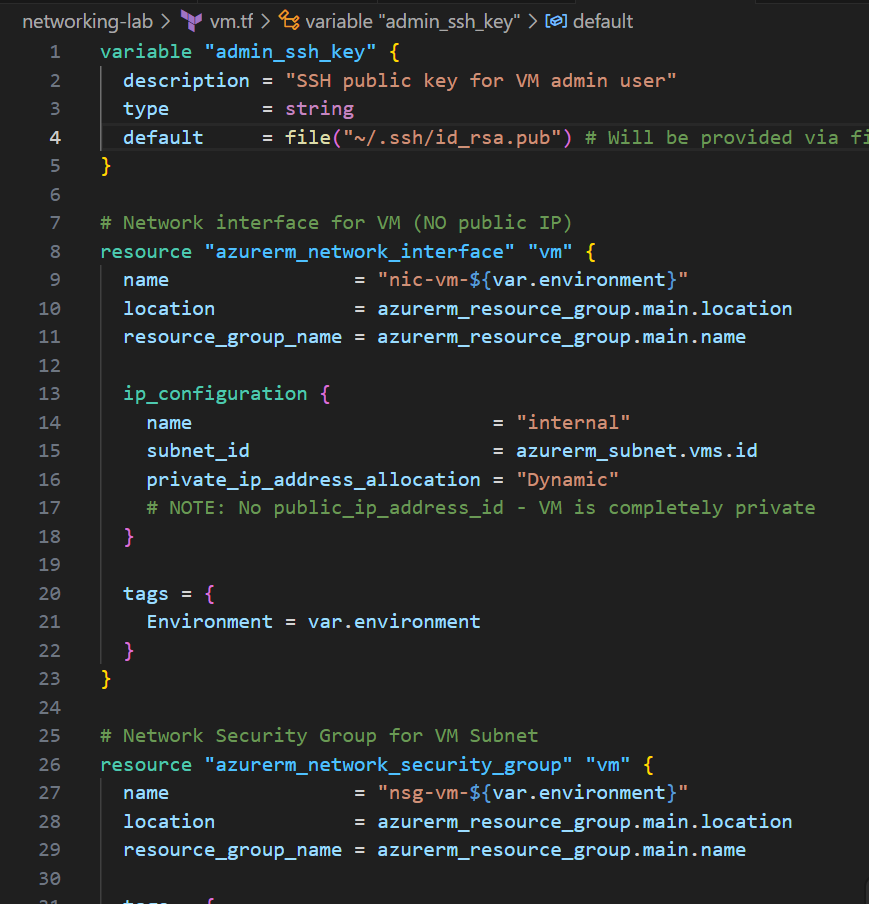
Step 5: Creating a Hardened Linux VM
Now let’s create a VM that’s properly secured from the start.
SSH Key Authentication
# vm.tf

# Variable for SSH public key
variable "admin_ssh_key" {
  description = "SSH public key for VM admin user"
  type        = string
  default     = ""  # Will be provided via file() function
}

# Network interface for VM (NO public IP)
resource "azurerm_network_interface" "vm" {
  name                = "nic-vm-${var.environment}"
  location            = azurerm_resource_group.main.location
  resource_group_name = azurerm_resource_group.main.name

  ip_configuration {
    name                          = "internal"
    subnet_id                     = azurerm_subnet.vms.id
    private_ip_address_allocation = "Dynamic"
    # NOTE: No public_ip_address_id - VM is completely private
  }

  tags = {
    Environment = var.environment
  }
}

# Network Security Group for VM Subnet
resource "azurerm_network_security_group" "vm" {
  name                = "nsg-vm-${var.environment}"
  location            = azurerm_resource_group.main.location
  resource_group_name = azurerm_resource_group.main.name

  tags = {
    Environment = var.environment
  }
}

# Allow SSH from Azure Bastion subnet ONLY
resource "azurerm_network_security_rule" "allow_ssh_from_bastion" {
  name                        = "AllowSshFromBastion"
  priority                    = 100
  direction                   = "Inbound"
  access                      = "Allow"
  protocol                    = "Tcp"
  source_port_range           = "*"
  destination_port_range      = "22"
  source_address_prefix       = "10.0.1.0/26"  # Bastion subnet
  destination_address_prefix  = "*"
  resource_group_name         = azurerm_resource_group.main.name
  network_security_group_name = azurerm_network_security_group.vm.name
}

# Deny all other inbound SSH
resource "azurerm_network_security_rule" "deny_ssh_from_internet" {
  name                        = "DenySshFromInternet"
  priority                    = 4096
  direction                   = "Inbound"
  access                      = "Deny"
  protocol                    = "Tcp"
  source_port_range           = "*"
  destination_port_range      = "22"
  source_address_prefix       = "Internet"
  destination_address_prefix  = "*"
  resource_group_name         = azurerm_resource_group.main.name
  network_security_group_name = azurerm_network_security_group.vm.name
}

# Associate NSG with NIC
resource "azurerm_network_interface_security_group_association" "vm" {
  network_interface_id      = azurerm_network_interface.vm.id
  network_security_group_id = azurerm_network_security_group.vm.id
}

# Hardened Linux VM
resource "azurerm_linux_virtual_machine" "main" {
  name                = "vm-linux-${var.environment}"
  resource_group_name = azurerm_resource_group.main.name
  location            = azurerm_resource_group.main.location
  size                = "Standard_B2s"  # Cost-effective for testing

  # Admin user configuration
  admin_username = "azureuser"

  # CRITICAL: Disable password authentication
  disable_password_authentication = true

  # Use SSH key authentication ONLY
  admin_ssh_key {
    username   = "azureuser"
    public_key = file("~/.ssh/azure_bastion_key.pub")
  }

  network_interface_ids = [
    azurerm_network_interface.vm.id
  ]

  # OS disk configuration
  os_disk {
    name                 = "osdisk-vm-${var.environment}"
    caching              = "ReadWrite"
    storage_account_type = "Premium_LRS"  # SSD for better performance

    # Encrypt disk at rest
    disk_encryption_set_id = null  # Use platform-managed keys
  }

  # Ubuntu 22.04 LTS
  source_image_reference {
    publisher = "Canonical"
    offer     = "0001-com-ubuntu-server-jammy"
    sku       = "22_04-lts-gen2"
    version   = "latest"
  }

  # Cloud-init script for hardening
  custom_data = base64encode(templatefile("${path.module}/cloud-init.yaml", {
    admin_username = "azureuser"
  }))

  # Identity for managed identity (optional but recommended)
  identity {
    type = "SystemAssigned"
  }

  tags = {
    Environment = var.environment
    Purpose     = "Secure Demo VM"
  }
}
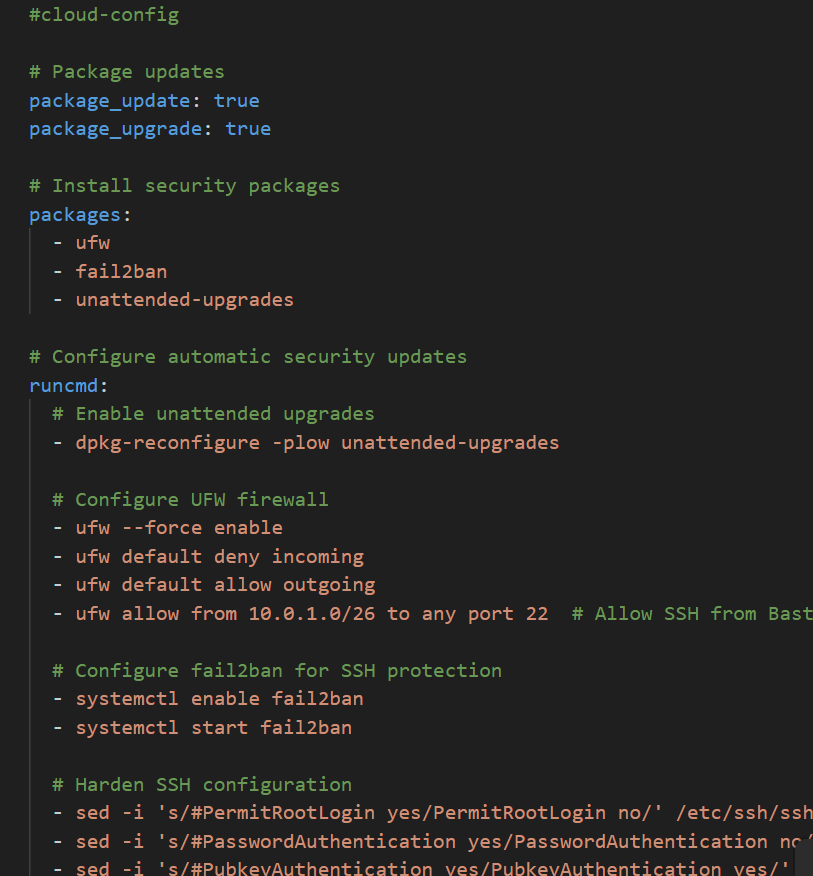
Cloud-Init Script for VM Hardening
Create a file named cloud-init.yaml:
#cloud-config

# Package updates
package_update: true
package_upgrade: true

# Install security packages
packages:
  - ufw
  - fail2ban
  - unattended-upgrades

# Configure automatic security updates
runcmd:
  # Enable unattended upgrades
  - dpkg-reconfigure -plow unattended-upgrades

  # Configure UFW firewall
  - ufw --force enable
  - ufw default deny incoming
  - ufw default allow outgoing
  - ufw allow from 10.0.1.0/26 to any port 22  # Allow SSH from Bastion only

  # Configure fail2ban for SSH protection
  - systemctl enable fail2ban
  - systemctl start fail2ban

  # Harden SSH configuration
  - sed -i 's/#PermitRootLogin yes/PermitRootLogin no/' /etc/ssh/sshd_config
  - sed -i 's/#PasswordAuthentication yes/PasswordAuthentication no/' /etc/ssh/sshd_config
  - sed -i 's/#PubkeyAuthentication yes/PubkeyAuthentication yes/' /etc/ssh/sshd_config
  - sed -i 's/#ChallengeResponseAuthentication yes/ChallengeResponseAuthentication no/' /etc/ssh/sshd_config
  - systemctl restart sshd

  # Set hostname
  - hostnamectl set-hostname secure-vm-${admin_username}

  # Create message of the day
  - echo "==================================" > /etc/motd
  - echo "Secured VM via Azure Bastion" >> /etc/motd
  - echo "Password authentication disabled" >> /etc/motd
  - echo "Automatic updates enabled" >> /etc/motd
  - echo "==================================" >> /etc/motd

# Configure timezone
timezone: Africa/Lagos

# System hardening
write_files:
  - path: /etc/sysctl.d/99-security-hardening.conf
    content: |
      # IP forwarding
      net.ipv4.ip_forward = 0

      # SYN cookies
      net.ipv4.tcp_syncookies = 1

      # Ignore ICMP redirects
      net.ipv4.conf.all.accept_redirects = 0
      net.ipv6.conf.all.accept_redirects = 0

      # Ignore source routed packets
      net.ipv4.conf.all.accept_source_route = 0
      net.ipv6.conf.all.accept_source_route = 0

      # Log martian packets
      net.ipv4.conf.all.log_martians = 1

final_message: "VM hardening complete! SSH access only via Azure Bastion."
What This Cloud-Init Script Does:
- Updates all packages to latest security patches
- Installs security tools: UFW (firewall), fail2ban (intrusion prevention), unattended-upgrades
- Configures automatic security updates so your VM stays patched
- Hardens SSH:
- Disables root login
- Disables password authentication
- Enables public key authentication only
- Sets up firewall rules allowing SSH only from Bastion subnet
- Applies kernel security parameters to prevent common attacks
Step 6: Implementing Role-Based Access Control (RBAC)
Now let’s restrict who can do what in our resource group.
Understanding Azure RBAC
Azure RBAC operates on three key components:
- Security Principal: Who (user, group, service principal, managed identity)
- Role Definition: What actions are allowed/denied
- Scope: Where (subscription, resource group, resource)
Common Built-in Roles
Owner: Full access including access management(Resource owners) Contributor: Can create/manage resources but not grant access (Developers, DevOps)
Reader: View-only access (Auditors, managers)
Virtual Machine Contributor: Manage VMs but not network/storage (VM operators)
Implementing RBAC
# rbac.tf
# Get current user
data "azurerm_client_config" "current" {}
# Option 1: Assign Contributor role to current user
resource "azurerm_role_assignment" "contributor" {
scope = azurerm_resource_group.main.id
role_definition_name = "Contributor"
principal_id = data.azurerm_client_config.current.object_id
description = "Allows deployment and management of infrastructure"
}
# Option 2: Create a custom role for DevSecOps engineers
resource "azurerm_role_definition" "devsecops" {
name = "DevSecOps Engineer"
scope = azurerm_resource_group.main.id
description = "Custom role for DevSecOps with security focus"
permissions {
actions = [
# Read everything
"*/read",
# Manage VMs
"Microsoft.Compute/virtualMachines/*",
# Manage networking (but not delete VNets)
"Microsoft.Network/networkInterfaces/*",
"Microsoft.Network/networkSecurityGroups/*",
# Manage Bastion
"Microsoft.Network/bastionHosts/*",
# View diagnostics
"Microsoft.Insights/*/read",
]
not_actions = [
# Prevent deletion of critical resources
"Microsoft.Network/virtualNetworks/delete",
"Microsoft.Network/bastionHosts/delete",
]
data_actions = []
not_data_actions = []
}
assignable_scopes = [
azurerm_resource_group.main.id
]
}
# Assign custom role to a specific user or group
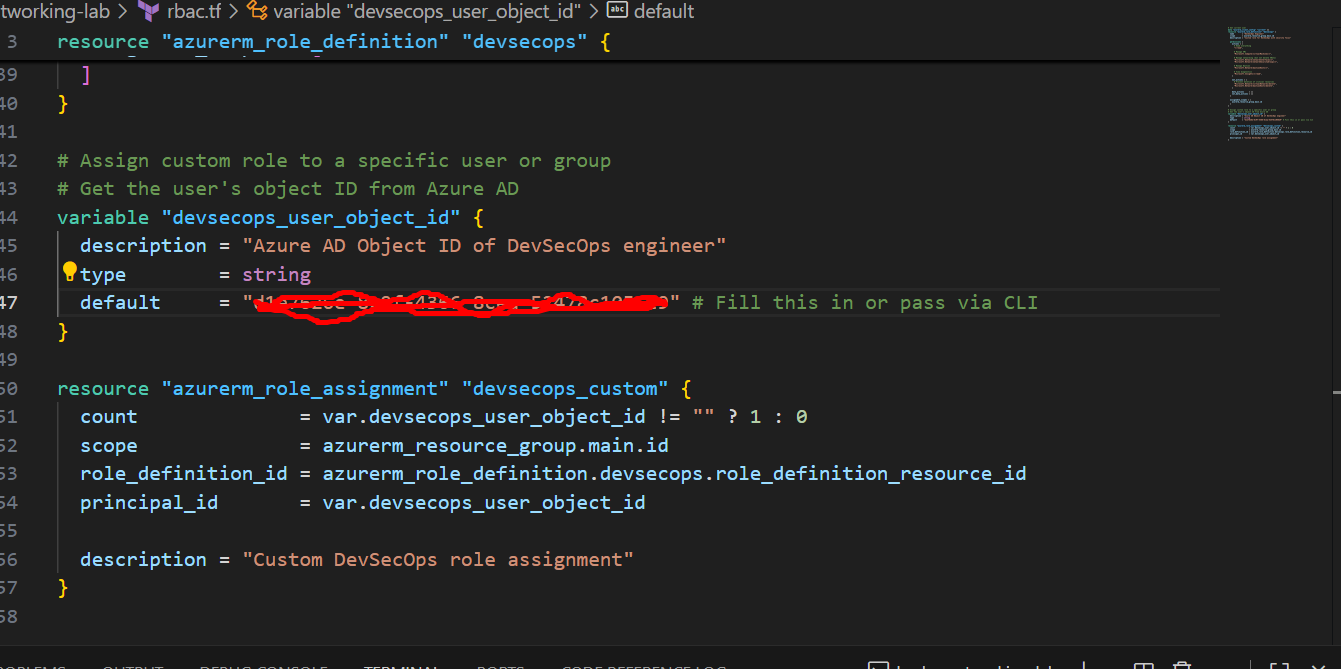
# Get the user's object ID from Azure AD
variable "devsecops_user_object_id" {
description = "Azure AD Object ID of DevSecOps engineer"
type = string
default = "" # Fill this in or pass via CLI
}
resource "azurerm_role_assignment" "devsecops_custom" {
count = var.devsecops_user_object_id != "" ? 1 : 0
scope = azurerm_resource_group.main.id
role_definition_id = azurerm_role_definition.devsecops.role_definition_resource_id
principal_id = var.devsecops_user_object_id
description = "Custom DevSecOps role assignment"
}
# Option 3: Restrict Bastion access to specific users
# This uses Azure AD authentication for Bastion connections
resource "azurerm_role_assignment" "bastion_user" {
scope = azurerm_bastion_host.main.id
role_definition_name = "Reader" # Minimum needed to see Bastion
principal_id = data.azurerm_client_config.current.object_id
}
# Grant VM login access (requires Azure AD login extension on VM)
resource "azurerm_role_assignment" "vm_user_login" {
scope = azurerm_linux_virtual_machine.main.id
role_definition_name = "Virtual Machine User Login"
principal_id = data.azurerm_client_config.current.object_id
description = "Allows SSH login to VM"
}
# For admin access (sudo privileges)
resource "azurerm_role_assignment" "vm_admin_login" {
scope = azurerm_linux_virtual_machine.main.id
role_definition_name = "Virtual Machine Administrator Login"
principal_id = data.azurerm_client_config.current.object_id
description = "Allows SSH login with sudo to VM"
}
Finding User Object IDs
To get your Azure AD Object ID:
# Get your own object ID
az ad signed-in-user show --query id -o tsv

# Get another user's object ID by email
az ad user show --id user@example.com --query id -o tsv

# Get a group's object ID
az ad group show --group "DevOps Team" --query id -o tsv
Best Practices for RBAC:
- Principle of Least Privilege: Only grant the minimum permissions needed
- Use Groups: Assign roles to Azure AD groups, not individual users
- Document Roles: Add descriptions to explain why each role is assigned
- Regular Audits: Review role assignments quarterly
- Use Custom Roles: Create specific roles for your organization’s needs
Step 7: Outputs and Monitoring
Let’s add outputs to make our infrastructure easier to use.
# outputs.tf
# Bastion information
output "bastion_name" {
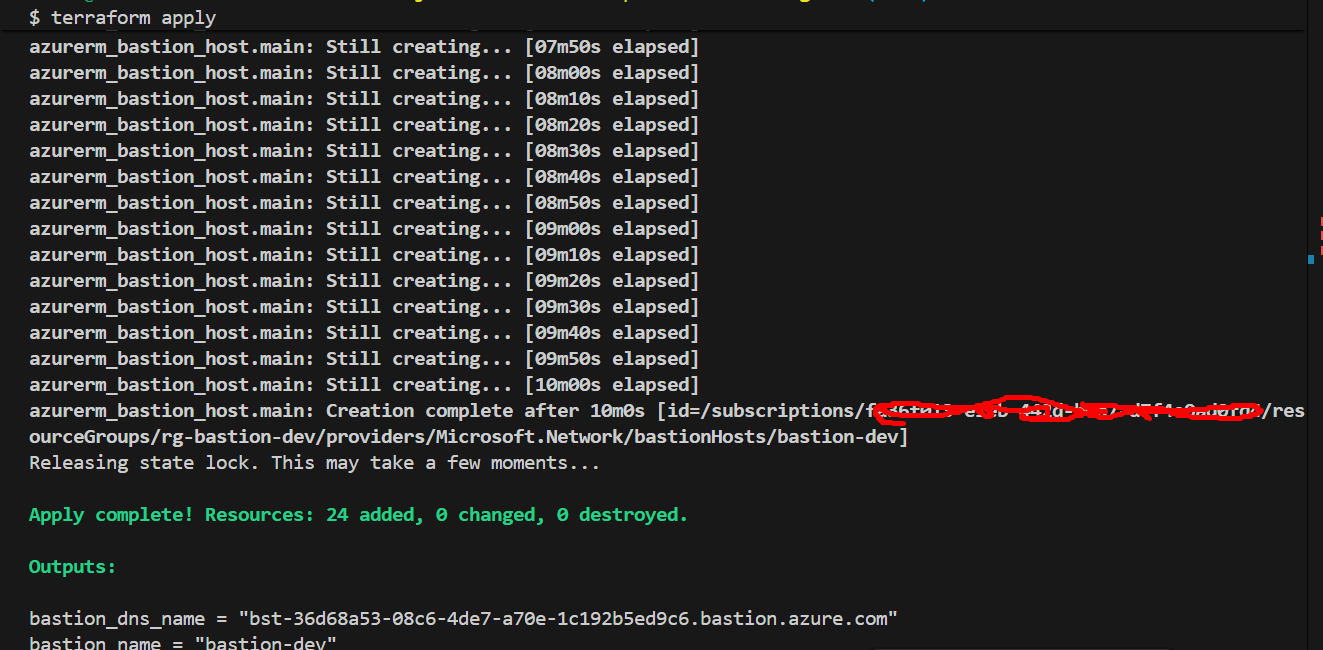
value = azurerm_bastion_host.main.name
description = "Name of the Azure Bastion host"
}
output "bastion_dns_name" {
value = azurerm_bastion_host.main.dns_name
description = "DNS name of the Bastion host"
}
output "bastion_public_ip" {
value = azurerm_public_ip.bastion.ip_address
description = "Public IP address of Bastion (for reference only)"
}
# VM information
output "vm_name" {
value = azurerm_linux_virtual_machine.main.name
description = "Name of the Linux VM"
}
output "vm_private_ip" {
value = azurerm_network_interface.vm.private_ip_address
description = "Private IP address of the VM"
}
output "vm_id" {
value = azurerm_linux_virtual_machine.main.id
description = "Resource ID of the VM"
}
# Connection commands
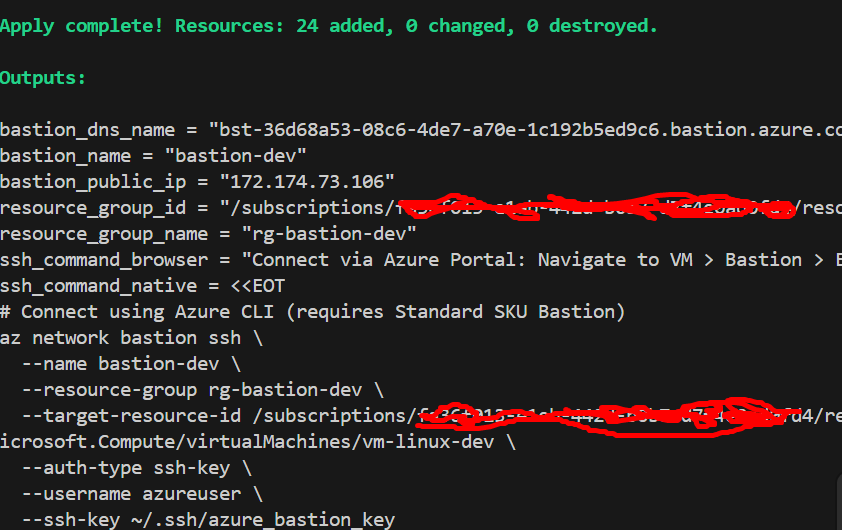
output "ssh_command_browser" {
value = "Connect via Azure Portal: Navigate to VM > Bastion > Enter username and SSH key"
description = "Instructions for browser-based SSH"
}
output "ssh_command_native" {
value = <<-EOT
# Connect using Azure CLI (requires Standard SKU Bastion)
az network bastion ssh \
--name ${azurerm_bastion_host.main.name} \
--resource-group ${azurerm_resource_group.main.name} \
--target-resource-id ${azurerm_linux_virtual_machine.main.id} \
--auth-type ssh-key \
--username azureuser \
--ssh-key ~/.ssh/azure_bastion_key
EOT
description = "Command to connect via native SSH client"
}
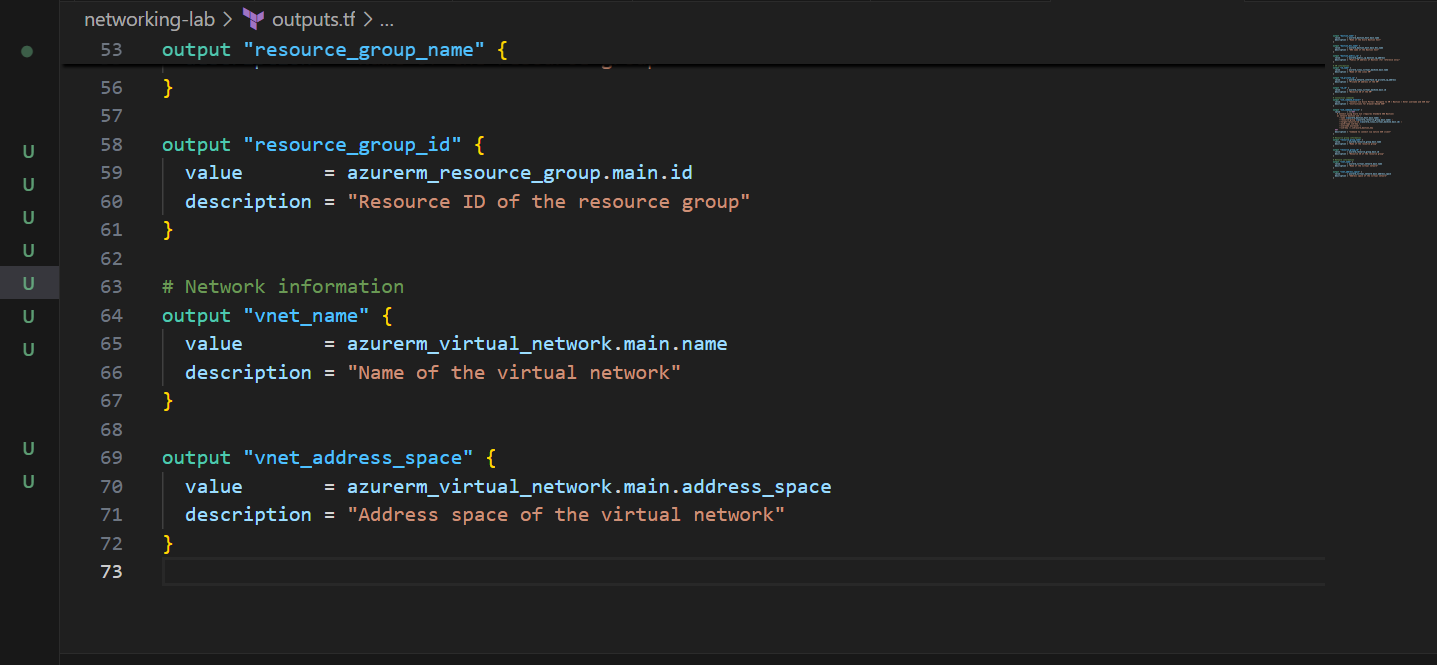
# Resource group information
output "resource_group_name" {
value = azurerm_resource_group.main.name
description = "Name of the resource group"
}
output "resource_group_id" {
value = azurerm_resource_group.main.id
description = "Resource ID of the resource group"
}
# Network information
output "vnet_name" {
value = azurerm_virtual_network.main.name
description = "Name of the virtual network"
}
output "vnet_address_space" {
value = azurerm_virtual_network.main.address_space
description = "Address space of the virtual network"
}
Step 8: Deployment
Now let’s deploy everything!
Complete Deployment Steps
# 1. Authenticate to Azure
az login
# 2. Set your subscription (if you have multiple)
az account set --subscription "Your Subscription Name"
# 3. Create SSH key if you haven't already
ssh-keygen -t rsa -b 4096 -f ~/.ssh/azure_bastion_key -C "azure-bastion-key"
# 4. Initialize Terraform (this will configure remote backend)
terraform init
# 5. Validate configuration
terraform validate
# 6. Format code (optional but recommended)
terraform fmt -recursive
# 7. Plan deployment
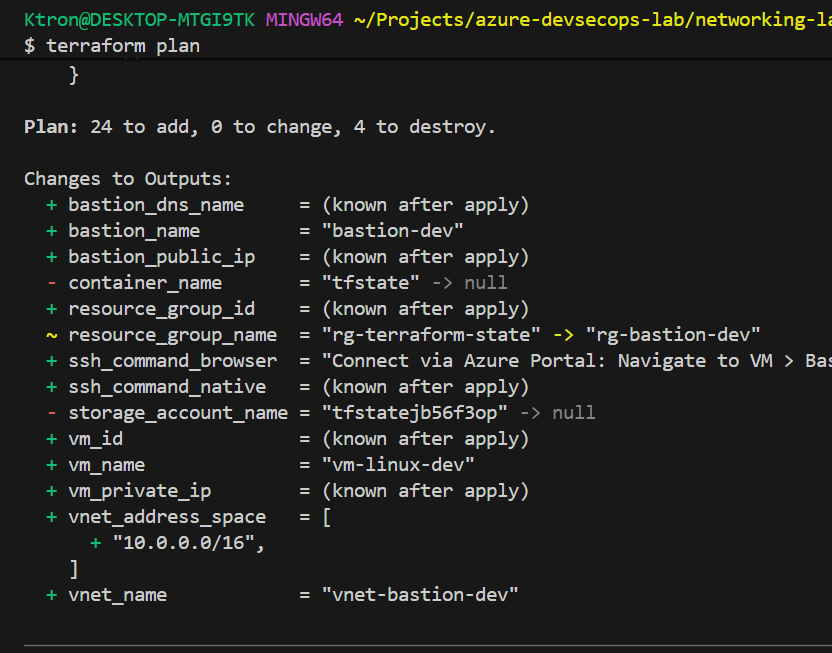
terraform plan -out=tfplan
# 8. Review the plan carefully
# Look for:
# - Resources being created
# - No unexpected deletions
# - Correct configurations
# 9. Apply the configuration
terraform apply tfplan
# 10. Save outputs
terraform output > deployment-info.txt
Expected Deployment Time:
- Storage Account: ~1-2 minutes
- Network Resources: ~2-3 minutes
- Azure Bastion: ~10-15 minutes (this is the slowest resource)
- Virtual Machine: ~3-5 minutes
Total: Approximately 20-25 minutes
Step 9: Connecting to Your VM
Now for the exciting part—connecting securely!
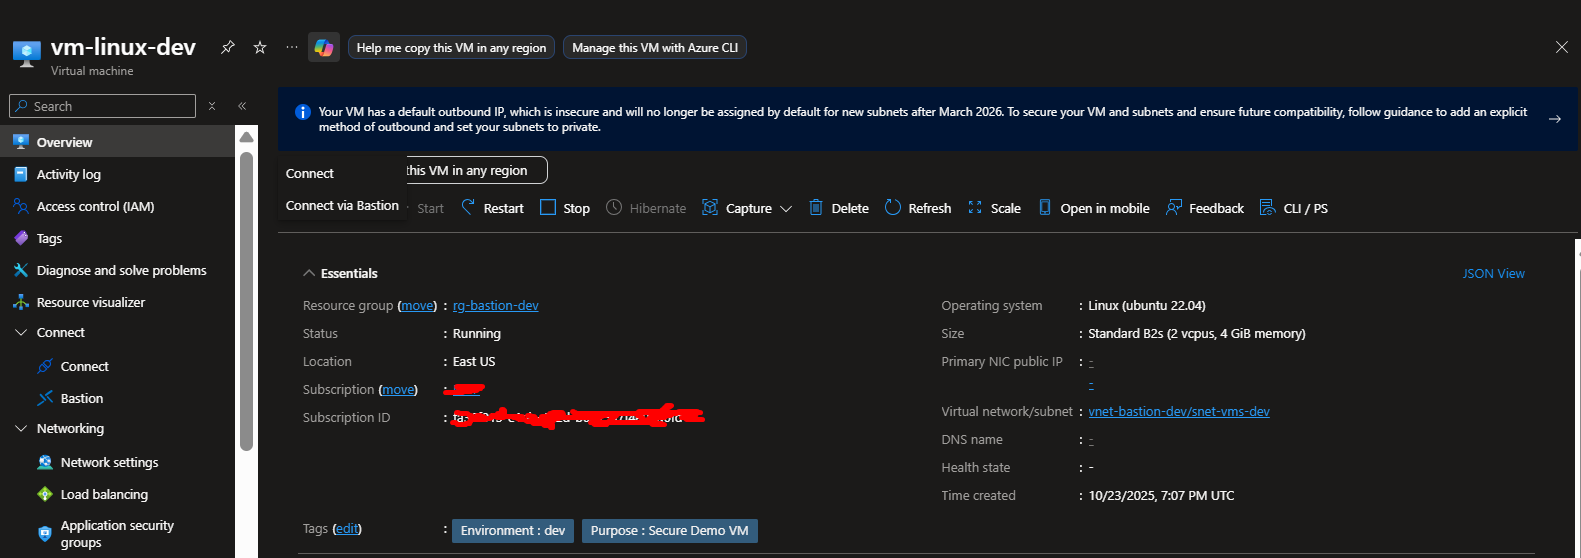
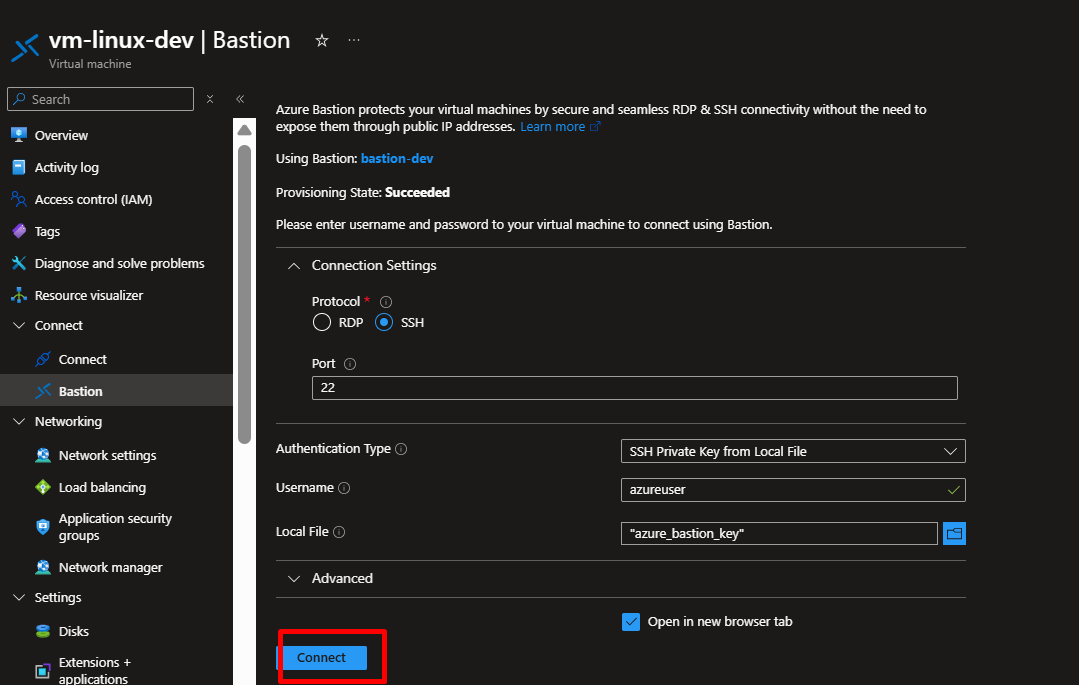
Method 1: Browser-Based Connection (All SKUs)
- Navigate to Azure Portal
- Go to Virtual Machines
- Select your VM (
vm-linux-dev) - Click Connect in the left menu
- Choose Bastion
- Select SSH Private Key from Local File
- Enter username:
azureuser - Upload your private key:
~/.ssh/azure_bastion_key - Click Connect
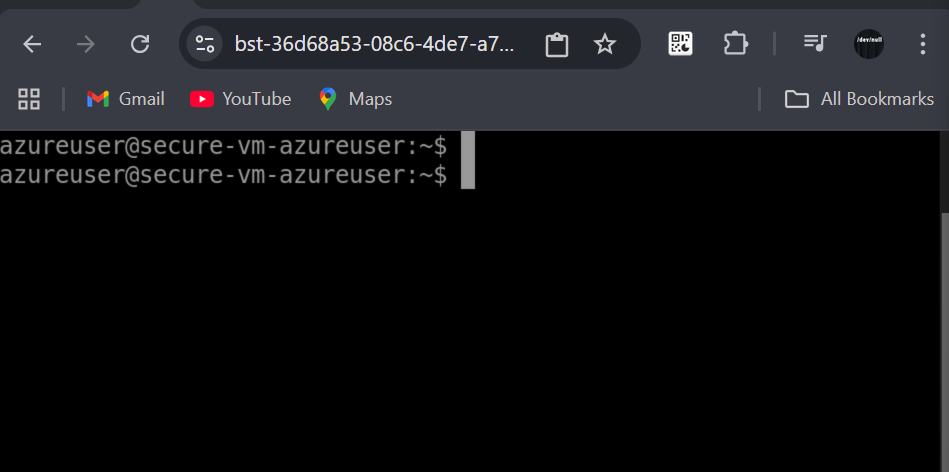
Your browser will open an in-portal SSH session!
Method 2: Native SSH Client (Standard/Premium SKU)
# Using Azure CLI tunnel
az network bastion ssh \
  --name bastion-dev \
  --resource-group rg-bastion-dev \
  --target-resource-id $(az vm show \
    --name vm-linux-dev \
    --resource-group rg-bastion-dev \
    --query id -o tsv) \
  --auth-type ssh-key \
  --username azureuser \
  --ssh-key ~/.ssh/azure_bastion_key
Step 10: Security Verification
Let’s verify our security improvements.
Security Checklist
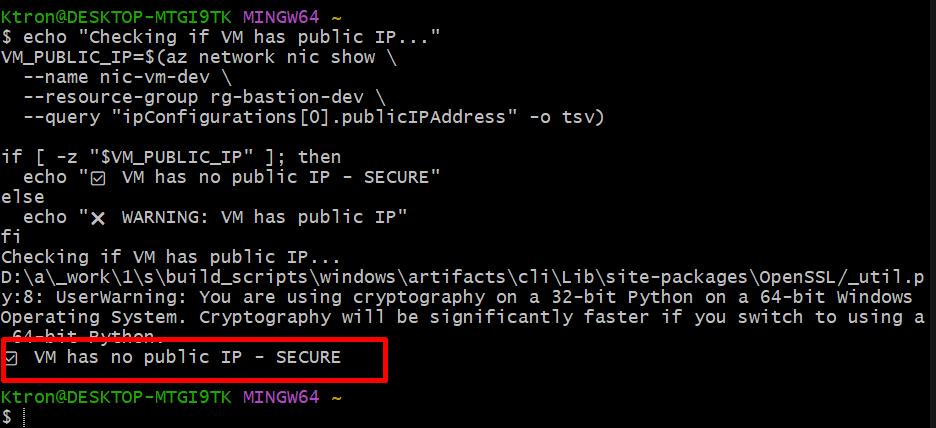
# 1. Verify VM has NO public IP
echo "Checking if VM has public IP..."
VM_PUBLIC_IP=$(az network nic show \
--name nic-vm-dev \
--resource-group rg-bastion-dev \
--query "ipConfigurations[0].publicIPAddress" -o tsv)
if [ -z "$VM_PUBLIC_IP" ]; then
echo "✅ VM has no public IP - SECURE"
else
echo "❌ WARNING: VM has public IP"
fi
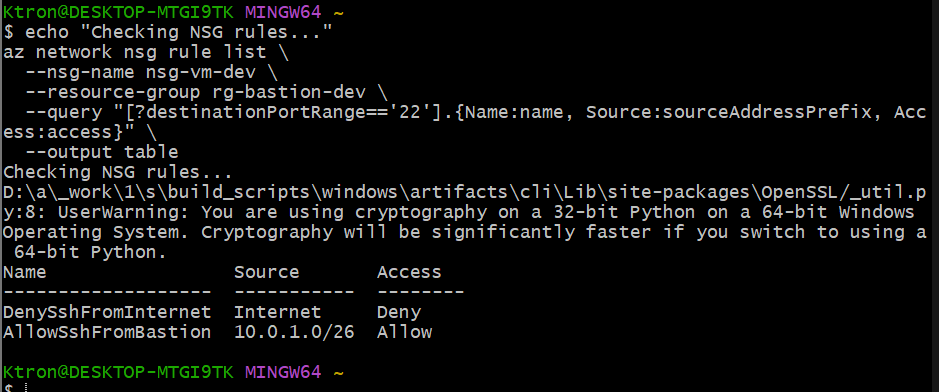
# 2. Check if SSH port is open to internet
echo "Checking NSG rules..."
az network nsg rule list \
--nsg-name nsg-vm-dev \
--resource-group rg-bastion-dev \
--query "[?destinationPortRange=='22'].{Name:name, Source:sourceAddressPrefix, Access:access}" \
--output table
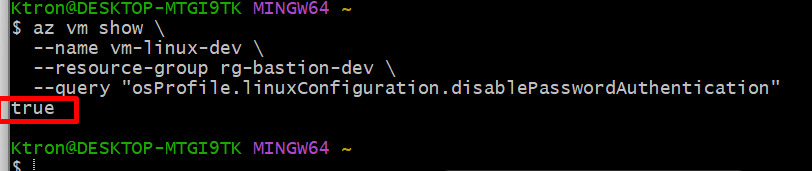
# 3. Verify password authentication is disabled
echo "Checking VM configuration..."
az vm show \
--name vm-linux-dev \
--resource-group rg-bastion-dev \
--query "osProfile.linuxConfiguration.disablePasswordAuthentication"
# Should return: true
# 4. Check if automatic updates are configured
# This requires connecting to the VM via Bastion
# 5. Review RBAC assignments
echo "Checking RBAC permissions..."
az role assignment list \
--scope $(az group show --name rg-bastion-dev --query id -o tsv) \
--output table
# 6. Verify Bastion subnet is correctly configured
az network vnet subnet show \
--vnet-name vnet-bastion-dev \
--name AzureBastionSubnet \
--resource-group rg-bastion-dev \
--query "addressPrefix"
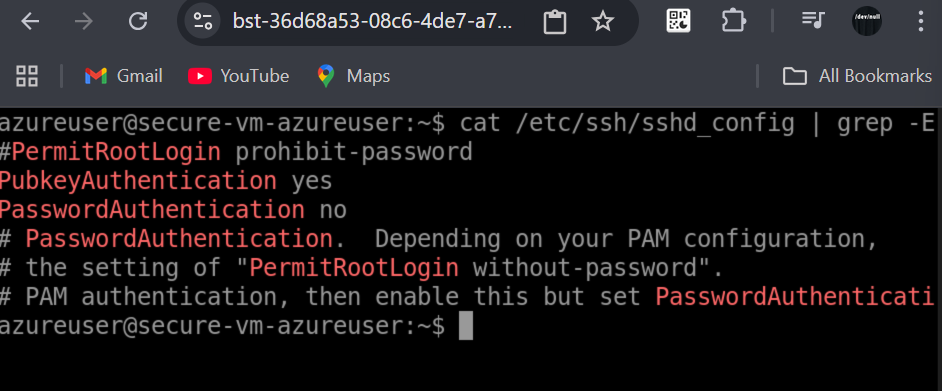
SSH into VM and Verify Hardening
# Connect via Bastion
az network bastion ssh \
--name bastion-dev \
--resource-group rg-bastion-dev \
--target-resource-id $(az vm show \
--name vm-linux-dev \
--resource-group rg-bastion-dev \
--query id -o tsv) \
--auth-type ssh-key \
--username azureuser \
--ssh-key ~/.ssh/azure_bastion_key
# Once connected, run these commands:
# Check SSH configuration
cat /etc/ssh/sshd_config | grep -E "PasswordAuthentication|PermitRootLogin|PubkeyAuthentication"
# Should show:
# PasswordAuthentication no
# PermitRootLogin no
# PubkeyAuthentication yes
# Verify firewall status
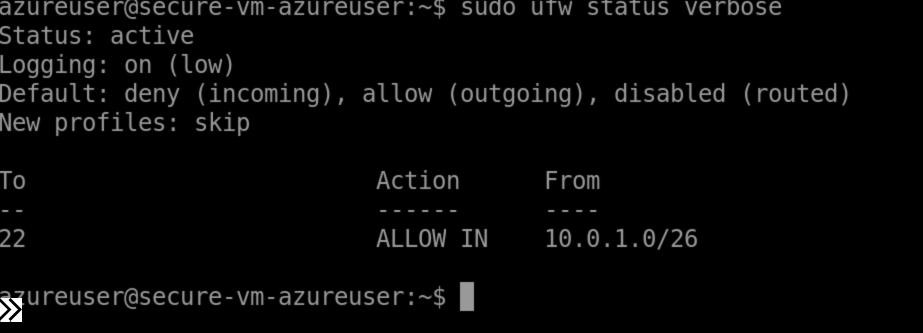
sudo ufw status verbose
# Check fail2ban
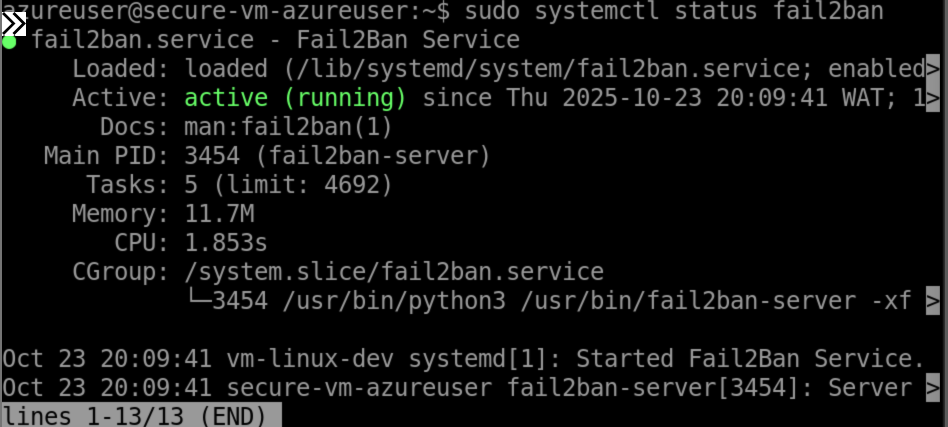
sudo systemctl status fail2ban
# Verify automatic updates
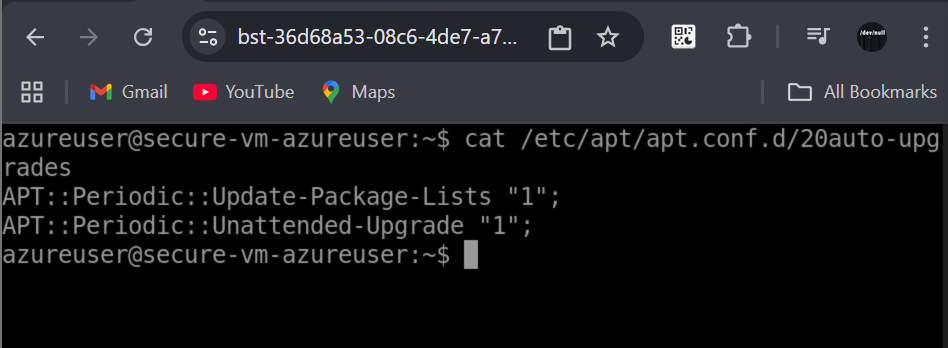
cat /etc/apt/apt.conf.d/20auto-upgrades
# Check kernel security parameters
sudo sysctl net.ipv4.tcp_syncookies
sudo sysctl net.ipv4.ip_forward
# Review installed security packages
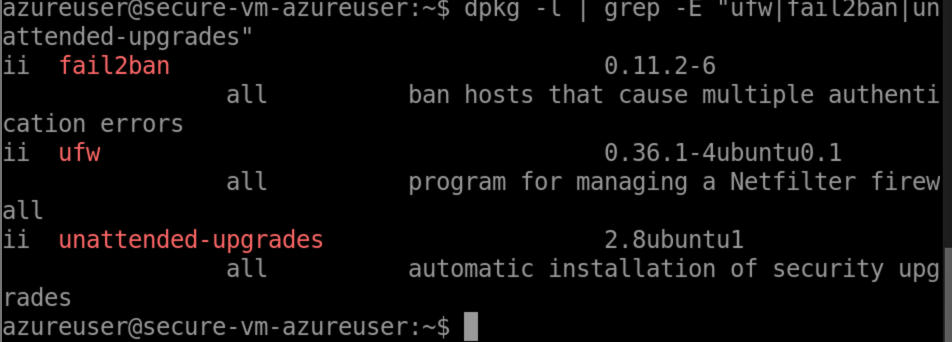
dpkg -l | grep -E "ufw|fail2ban|unattended-upgrades"
Security Audit Report
Create a simple audit script:
# security-audit.sh
#!/bin/bash

echo "==================================="
echo "Azure Bastion Security Audit"
echo "==================================="
echo ""

RG_NAME="rg-bastion-dev"

echo "1. Checking VM Public IP Exposure..."
VM_HAS_PUBLIC_IP=$(az network nic list \
  --resource-group $RG_NAME \
  --query "[?contains(name, 'vm')].ipConfigurations[0].publicIPAddress" -o tsv)

if [ -z "$VM_HAS_PUBLIC_IP" ]; then
  echo "   ✅ No VMs exposed to internet"
else
  echo "   ❌ WARNING: VMs have public IPs"
fi

echo ""
echo "2. Checking Bastion Deployment..."
BASTION_STATE=$(az network bastion show \
  --name bastion-dev \
  --resource-group $RG_NAME \
  --query "provisioningState" -o tsv 2>/dev/null)

if [ "$BASTION_STATE" == "Succeeded" ]; then
  echo "   ✅ Bastion is deployed and healthy"
else
  echo "   ❌ Bastion issue detected"
fi

echo ""
echo "3. Checking VM Password Authentication..."
PASSWORD_AUTH=$(az vm show \
  --name vm-linux-dev \
  --resource-group $RG_NAME \
  --query "osProfile.linuxConfiguration.disablePasswordAuthentication" -o tsv)

if [ "$PASSWORD_AUTH" == "true" ]; then
  echo "   ✅ Password authentication disabled"
else
  echo "   ❌ WARNING: Password authentication enabled"
fi

echo ""
echo "4. Reviewing NSG Rules..."
DANGEROUS_RULES=$(az network nsg rule list \
  --nsg-name nsg-vm-dev \
  --resource-group $RG_NAME \
  --query "[?sourceAddressPrefix=='Internet' && access=='Allow' && destinationPortRange=='22'].name" -o tsv)

if [ -z "$DANGEROUS_RULES" ]; then
  echo "   ✅ No dangerous SSH rules found"
else
  echo "   ❌ WARNING: SSH exposed to internet"
fi

echo ""
echo "==================================="
echo "Audit Complete"
echo "==================================="
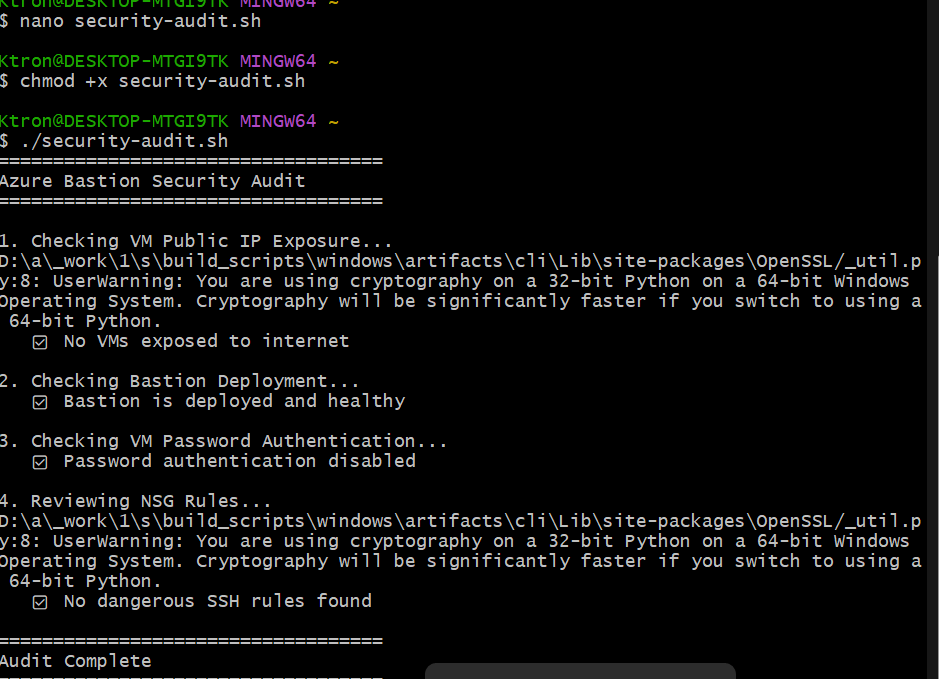
Run it:
chmod +x security-audit.sh
./security-audit.sh
Reflection
This project represents a fundamental shift in thinking, from “making it work” to “making it work securely.” Every DevSecOps engineer must internalize this principle: security isn’t an afterthought; it’s the foundation.
By removing public IPs, implementing Azure Bastion, enforcing SSH key authentication, and applying RBAC, we’ve created an infrastructure that’s not just functional, it’s trustworthy. The automation through Terraform ensures these security controls are consistent, repeatable, and auditable.
The investment in proper remote state management means our infrastructure is ready for team collaboration and enterprise workflows. The hardening steps ensure our VMs resist common attacks. The RBAC configuration means only authorized users can perform specific actions.
This is what DevSecOps looks like in practice: security baked into every layer, automated through code, and validated through testing.
Cleanup and Teardown
When you’re done testing, properly clean up resources:
# Destroy all resources
terraform destroy

# Review what will be destroyed
terraform plan -destroy

# Confirm and destroy
terraform destroy -auto-approve


Leave a comment