
Imagine running a popular online store on a single server. Everything works fine until Black Friday hits, and suddenly your server crashes under the load. Or worse, the server has a hardware failure at 2 AM, and your entire business goes offline until morning.
This is where load balancing comes in. In this tutorial, we’ll build a resilient web application architecture using Azure Load Balancer that can handle failures gracefully and distribute traffic intelligently across multiple servers.
Understanding the Concept First
Before we dive into Azure Portal, let’s understand what we’re building.
The Problem: Your web application runs on one VM. If it fails, users get error messages.
The Solution: Deploy two identical VMs behind a Load Balancer. The Load Balancer acts like a traffic cop, directing users to healthy servers and automatically routing around failures.
Key Components:
- Frontend IP: The public-facing address users connect to
- Backend Pool: Your group of VMs that actually serve the content
- Health Probe: A regular check-up that asks “Are you alive and working?”
- Load Balancing Rules: Instructions telling the Load Balancer how to distribute traffic
Part 1: Creating Your Virtual Machines
We’ll create two identical VMs that will host simple web pages.
Step 1.1: Create the First Virtual Machine
- Navigate to Azure Portal (portal.azure.com)
- Click “Create a resource” → Search for “Virtual Machine”
- Click “Create”
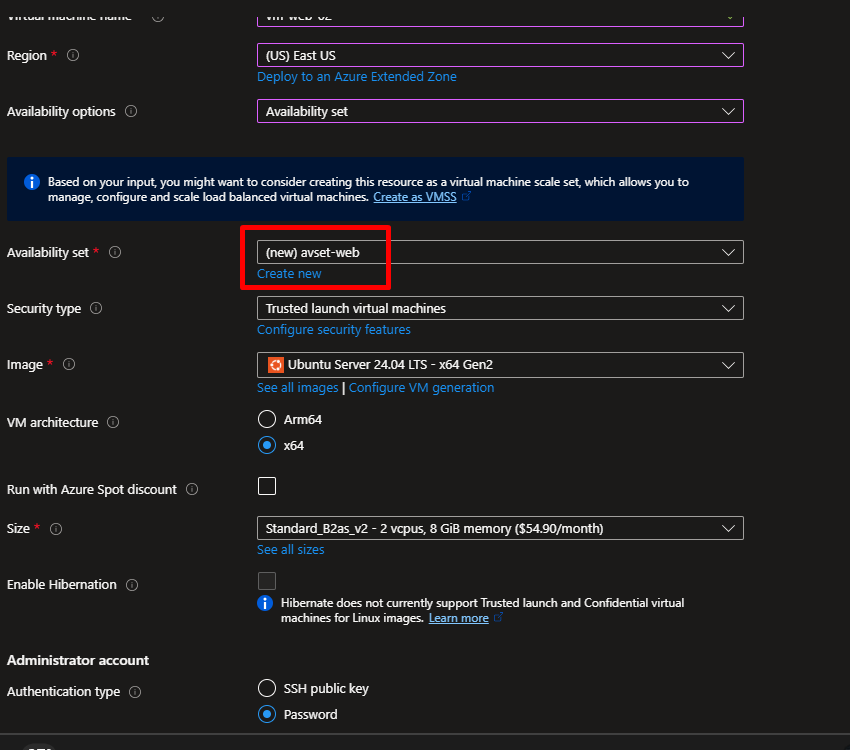
Basic Configuration:
- Subscription: Choose your subscription
- Resource Group: Create new → Name it
rg-loadbalancer-demo - Virtual Machine Name:
vm-web-01 - Region: Choose one close to you (example: East US)
- Availability Options: Select “Availability Set” → Create new → Name:
avset-web - Image: Ubuntu Server 22.04 LTS (or Windows Server if you prefer)
- Size: Standard_B2s (2 vCPUs, 4GB RAM) – sufficient for testing
- Authentication: Choose SSH public key or Password (remember your credentials!)
Networking Settings:
- Virtual Network: Create new → Name:
vnet-webapp - Subnet: Keep default
- Public IP: Create new → Name:
pip-vm-web-01 - NIC Network Security Group: Advanced → Create new
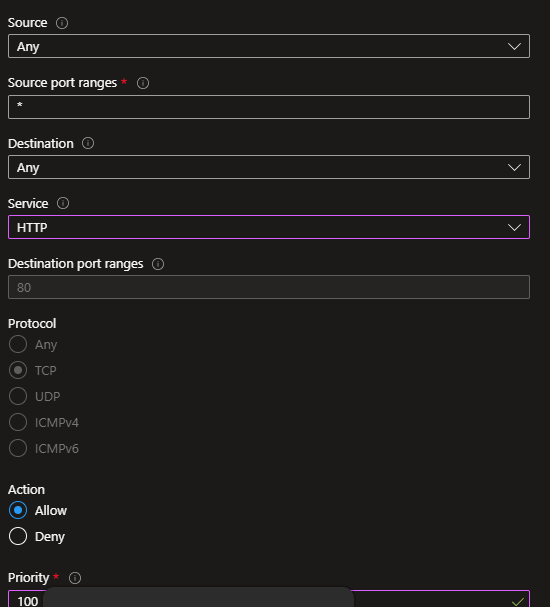
NSG (Network Security Group) Rules:
- Add inbound rule:
- Source: Any
- Source port ranges: *
- Destination: Any
- Service: HTTP
- Destination port ranges: 80
- Protocol: TCP
- Action: Allow
- Priority: 100
- Name:
Allow-HTTP
- Click “Review + Create” → “Create”

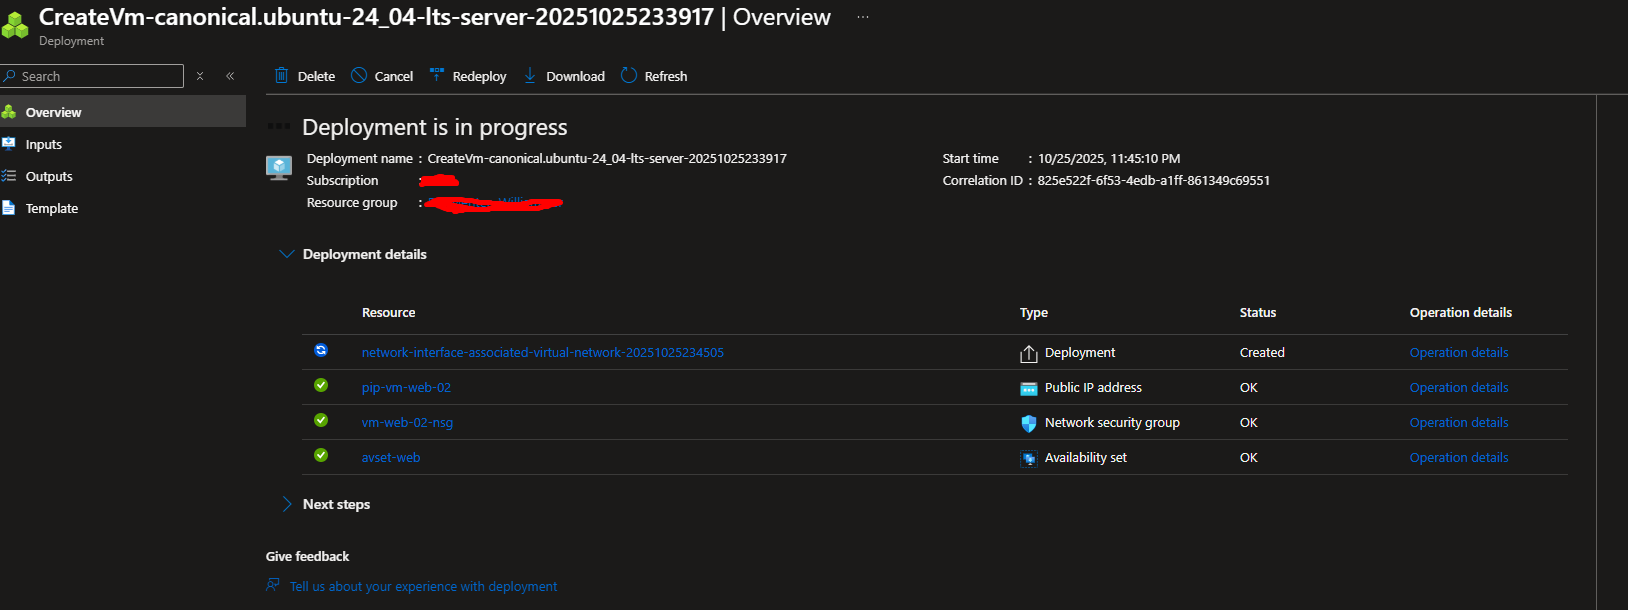
Step 1.2: Create the Second Virtual Machine
Repeat the exact same process with these changes:
- Name:
vm-web-02 - Availability Set: Choose the existing
avset-web(very important!) - Public IP: Create new → Name:
pip-vm-web-02 - Keep everything else identical to VM1
Pro Tip: Using the same Availability Set ensures Azure places these VMs on different physical hardware, protecting you from hardware failures.
Part 2: Setting Up Web Servers
Now we’ll install a simple web server on each VM so we can see the load balancing in action.
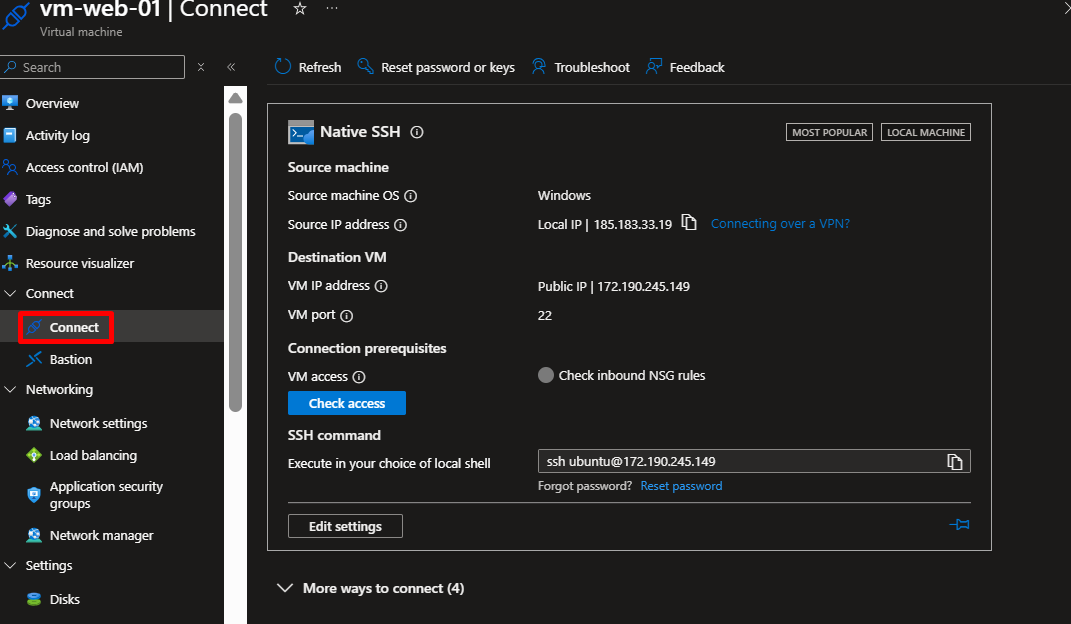
Step 2.1: Connect to VM1
For Linux/Ubuntu:
- Go to your VM1 in Azure Portal
- Click “Connect” → Choose SSH
- Copy the SSH command (looks like:
ssh azureuser@<public-ip>) - Open your local terminal and paste the command
- Accept the fingerprint and enter your password
For Windows Server: Use Remote Desktop Connection with the public IP
Step 2.2: Install Web Server on VM1
For Ubuntu, run these commands:
# Update package list
sudo apt update
# Install Nginx web server
sudo apt install nginx -y
# Create a custom webpage
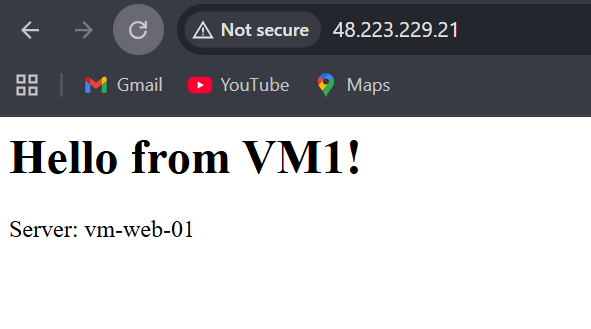
echo '<h1>Hello from VM1!</h1><p>Server: vm-web-01</p>' | sudo tee /var/www/html/index.html
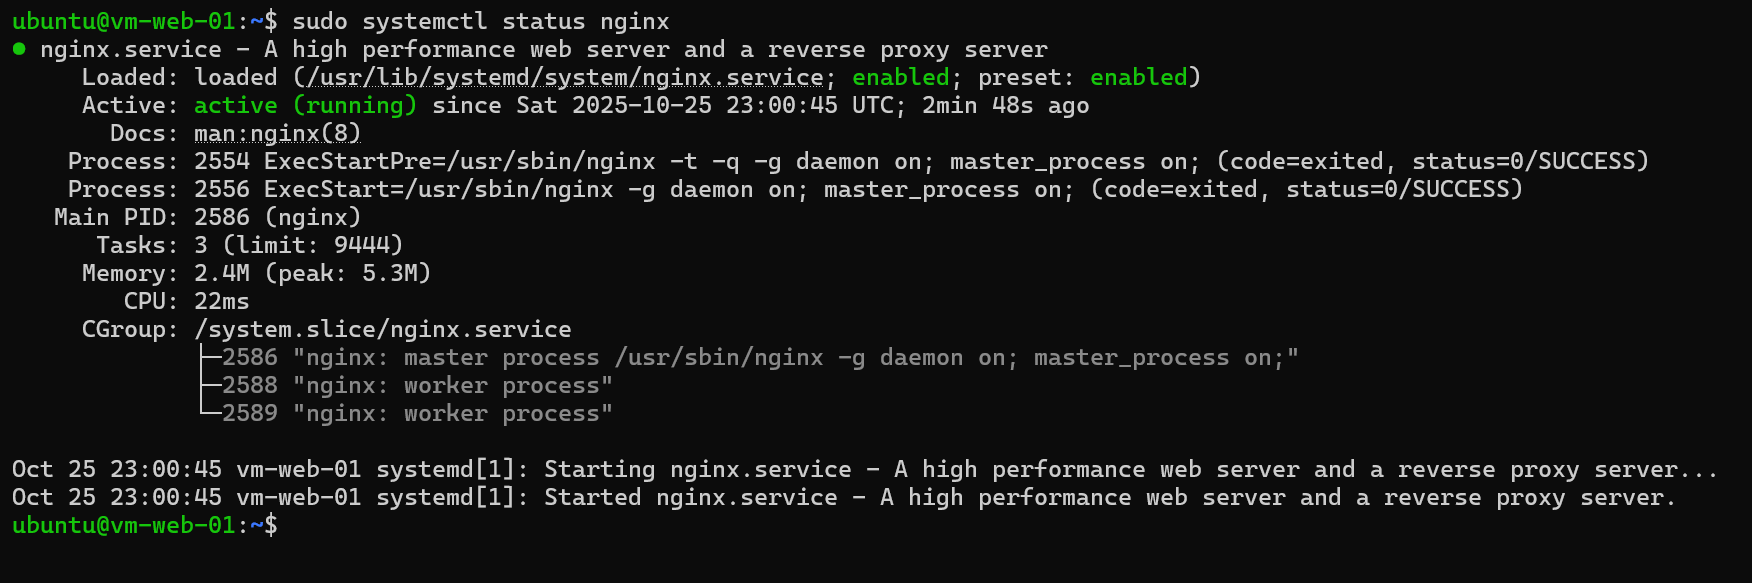
# Ensure Nginx is running
sudo systemctl status nginx

For Windows Server, use PowerShell:
# Install IIS
Install-WindowsFeature -name Web-Server -IncludeManagementTools

# Create custom webpage
Set-Content -Path "C:\inetpub\wwwroot\index.html" -Value "<h1>Hell
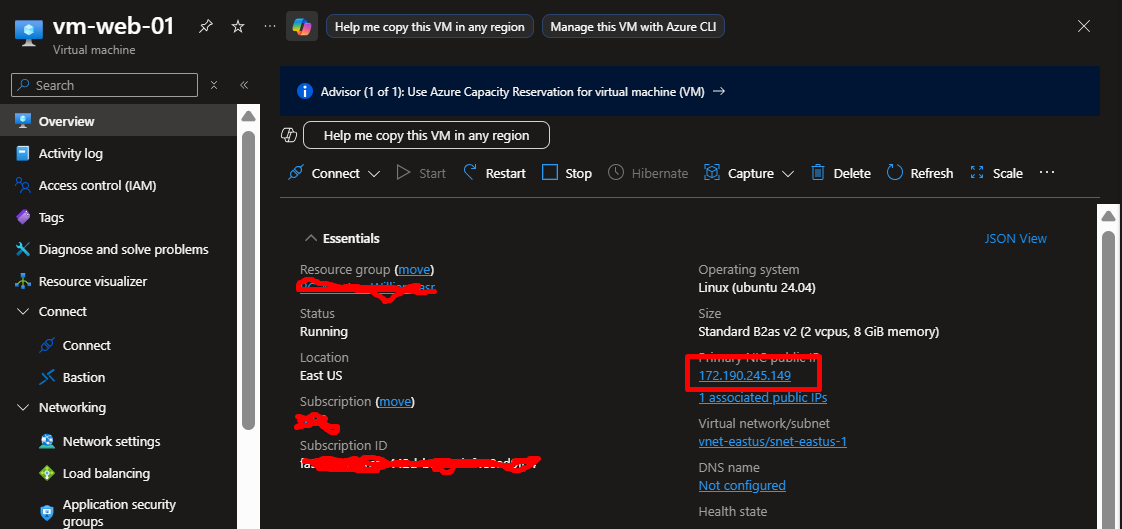
Step 2.3: Test VM1’s Web Server
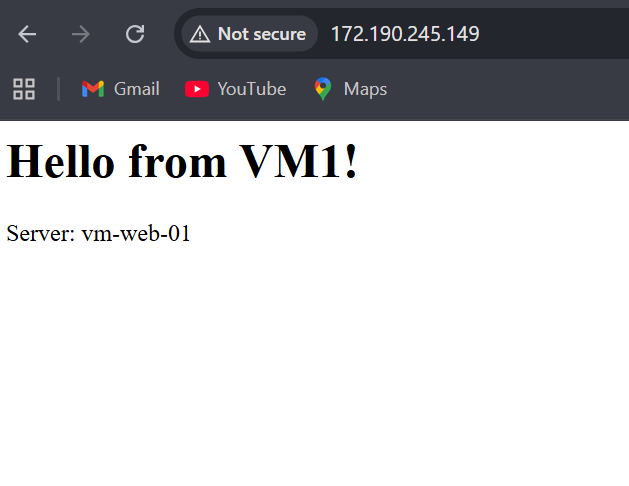
- Open a browser
- Navigate to VM1’s public IP address (find it in Azure Portal)
- You should see: “Hello from VM1!”
Step 2.4: Repeat for VM2
Connect to VM2 and run the same commands, but change the HTML to:
bash
echo "<h1>Hello from VM2!</h1><p>Server: vm-web-02</p>" | sudo tee /var/www/html/index.html
Test it by visiting VM2’s public IP.
Checkpoint: You should now have two working web servers, each displaying different messages.
Part 3: Creating the Azure Load Balancer
Now comes the exciting part where we tie everything together.
Step 3.1: Create Load Balancer Resource
- In Azure Portal, click “Create a resource”
- Search for “Load Balancer”
- Click “Create”
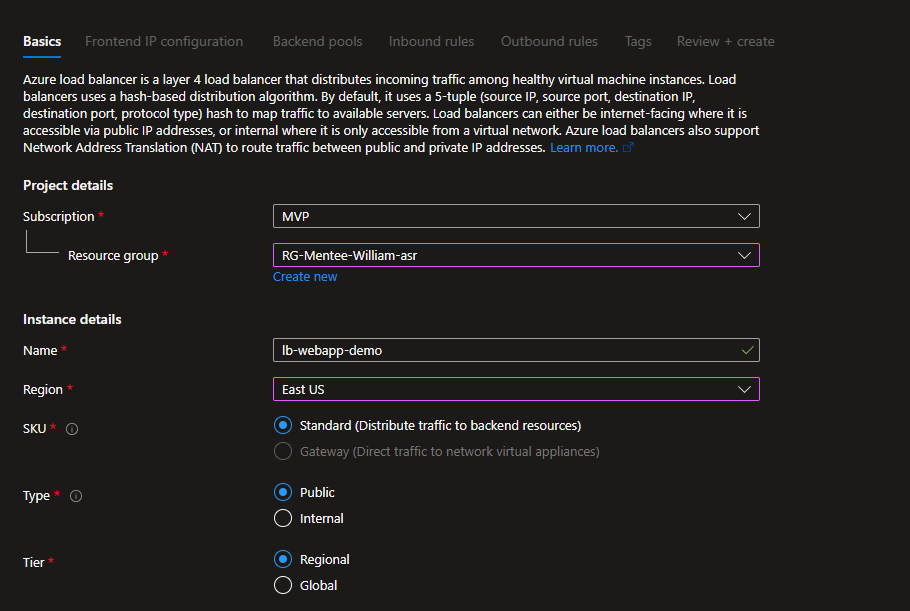
Basic Settings:
- Subscription: Your subscription
- Resource Group:
rg-loadbalancer-demo(same as your VMs) - Name:
lb-webapp-demo - Region: Same as your VMs (critical!)
- SKU: Standard
- Type: Public
- Tier: Regional
- Click “Next: Frontend IP configuration”
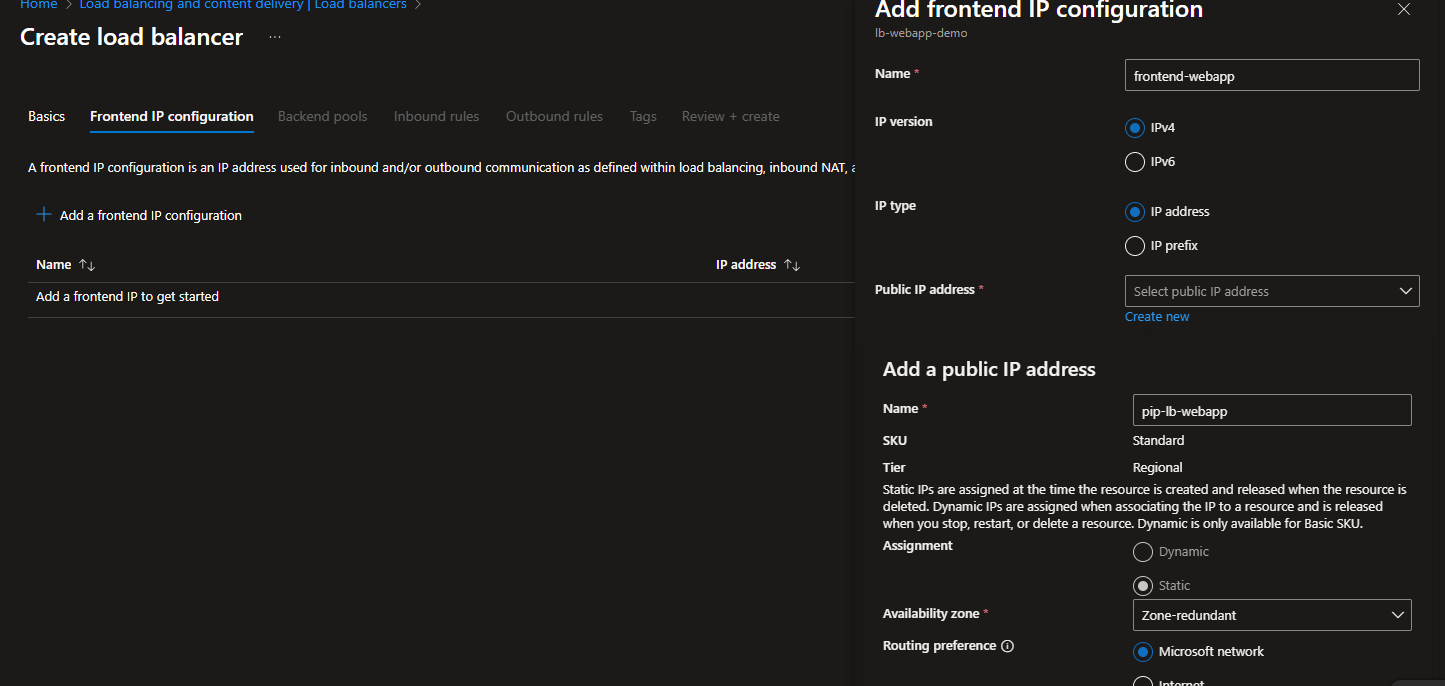
Step 3.2: Configure Frontend IP
This is the public-facing IP address users will access.
- Click “Add a frontend IP configuration”
- Name:
frontend-webapp - IP version: IPv4
- Public IP address: Create new
- Name:
pip-lb-webapp - SKU: Standard
- Assignment: Static
- Name:
- Click “Add”
- Click “Next: Backend pools”
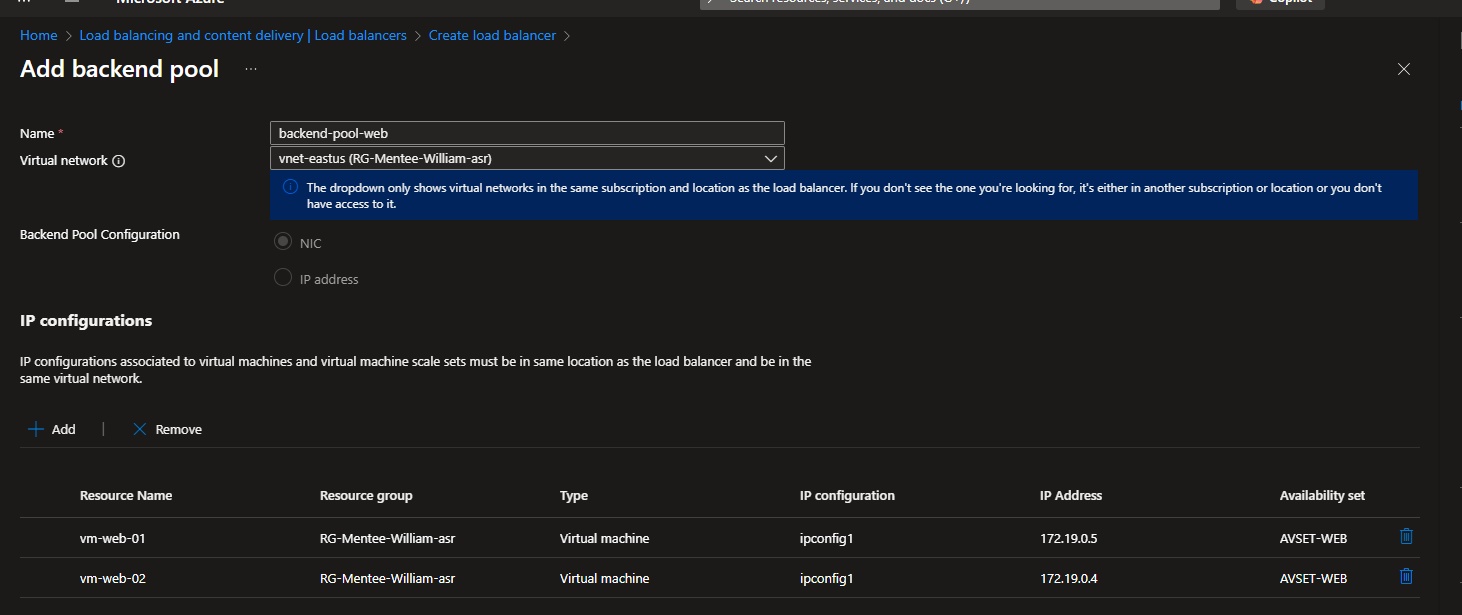
Step 3.3: Create Backend Pool
This is where we add our VMs.
- Click “Add a backend pool”
- Name:
backend-pool-web - Virtual network:
vnet-webapp - Backend Pool Configuration: NIC
- Click “Add” under Virtual machines
Add VM1:
- Virtual machine:
vm-web-01 - Network IP configuration: Select the available option
Add VM2:
- Click “Add” again
- Virtual machine:
vm-web-02 - Network IP configuration: Select the available option
- Click “Add” to save the backend pool
- Click “Next: Inbound rules”
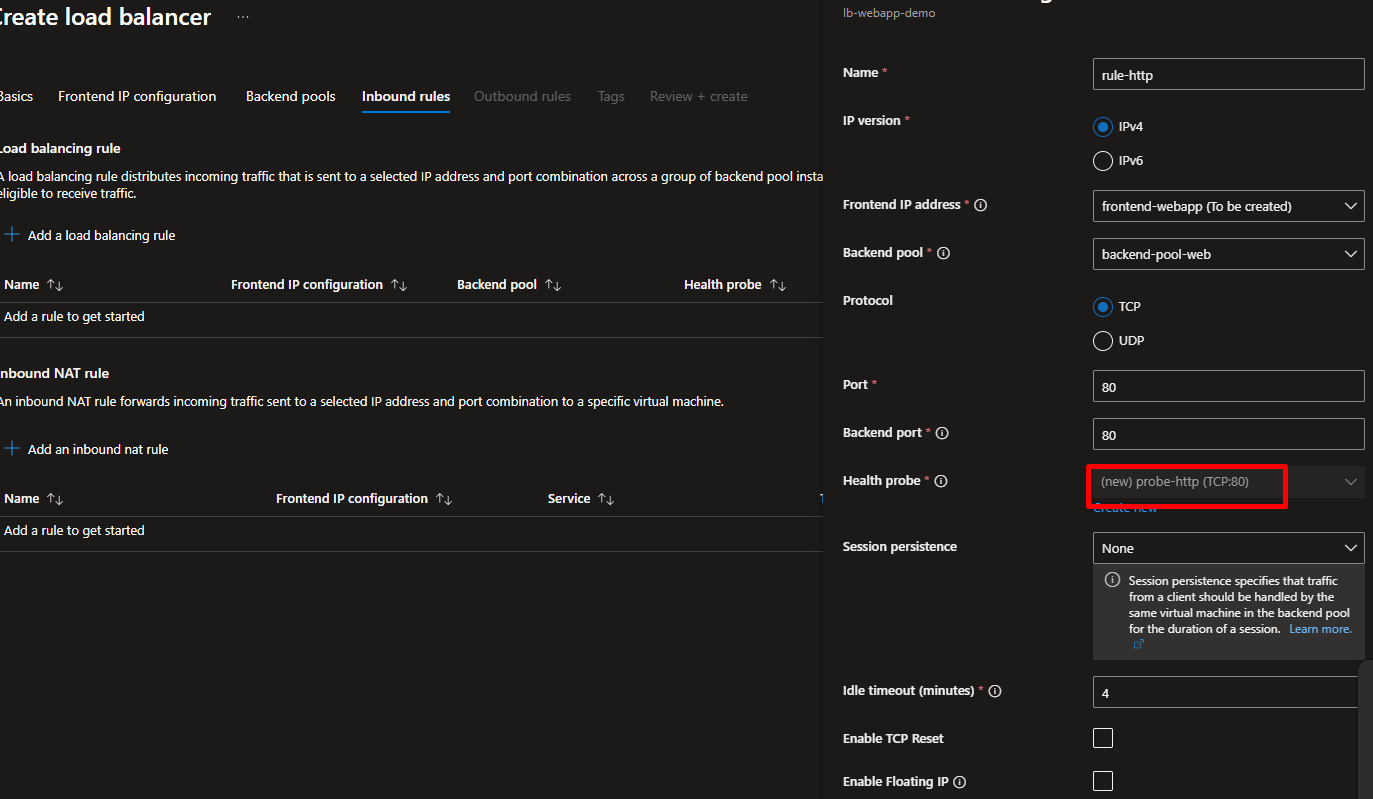
Step 3.4: Add Load Balancing Rule
This rule tells the Load Balancer how to distribute traffic.
- Under “Load balancing rules”, click “Add a load balancing rule”
- Under “Health probes”, click “Add a health probe”
- Name:
probe-http - Protocol: HTTP
- Port: 80
- Path:
/(checks the homepage) - Interval: 5 seconds (how often to check)
- Unhealthy threshold: 2 (fails after 2 missed checks)
- Click “Add”
- Name:
rule-http - IP Version: IPv4
- Frontend IP address: Select
frontend-webapp - Protocol: TCP
- Port: 80
- Backend port: 80
- Backend pool:
backend-pool-web - Health probe:
probe-http - Session persistence: None (distributes requests evenly)
- Idle timeout: 4 minutes
- TCP reset: Disabled
- Floating IP: Disabled
- Click “Add”
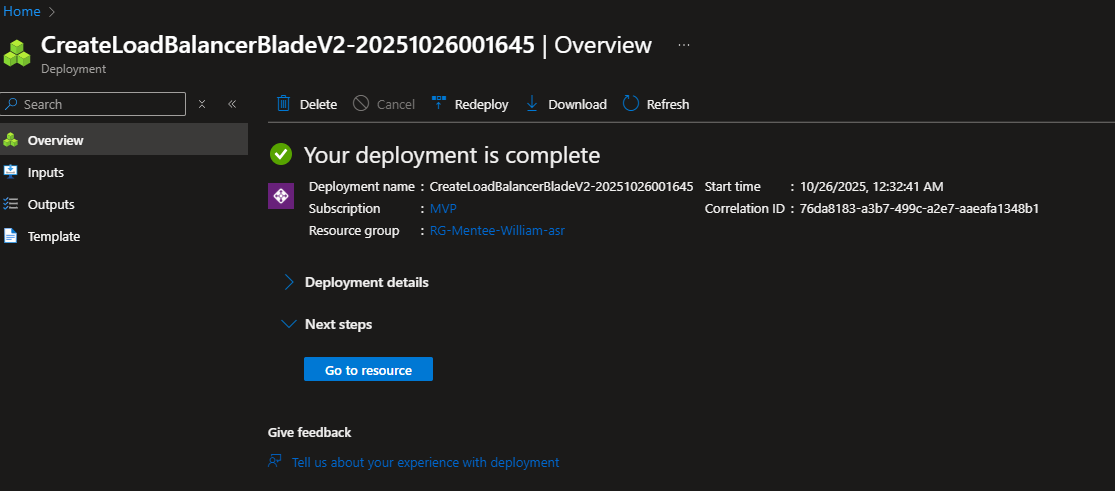
Step 3.6: Review and Create
- Click “Review + create”
- Verify all settings
- Click “Create”
- Wait 2-3 minutes for deployment
Part 4: Testing Your Load Balancer
This is where the magic happens!
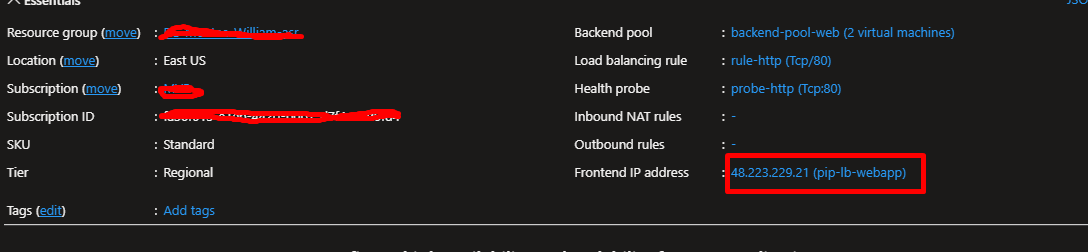
Step 4.1: Find Your Load Balancer’s Public IP
- Go to your Load Balancer resource (
lb-webapp-demo) - Click “Frontend IP configuration” in the left menu
- Copy the Public IP address
Step 4.2: Test Load Distribution
- Open a web browser
- Navigate to the Load Balancer’s public IP
- You should see either “Hello from VM1!” or “Hello from VM2!”
- Refresh the page multiple times
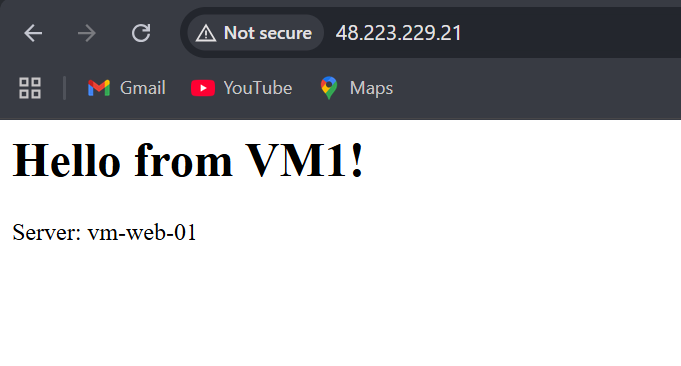
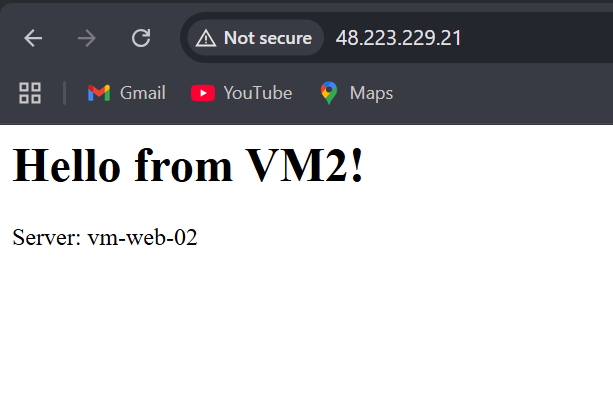
What you should see: The responses alternate between VM1 and VM2. The Load Balancer is distributing your requests evenly!
Note: Sometimes you might see the same server multiple times in a row due to browser caching or connection reuse. Try using different browsers or incognito mode to see clearer distribution.
Step 4.3: Test High Availability (The Exciting Part!)
Now let’s simulate a real-world failure.
- Go to Azure Portal
- Navigate to
vm-web-01 - Click “Stop” at the top
- Wait for VM1 to fully stop (about 30 seconds)
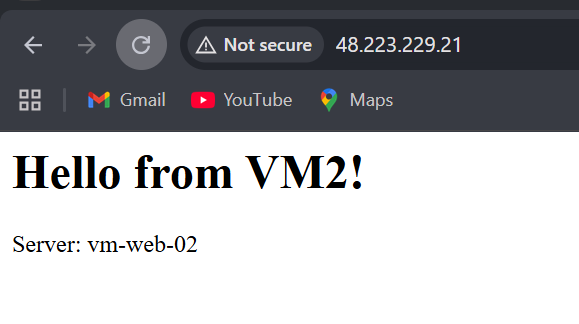
- Go back to your browser
- Refresh the Load Balancer’s IP address multiple times

What happens? All traffic now goes to VM2! The Load Balancer detected that VM1 failed its health check and automatically removed it from rotation. Your users experience no downtime.
Step 4.4: Test Automatic Recovery
- Start VM1 again (click “Start” in Azure Portal)
- Wait 2-3 minutes for the VM to boot and pass health checks
- Refresh your browser
What happens? Traffic starts splitting between both VMs again. The Load Balancer automatically brought VM1 back into rotation once it became healthy.
Part 6: Monitoring Your Setup
View Load Balancer Metrics
- Go to your Load Balancer in Azure Portal
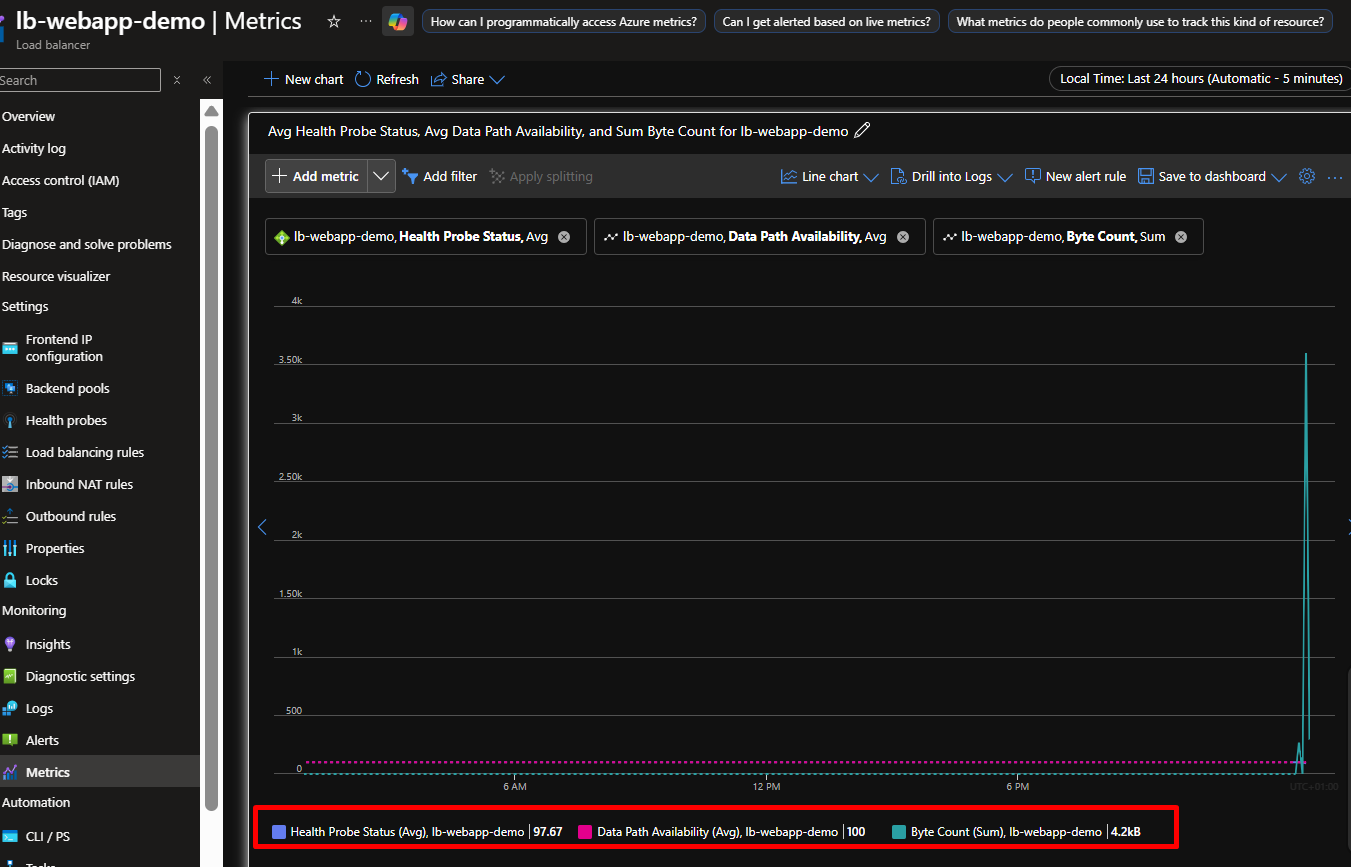
- Click “Metrics” in the left menu
- Add these metrics to your dashboard:
- Health Probe Status: Shows which VMs are healthy
- Data Path Availability: Overall health of your setup
- Byte Count: How much traffic is flowing through
Check Backend Pool Health
- In your Load Balancer, click “Backend pools”
- Click on
backend-pool-web - You’ll see each VM’s health status (Healthy/Unhealthy)
View VM Logs
For Ubuntu VMs, SSH in and check Nginx logs:
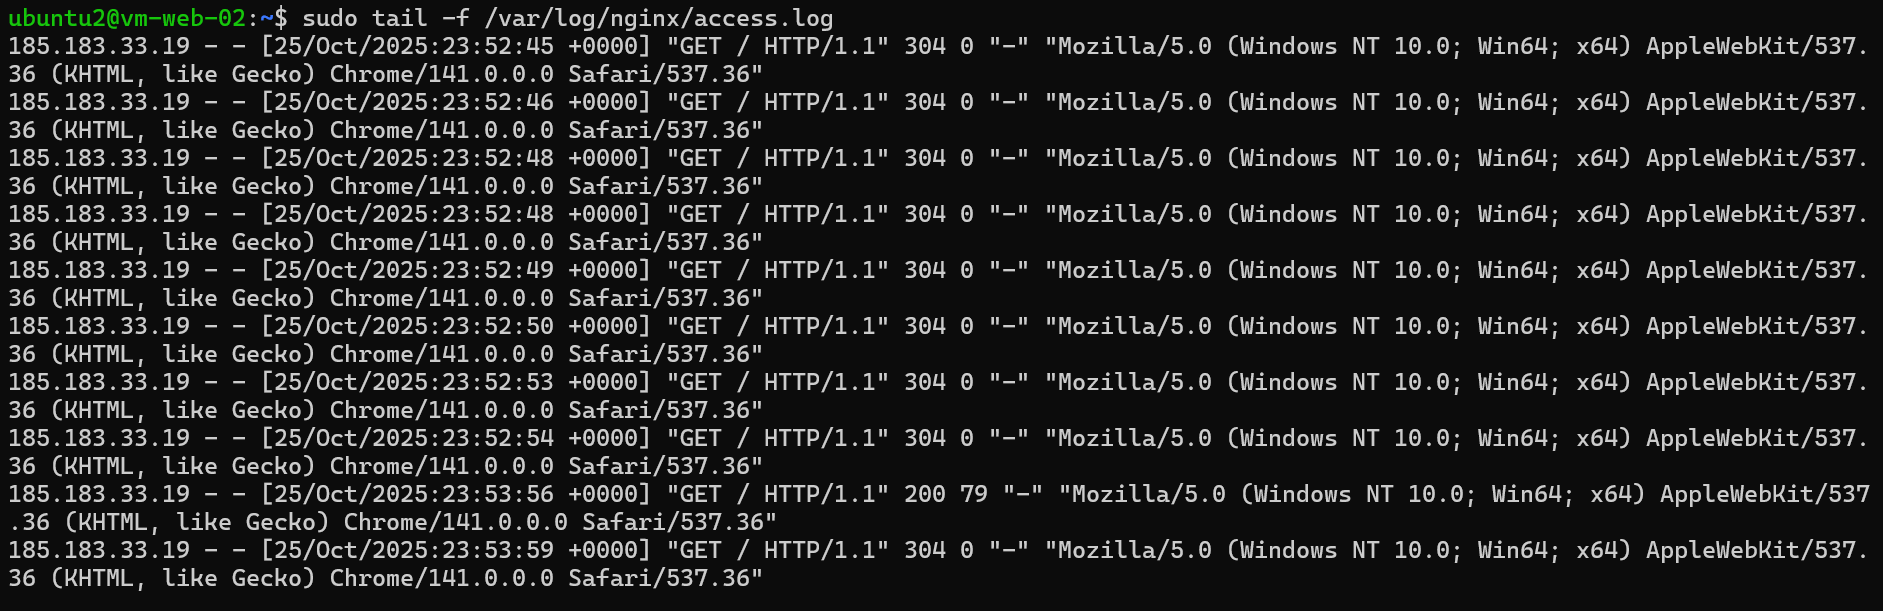
sudo tail -f /var/log/nginx/access.log
You’ll see incoming requests from the Load Balancer’s health probe and actual user traffic.
Real-World Production Considerations
Now that you understand the basics, here’s what enterprises do differently:
1. Availability Zones
Instead of an Availability Set, use Availability Zones to protect against datacenter-level failures. This spreads VMs across physically separate datacenters within a region.
2. Multiple Backend Pools
Large applications might have:
- Backend pool for web servers (port 80/443)
- Backend pool for API servers (port 8080)
- Backend pool for admin interfaces (port 9000)
3. HTTPS/SSL Configuration
Always use HTTPS in production:
- Use Azure Application Gateway (Layer 7) for SSL termination
- Or configure SSL certificates directly on your VMs
4. Auto-Scaling
Combine with Azure Virtual Machine Scale Sets to automatically add/remove VMs based on load.
5. Advanced Health Checks
Instead of just checking if the server responds, health probes can hit specific endpoints that verify database connectivity, cache availability, etc.
6. Monitoring and Alerts
Set up Azure Monitor alerts for:
- When all VMs in a pool become unhealthy
- When traffic exceeds certain thresholds
- When response times spike
Cost Optimization Tips
Azure Load Balancer costs money while running. Here’s how to minimize costs:
During Learning:
- Use B-series VMs (burstable, cheaper)
- Delete resources when not actively testing
- Use one region to avoid cross-region transfer charges
For Production:
- Standard Load Balancer: ~$0.025/hour + $0.005 per GB processed
- VM costs: Varies by size (B2s ~$30-40/month per VM)
- Use Reserved Instances for long-term VMs (save up to 72%)
To Delete This Demo:
- Go to Resource Group
rg-loadbalancer-demo - Click “Delete resource group”
- Type the resource group name to confirm
- Everything gets deleted (VMs, Load Balancer, IPs, etc.)


Leave a comment