
Picture this: It’s Monday morning. You grab your coffee, open Azure Portal, and… your production VM is gone. Deleted. Corrupted. Or worse, your entire region is down.
Without a backup and recovery strategy, you’re looking at:
- Hours (or days) of downtime
- Lost customer data
- Angry stakeholders
- A very bad day
But with Azure Backup and Azure Site Recovery, you can restore your VM in minutes and failover to another region seamlessly. Let me show you how.
What We’re Working on
We expect to set up:
Automated daily backups of our Azure VM
A disaster recovery replica in another Azure region
Tested failover to prove your setup works
Monitoring alerts to stay informed
Part 1: Creating Your Recovery Services Vault
Think of a Recovery Services Vault as a secure storage locker for all your backups and recovery data.
Step-by-Step:
- Open Azure Portal and search for “Recovery Services vaults” in the top search bar
- Click + Create
- Fill in the basics:
- Subscription: Your Azure subscription
- Resource Group: Choose existing or create new (e.g.,
rg-bcdr) - Vault Name: Something memorable like
bcdr-vault-prod - Region: Pick your primary region (where your VM lives) and leave the remaining tab as default
- Click Review + Create, then Create
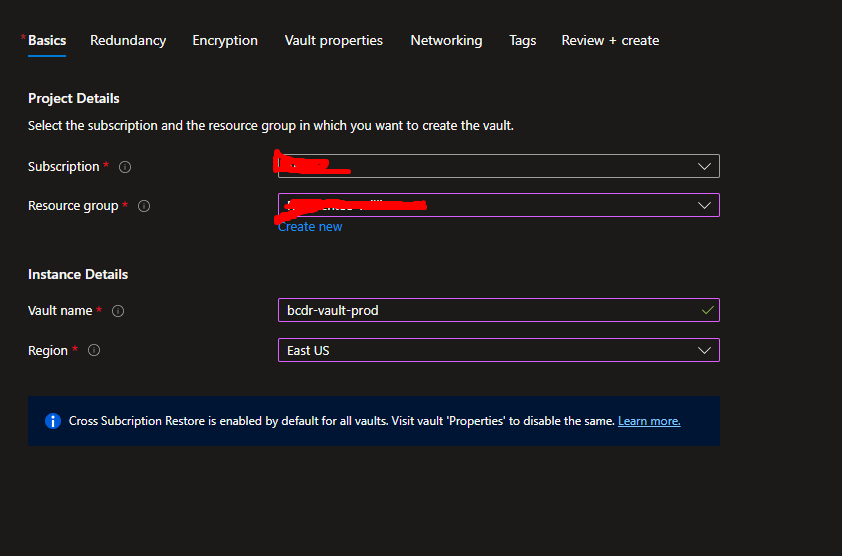
Tip: Keep your vault in the same region as your resources for better performance and lower costs.
Part 2: Setting Up Azure Backup
Now let’s protect your VM with automated backups!
Step-by-Step:
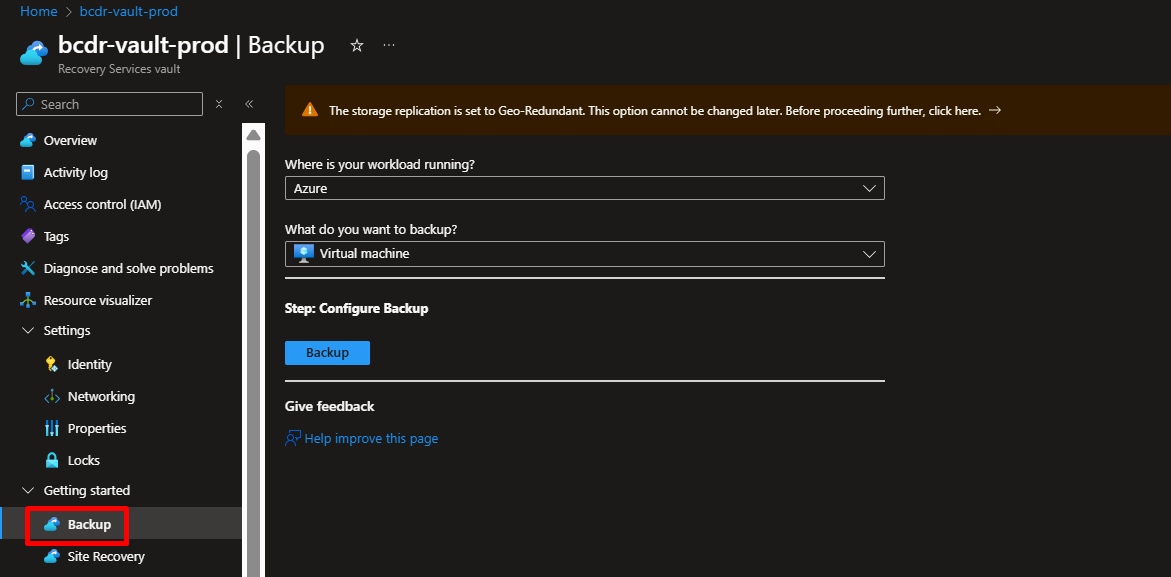
- Open your newly created vault
- In the left menu, under Getting Started, click Backup
- Configure your backup goal:
- “Where is your workload running?” → Azure
- “What do you want to back up?” → Virtual machine
- Click Backup
- Click + Add and select your target VM from the list
- Configure your Backup Policy:
- Schedule: Daily at 10:00 PM (or your preferred time)
- Retention: Keep backups for 30 days
- You can customize this based on your needs!
- Click Enable Backup

What Happens Next?
Azure will:
- Install the backup extension on your VM
- Take an initial snapshot (takes 15-30 minutes)
- Schedule daily backups automatically
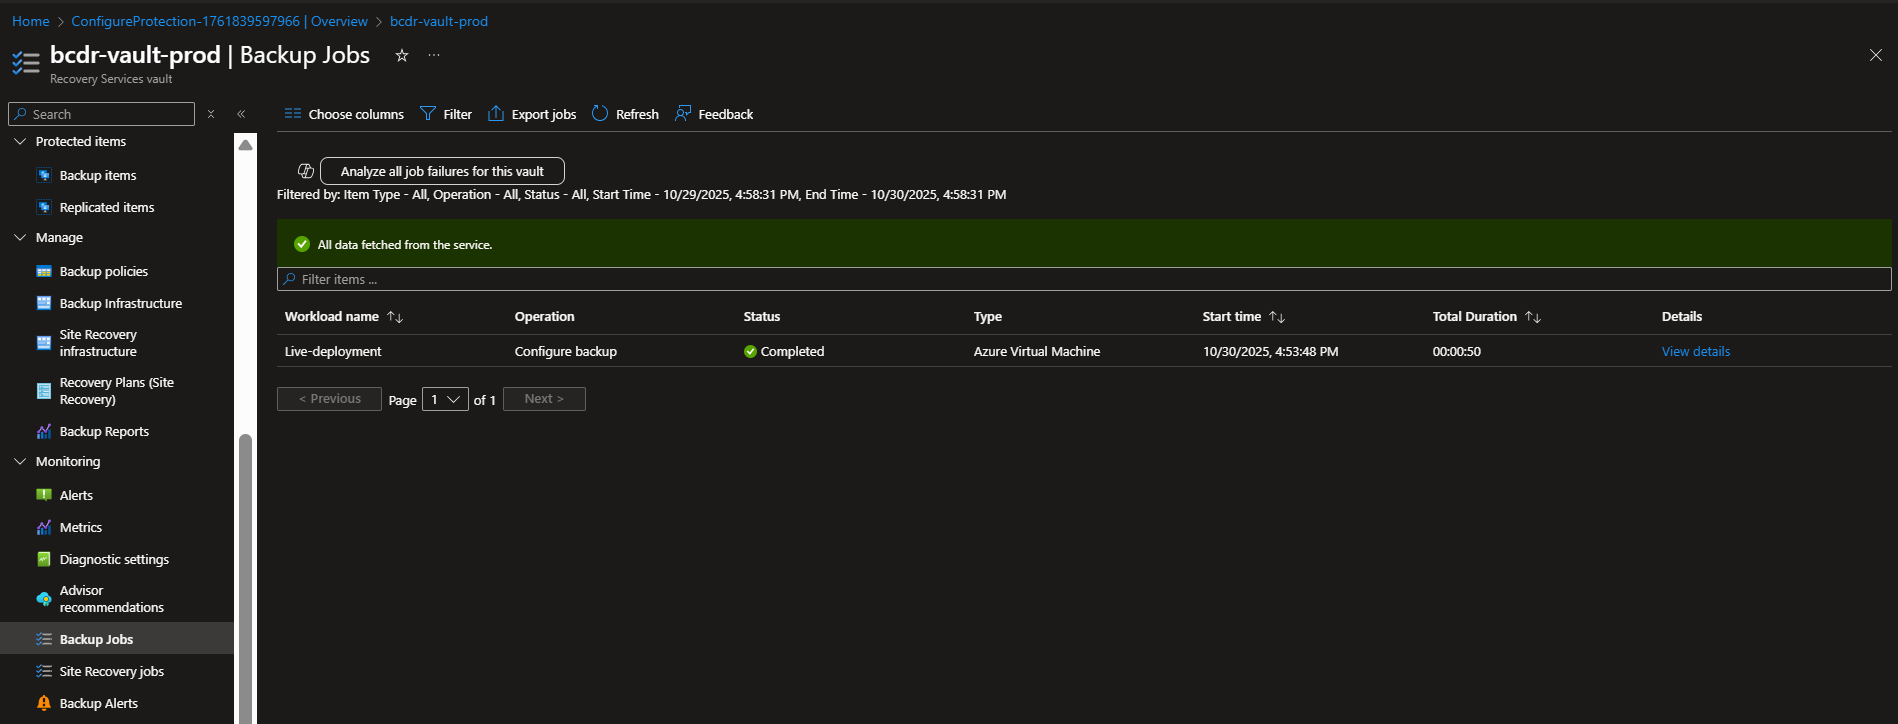
You can monitor progress under Backup Jobs in your vault.
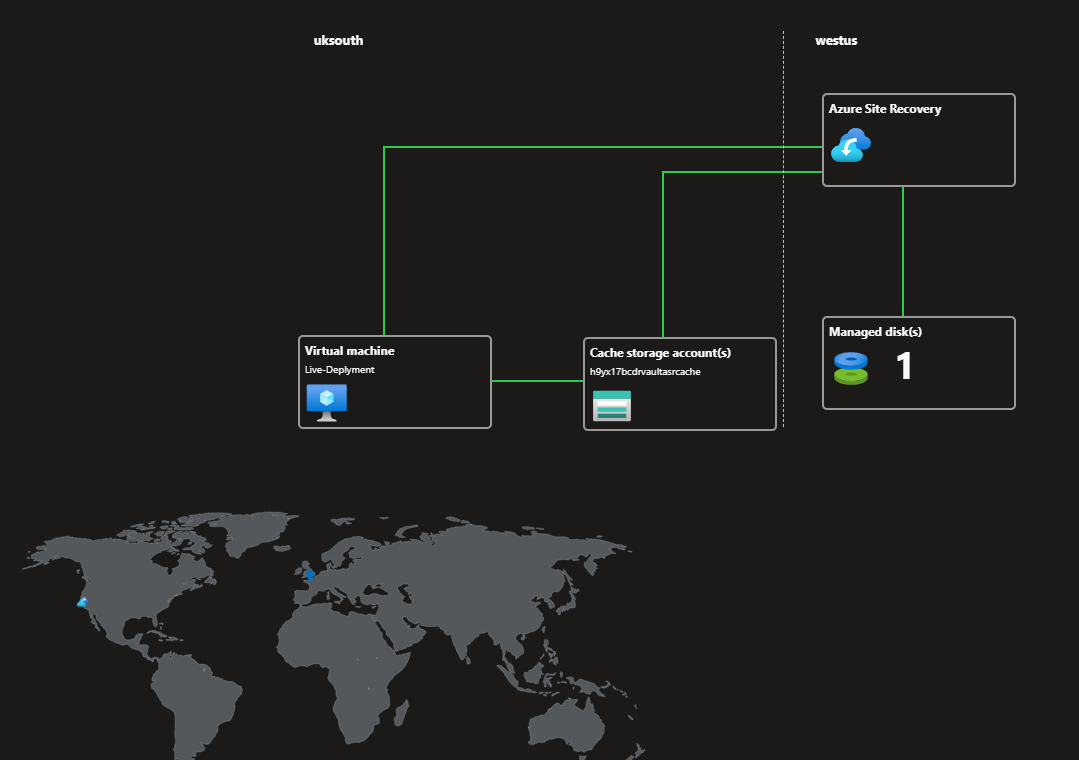
Part 3: Enabling Azure Site Recovery (The Magic Part!)
This is where it gets cool. We’re going to create a live replica of your VM in another region. If your primary region fails, you can switch to the replica in minutes.
Step-by-Step:
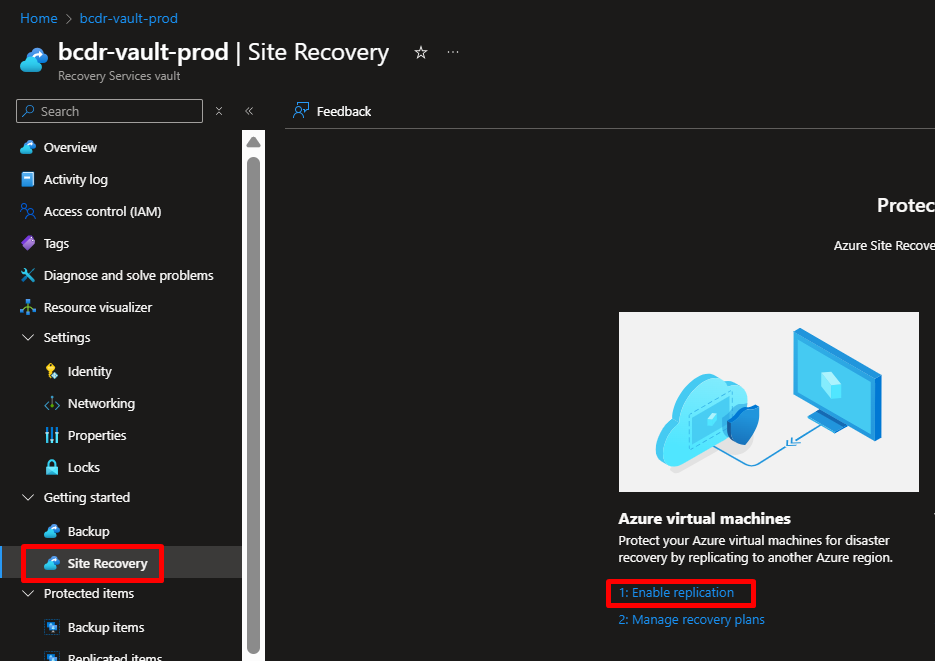
- Go to the vault → Site Recovery → Enable replication
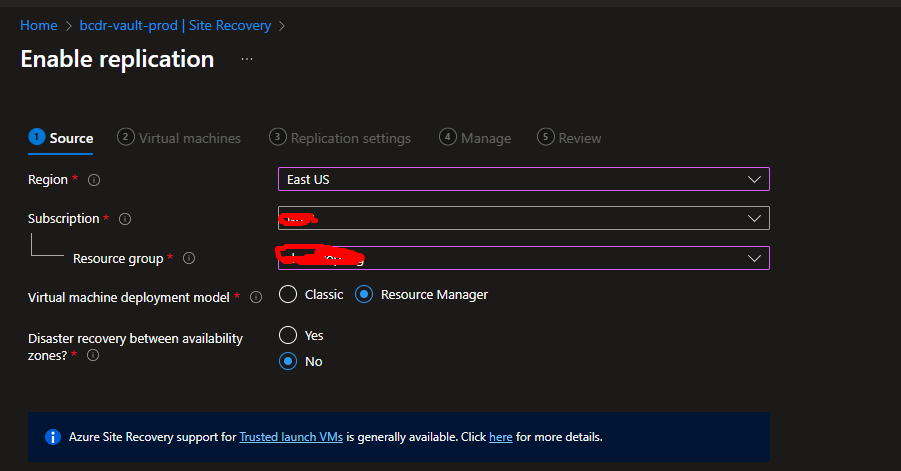
- Select source details
- Region (where the VM currently runs)
- Subscription and Resource Group of the VM
- Deployment model of the VM (typically Azure Resource Manager)
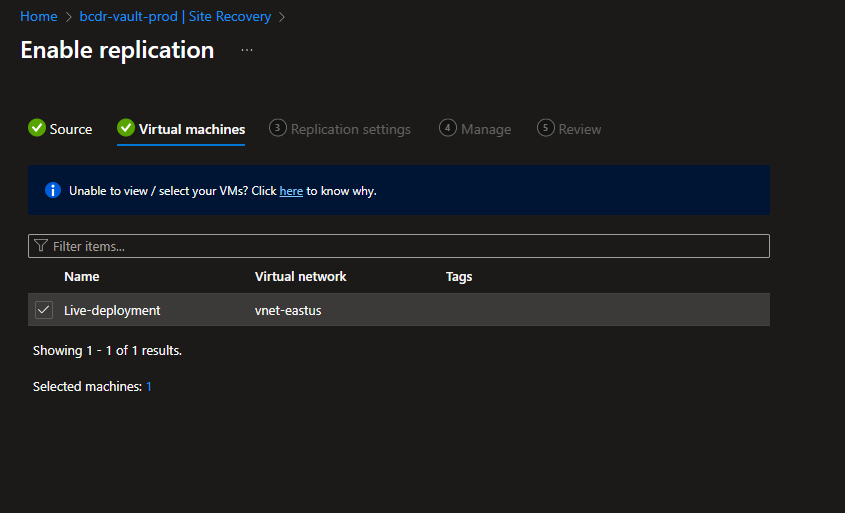
- Select the virtual machines to protect
- Choose one or more VMs from the list eligible for replication in the selected resource group.
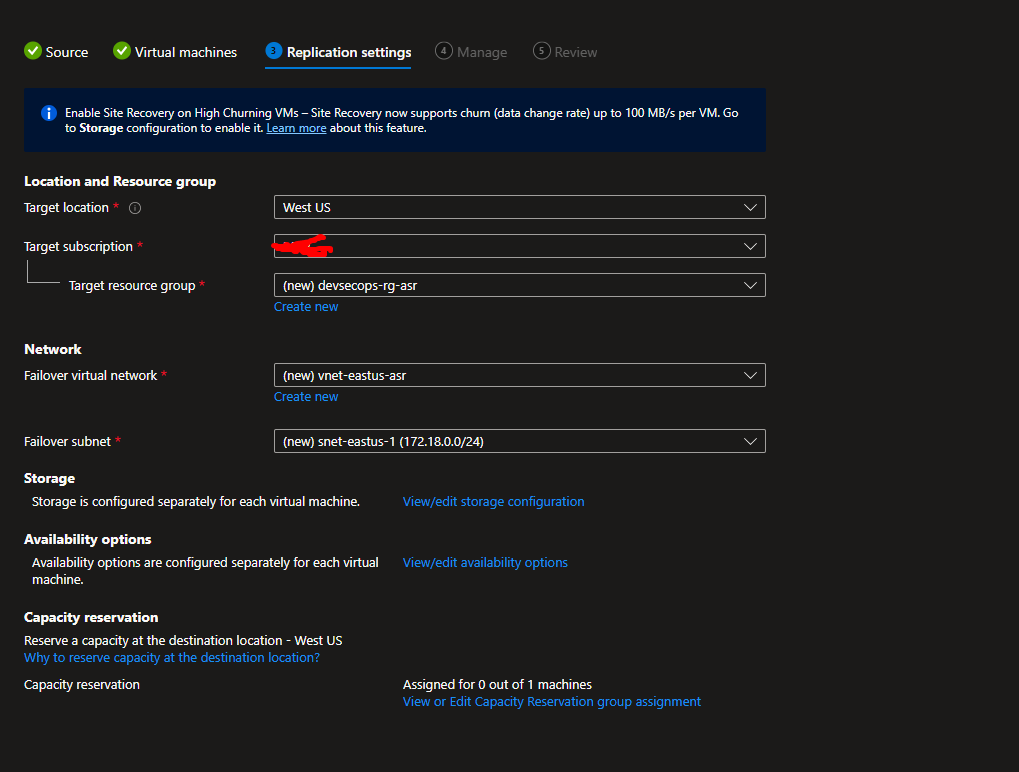
- Configure Replication Settings
- Target location: Select destination region for replication
- Subscription & resource group for target
- Virtual network & subnet in target region
- Storage/managed disks settings (site-recovery will replicate to managed disks)
- Optionally select zonal disaster recovery, proximity placement groups, etc.
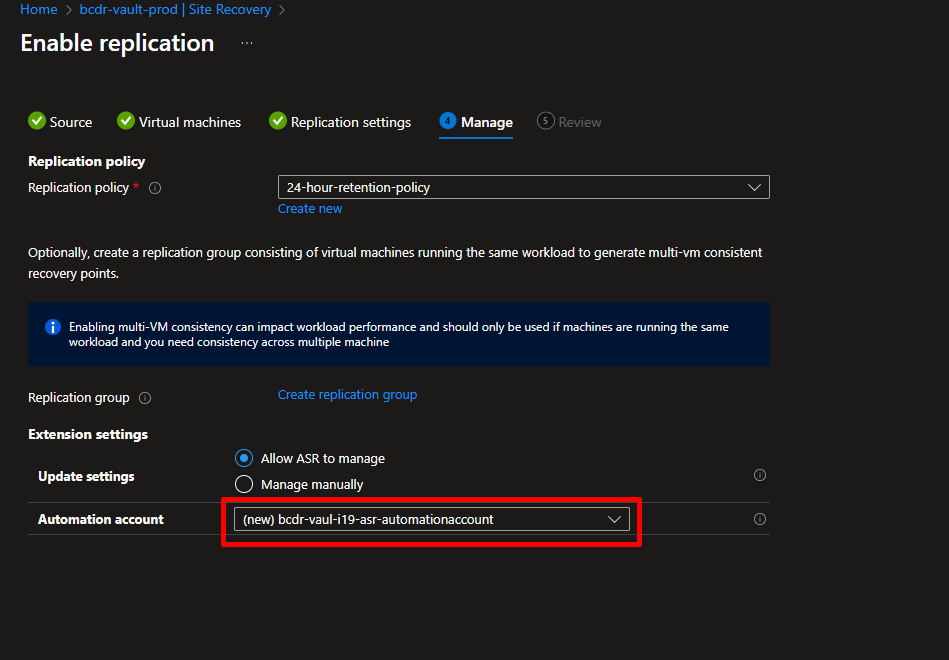
- Select or create a Replication Policy
- Defines retention (e.g., how many recovery points), app-consistent snapshot frequency, etc.
- Enable replication
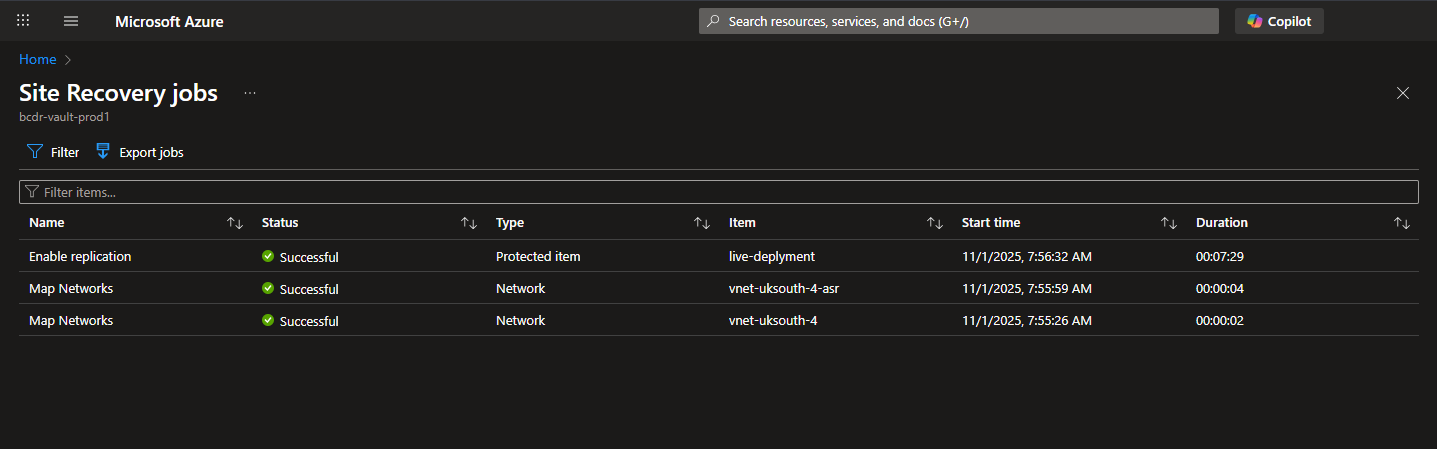
What’s Happening Behind the Scenes?
Azure Site Recovery is now:
- Continuously syncing disk changes to the target region
- Keeping your replica up-to-date (usually within 5-15 minutes)
- Ready to failover at any moment
Part 4: Testing Your Disaster Recovery Setup
Never trust a backup you haven’t tested! Let’s simulate a disaster without affecting production.
Step-by-Step:
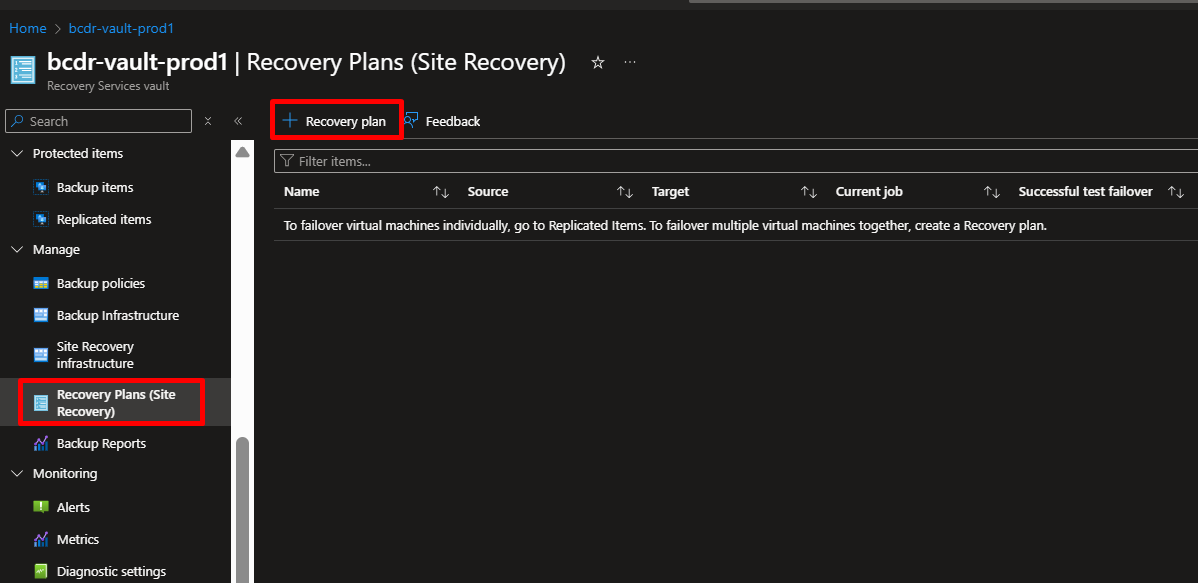
- In your vault, go to Site Recovery → Recovery Plans
- Click + Recovery plan
- Give it a name:
dr-plan-prod - Add your replicated VM to the plan
- Click OK
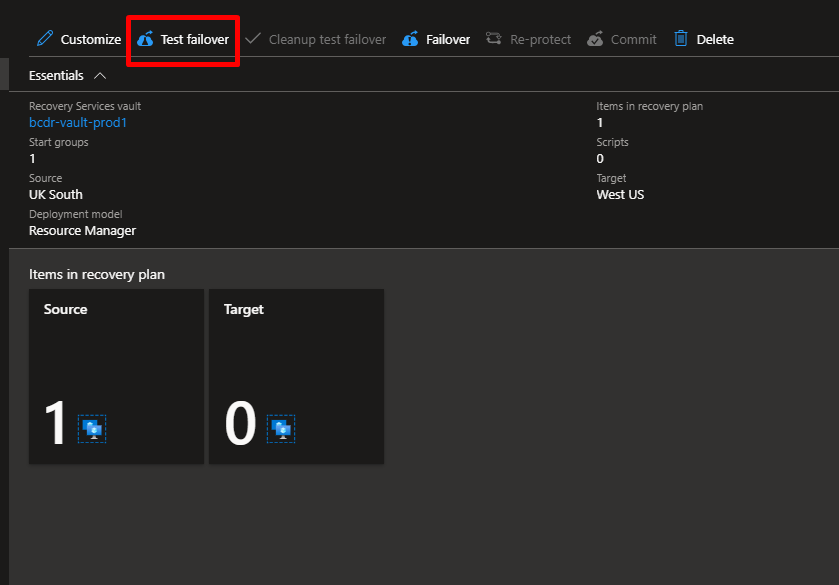
- Now click on your recovery plan
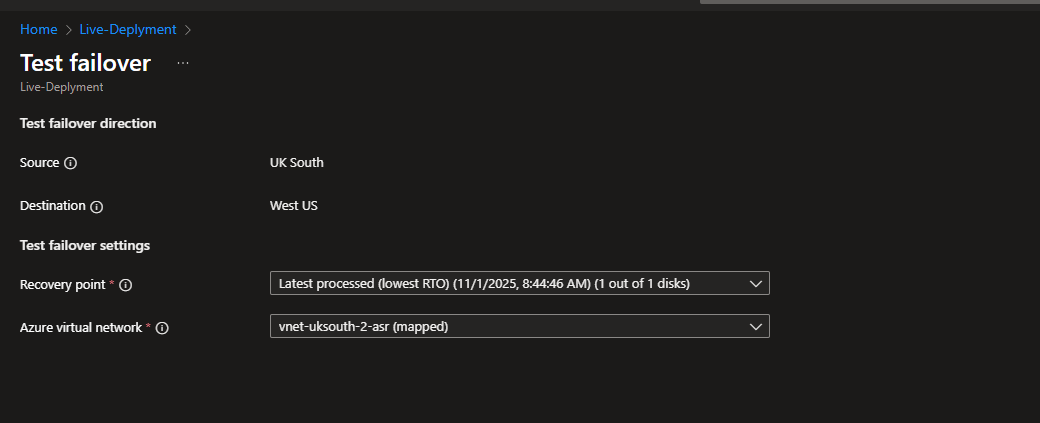
- Click Test Failover
- Choose:
- Recovery point: Latest (or pick a specific snapshot)
- Virtual network: Select the target network in your secondary region
- Click OK to start the test
What to Verify:
Once the test VM spins up (5-10 minutes):
- Try logging into it via RDP/SSH
- Check that your application works
- Verify data is intact

✅ If everything works, click Cleanup test failover to remove the test VM.
Conclusion
We’ve just built a production-ready business continuity solution. Your VMs are now protected against:
- Accidental deletions
- Ransomware attacks
- Regional outages
- Hardware failures
Remember: Hope is not a strategy. Backups and disaster recovery are your safety net in the cloud.
Tags: #Azure #AZ104 #DevOps #DisasterRecovery #CloudComputing #BackupAndRecovery


Leave a comment