
Picture this! You’ve built a beautiful website. It’s fast, it’s functional, and you’re proud of it. Then one day, the server crashes. Your site goes dark. Users can’t access it. Panic sets in. This happened to me (in a test environment, thankfully), and it taught me something crucial: One server is a single point of failure. Today, I learned how to fix that.
What Is High Availability?
Think of high availability like having a backup generator. When the main power goes out, the backup kicks in automatically. No one even notices there was a problem.
In cloud terms, this means:
- Multiple servers running your application
- A traffic director (load balancer) that sends users to healthy servers
- Automatic failover when something breaks
What we’re Building Today
I created a system with:
- Two virtual machines (think: two computers in the cloud)
- An Availability Set (Azure’s way of keeping those VMs on different physical hardware)
- A Load Balancer (the traffic cop that distributes visitors between VMs)
- A Health Probe (constantly checks if each VM is alive and responding).
Why This Matters is that if VM1 crashes, VM2 keeps running. Users get routed to VM2 automatically. Zero downtime.
Getting to It
Part 1: Setting Up the Foundation
Create your project folder:
mkdir day7-high-availability
cd day7-high-availability
```

Create these files:
```
day7-high-availability/
├── main.tf           # Main infrastructure
├── variables.tf      # Configurable values
├── outputs.tf        # Display information
├── terraform.tfvars  # Your personal settings
└── providers.tf      # Azure connection
Step 2: Configuration Files
providers.tf
terraform {

  required_providers {
    azurerm = {
      source  = "hashicorp/azurerm"
      version = "~> 4.0"
    }
  }
}

provider "azurerm" {
  features {}
}

What this does: Tells Terraform to use Azure and which version of the Azure provider to download.
variables.tf
variable "resource_group_name" {
  description = "Name of the resource group"
  type        = string
  default     = "rg-ha-lab"
}

variable "location" {
  description = "Azure region"
  type        = string
  default     = "East US"
}

variable "admin_username" {
  description = "Admin username for VMs"
  type        = string
  default     = "azureuser"
}

variable "admin_password" {
  description = "Admin password for VMs"
  type        = string
  sensitive   = true
}

variable "vm_count" {
  description = "Number of VMs to create"
  type        = number
  default     = 2
}
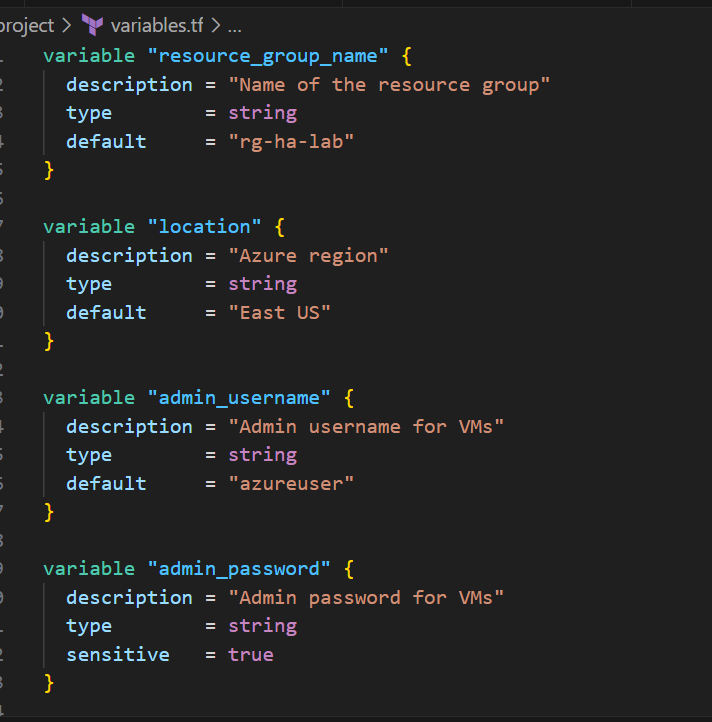
What this does: Defines what can be customized without editing the main code.
terraform.tfvars
resource_group_name = "rg-ha-lab"
location            = "East US"
admin_username      = "azureuser"
admin_password      = "P@ssw0rd123!SecurePass"  # Change this!
vm_count            = 2
Security Note: In production, NEVER store passwords in plain text. Use Azure Key Vault or SSH keys instead. For this learning lab, we’re using passwords for simplicity.
Better approach (SSH key):
# Generate SSH key pair
ssh-keygen -t rsa -b 4096 -f ~/.ssh/azure_vm_key
main.tf
I’ll break this into logical sections:
Part 1: Resource Group
# Resource Group - Container for all resources
resource "azurerm_resource_group" "rg" {
  name     = var.resource_group_name
  location = var.location

  tags = {
    Environment = "Learning"
    Project     = "High-Availability"
    ManagedBy   = "Terraform"
  }
}
What this creates: A folder in Azure to organize all your resources.

Part 2: Virtual Network (VNet)
# Virtual Network - Private network for VMs
resource "azurerm_virtual_network" "vnet" {
  name                = "ha-vnet"
  address_space       = ["10.0.0.0/16"]
  location            = azurerm_resource_group.rg.location
  resource_group_name = azurerm_resource_group.rg.name

  tags = {
    Purpose = "VM-Network"
  }
}

# Subnet - Section of the network for VMs
resource "azurerm_subnet" "subnet" {
  name                 = "vm-subnet"
  resource_group_name  = azurerm_resource_group.rg.name
  virtual_network_name = azurerm_virtual_network.vnet.name
  address_prefixes     = ["10.0.1.0/24"]
}
What this creates:
- VNet: A private network (like your home WiFi network)
- Subnet: A segment of that network (like devices on 192.168.1.x)
IP addresses explained:
10.0.0.0/16= VNet can have IPs from 10.0.0.0 to 10.0.255.255 (65,536 addresses)10.0.1.0/24= Subnet uses 10.0.1.0 to 10.0.1.255 (256 addresses)
Part 3: Network Security Group (Firewall)
# Network Security Group - Firewall rules
resource "azurerm_network_security_group" "nsg" {
  name                = "ha-nsg"
  location            = azurerm_resource_group.rg.location
  resource_group_name = azurerm_resource_group.rg.name

  # Allow HTTP traffic (port 80)
  security_rule {
    name                       = "AllowHTTP"
    priority                   = 100
    direction                  = "Inbound"
    access                     = "Allow"
    protocol                   = "Tcp"
    source_port_range          = "*"
    destination_port_range     = "80"
    source_address_prefix      = "*"
    destination_address_prefix = "*"
  }

  # Allow SSH (port 22) - for management
  security_rule {
    name                       = "AllowSSH"
    priority                   = 110
    direction                  = "Inbound"
    access                     = "Allow"
    protocol                   = "Tcp"
    source_port_range          = "*"
    destination_port_range     = "22"
    source_address_prefix      = "*"
    destination_address_prefix = "*"
  }

  # Allow Load Balancer health probes
  security_rule {
    name                       = "AllowAzureLoadBalancer"
    priority                   = 120
    direction                  = "Inbound"
    access                     = "Allow"
    protocol                   = "*"
    source_port_range          = "*"
    destination_port_range     = "*"
    source_address_prefix      = "AzureLoadBalancer"
    destination_address_prefix = "*"
  }

  tags = {
    Purpose = "VM-Security"
  }
}

# Associate NSG with Subnet
resource "azurerm_subnet_network_security_group_association" "nsg_association" {
  subnet_id                 = azurerm_subnet.subnet.id
  network_security_group_id = azurerm_network_security_group.nsg.id
}

What this creates: Firewall rules that control what traffic can reach your VMs.
Rules explained:
- AllowHTTP: Anyone can access port 80 (web traffic)
- AllowSSH: Anyone can SSH to VMs (in production, restrict to your IP only)
- AllowAzureLoadBalancer: Critical! Allows health probes from Load Balancer
Priority numbers: Lower = higher priority (100 runs before 110)
Part 4: Availability Set
# Availability Set - Ensures VMs are on different hardware
resource "azurerm_availability_set" "avset" {
  name                         = "ha-avset"
  location                     = azurerm_resource_group.rg.location
  resource_group_name          = azurerm_resource_group.rg.name
  platform_fault_domain_count  = 2  # VMs on 2 different racks
  platform_update_domain_count = 2  # Updates happen to 1 VM at a time
  managed                      = true  # Use managed disks

  tags = {
    Purpose = "High-Availability"
  }
}
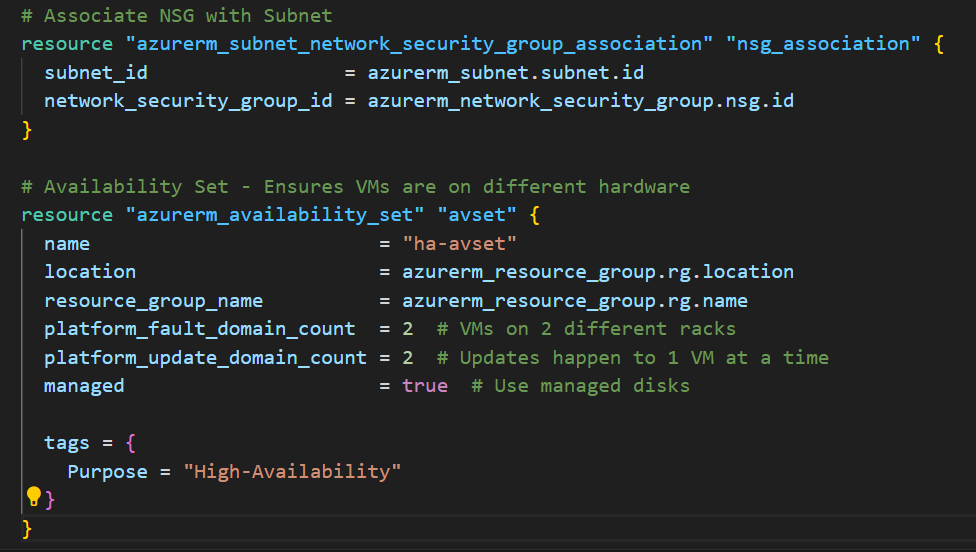
What this creates: The magic that spreads your VMs across different physical hardware.
Configuration:
fault_domain_count = 2: VMs will be on 2 separate racksupdate_domain_count = 2: Azure updates 1 VM at a time (never both simultaneously)managed = true: Use Azure-managed disks (recommended)
Part 5: Public IP for Load Balancer
# Public IP - The address users connect to
resource "azurerm_public_ip" "lb_public_ip" {
  name                = "ha-lb-public-ip"
  location            = azurerm_resource_group.rg.location
  resource_group_name = azurerm_resource_group.rg.name
  allocation_method   = "Static"  # IP never changes
  sku                 = "Standard"  # Required for Standard Load Balancer

  tags = {
    Purpose = "LoadBalancer-Frontend"
  }
}
What this creates: The public IP address users will connect to (like 20.30.40.50).
Static vs Dynamic:
- Static: IP never changes (good for production)
- Dynamic: IP might change when resource is stopped (cheaper, but bad for users)

Part 6: Load Balancer
# Load Balancer - Traffic distributor
resource "azurerm_lb" "lb" {
  name                = "ha-load-balancer"
  location            = azurerm_resource_group.rg.location
  resource_group_name = azurerm_resource_group.rg.name
  sku                 = "Standard"

  frontend_ip_configuration {
    name                 = "PublicFrontend"
    public_ip_address_id = azurerm_public_ip.lb_public_ip.id
  }

  tags = {
    Purpose = "Traffic-Distribution"
  }
}

# Backend Pool - Collection of VMs behind the LB
resource "azurerm_lb_backend_address_pool" "backend_pool" {
  name            = "vm-backend-pool"
  loadbalancer_id = azurerm_lb.lb.id
}

# Health Probe - Checks if VMs are responsive
resource "azurerm_lb_probe" "health_probe" {
  name                = "http-probe"
  loadbalancer_id     = azurerm_lb.lb.id
  protocol            = "Tcp"
  port                = 80
  interval_in_seconds = 5   # Check every 5 seconds
  number_of_probes    = 2   # 2 failures = unhealthy
}

# Load Balancing Rule - How to distribute traffic
resource "azurerm_lb_rule" "lb_rule" {
  name                           = "http-rule"
  loadbalancer_id                = azurerm_lb.lb.id
  protocol                       = "Tcp"
  frontend_port                  = 80
  backend_port                   = 80
  frontend_ip_configuration_name = "PublicFrontend"
  backend_address_pool_ids       = [azurerm_lb_backend_address_pool.backend_pool.id]
  probe_id                       = azurerm_lb_probe.health_probe.id
  disable_outbound_snat          = true
  tcp_reset_enabled               = true
}

# Outbound Rule - Allow VMs to access internet
resource "azurerm_lb_outbound_rule" "outbound_rule" {
  name                    = "outbound-internet"
  loadbalancer_id         = azurerm_lb.lb.id
  protocol                = "All"
  backend_address_pool_id = azurerm_lb_backend_address_pool.backend_pool.id

  frontend_ip_configuration {
    name = "PublicFrontend"
  }
}

What this creates: The complete load balancing setup.
Components:
- Load Balancer: Main resource
- Backend Pool: List of VMs to distribute traffic to
- Health Probe: Checks VM health every 5 seconds
- Load Balancing Rule: Port 80 → VMs on port 80
- Outbound Rule: Lets VMs reach internet for updates
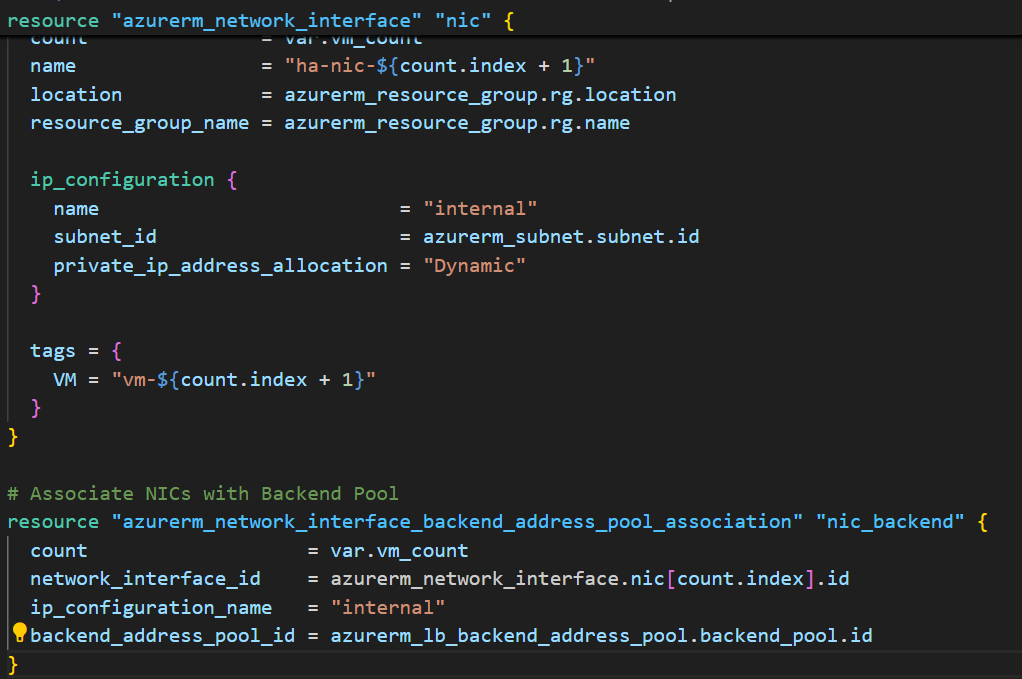
Part 7: Network Interfaces for VMs
# Network Interfaces - Virtual network cards for VMs
resource "azurerm_network_interface" "nic" {
  count               = var.vm_count
  name                = "ha-nic-${count.index + 1}"
  location            = azurerm_resource_group.rg.location
  resource_group_name = azurerm_resource_group.rg.name

  ip_configuration {
    name                          = "internal"
    subnet_id                     = azurerm_subnet.subnet.id
    private_ip_address_allocation = "Dynamic"
  }

  tags = {
    VM = "vm-${count.index + 1}"
  }
}

# Associate NICs with Backend Pool
resource "azurerm_network_interface_backend_address_pool_association" "nic_backend" {
  count                   = var.vm_count
  network_interface_id    = azurerm_network_interface.nic[count.index].id
  ip_configuration_name   = "internal"
  backend_address_pool_id = azurerm_lb_backend_address_pool.backend_pool.id
}
What this creates: Virtual network cards for each VM, connected to the backend pool.
The count parameter: Creates 2 NICs (one per VM) automatically.
Part 8: Virtual Machines
# Virtual Machines
resource "azurerm_linux_virtual_machine" "vm" {
  count                 = var.vm_count
  name                  = "ha-vm-${count.index + 1}"
  location              = azurerm_resource_group.rg.location
  resource_group_name   = azurerm_resource_group.rg.name
  network_interface_ids = [azurerm_network_interface.nic[count.index].id]
  size                  = "Standard_B1s"  # 1 vCPU, 1GB RAM (cheapest)
  availability_set_id   = azurerm_availability_set.avset.id

  # OS disk configuration
  os_disk {
    name                 = "ha-vm-osdisk-${count.index + 1}"
    caching              = "ReadWrite"
    storage_account_type = "Standard_LRS"
  }

  # Ubuntu 20.04 image
  source_image_reference {
    publisher = "Canonical"
    offer     = "0001-com-ubuntu-server-focal"
    sku       = "20_04-lts"
    version   = "latest"
  }

  # Admin credentials
  admin_username                  = var.admin_username
  admin_password                  = var.admin_password
  disable_password_authentication = false

  # Startup script - Install Nginx
  custom_data = base64encode(<<-EOF
    #!/bin/bash
    apt-get update
    apt-get install -y nginx

    # Create custom web page showing VM name
    echo "<h1>Hello from VM ${count.index + 1}</h1>" > /var/www/html/index.html
    echo "<p>This is VM ${count.index + 1} responding to your request</p>" >> /var/www/html/index.html

    systemctl restart nginx
  EOF
  )

  tags = {
    Name        = "vm-${count.index + 1}"
    Environment = "HA-Lab"
  }
}

What this creates: 2 Ubuntu VMs with Nginx automatically installed.
VM size breakdown:
Standard_B1s: 1 vCPU, 1GB RAM- Cost: ~$7.50/month per VM
- Good for: Testing, small websites, learning
The custom_data script: This runs automatically when VM first starts:
- Updates package list
- Installs Nginx web server
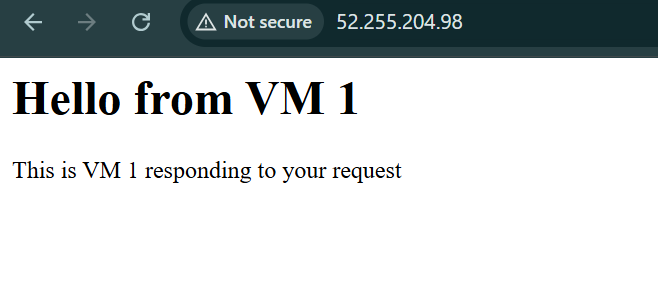
- Creates a custom homepage showing which VM is responding
- Starts Nginx
Result: Each VM will show “Hello from VM 1” or “Hello from VM 2”
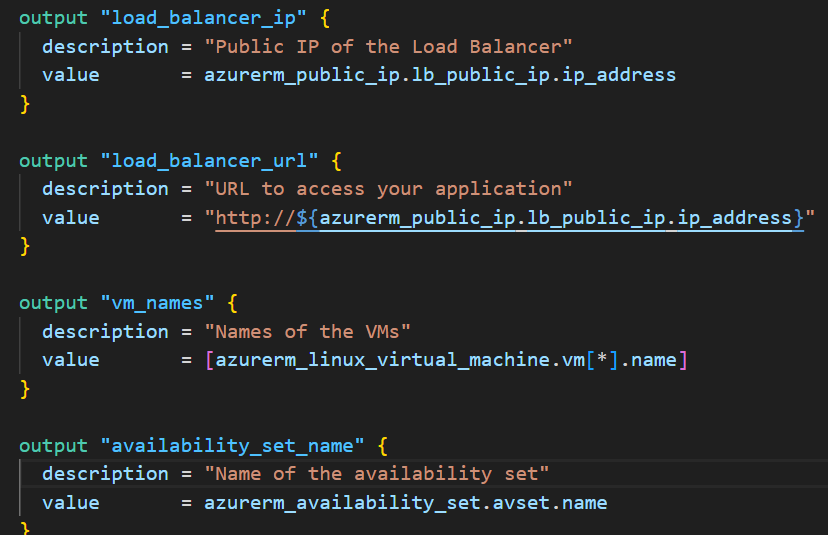
outputs.tf
output "load_balancer_ip" {
  description = "Public IP of the Load Balancer"
  value       = azurerm_public_ip.lb_public_ip.ip_address
}

output "load_balancer_url" {
  description = "URL to access your application"
  value       = "http://${azurerm_public_ip.lb_public_ip.ip_address}"
}

output "vm_names" {
  description = "Names of the VMs"
  value       = [azurerm_linux_virtual_machine.vm[*].name]
}

output "availability_set_name" {
  description = "Name of the availability set"
  value       = azurerm_availability_set.avset.name
}
What this does: After deployment, shows you important information like the public IP to test.
Step 3: Deploy the Infrastructure
Now let’s build everything!
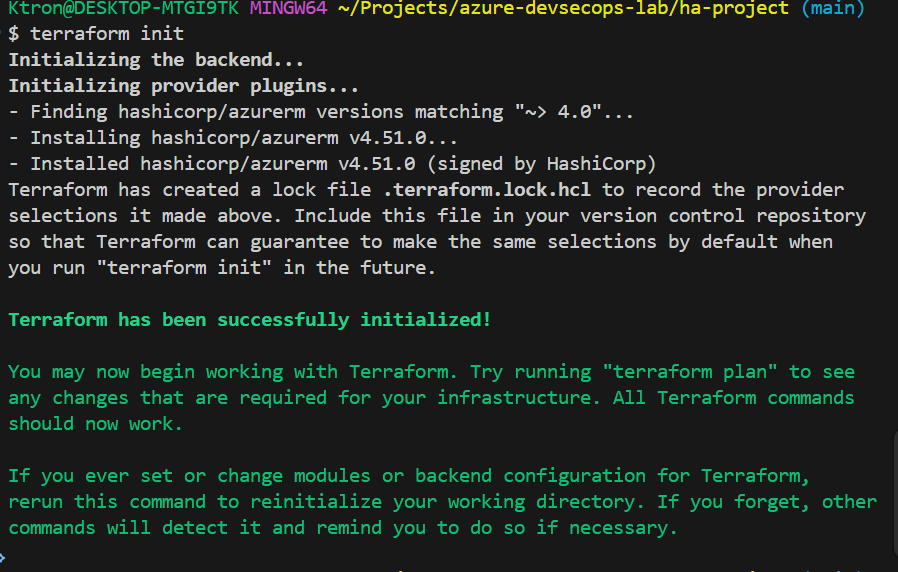
# Step 1: Initialize Terraform
terraform init
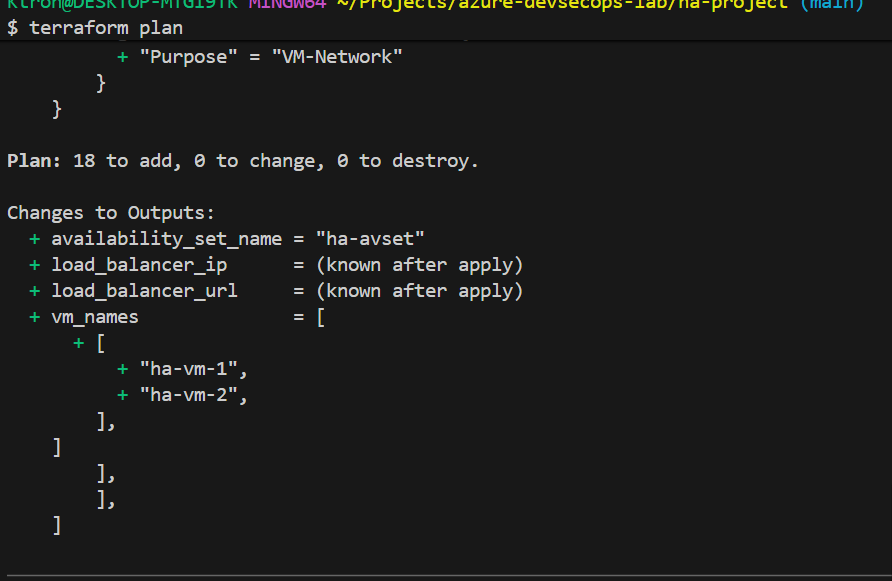
# Step 2: Preview what will be created
terraform plan
# Step 3: Deploy (confirm with 'yes')
terraform apply
```
**What happens:**
1. **terraform init** (~30 seconds)
- Downloads Azure provider plugins
- Prepares backend storage
2. **terraform plan** (~15 seconds)
- Shows exactly what will be created
- Estimates 20+ resources
3. **terraform apply** (~5-7 minutes)
- Creates resource group
- Creates network infrastructure
- Creates availability set
- Creates load balancer
- Creates 2 VMs
- Installs Nginx on both VMs
**Expected output:**
```
Apply complete! Resources: 23 added, 0 changed, 0 destroyed.
Outputs:
load_balancer_ip = "20.30.40.50"
load_balancer_url = "http://20.30.40.50"
vm_names = [
"ha-vm-1",
"ha-vm-2",
]
availability_set_name = "ha-avset"

Copy the load_balancer_url — you’ll use it to test!


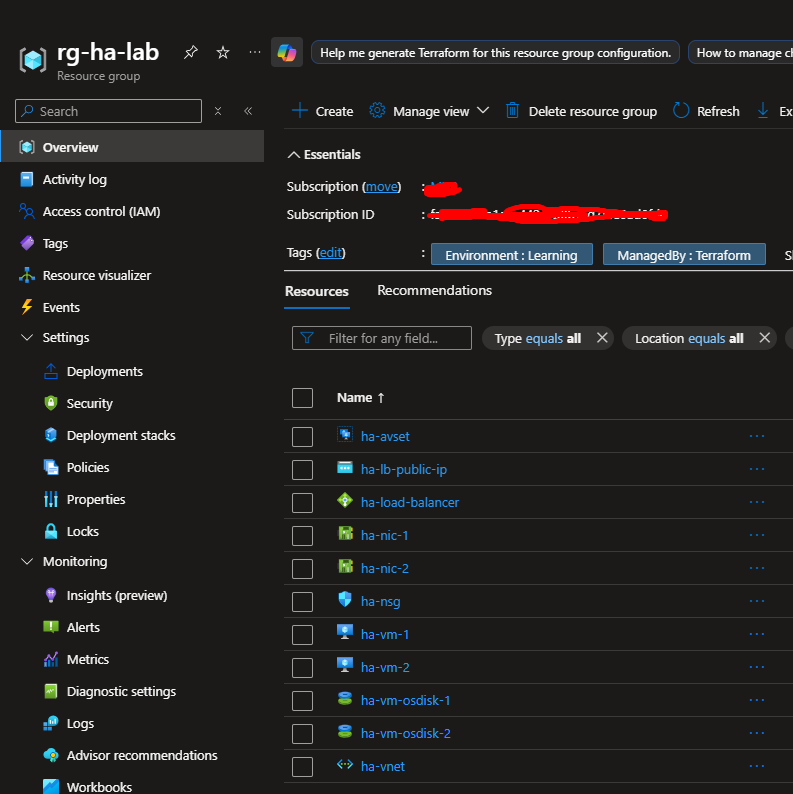
Step 4: Verify in Azure Portal (Continued)
Check 2: Availability Set
- In your resource group, click on “ha-avset”
- You should see:
- Virtual machines: 2 (ha-vm-1, ha-vm-2)
- Fault domains: 2
- Update domains: 2
- Click on “Virtual machines” in the left menu
- Keep refreshing: it will alternate:
- What’s happening: The Load Balancer is using round-robin distribution, each request goes to the next VM in rotation.
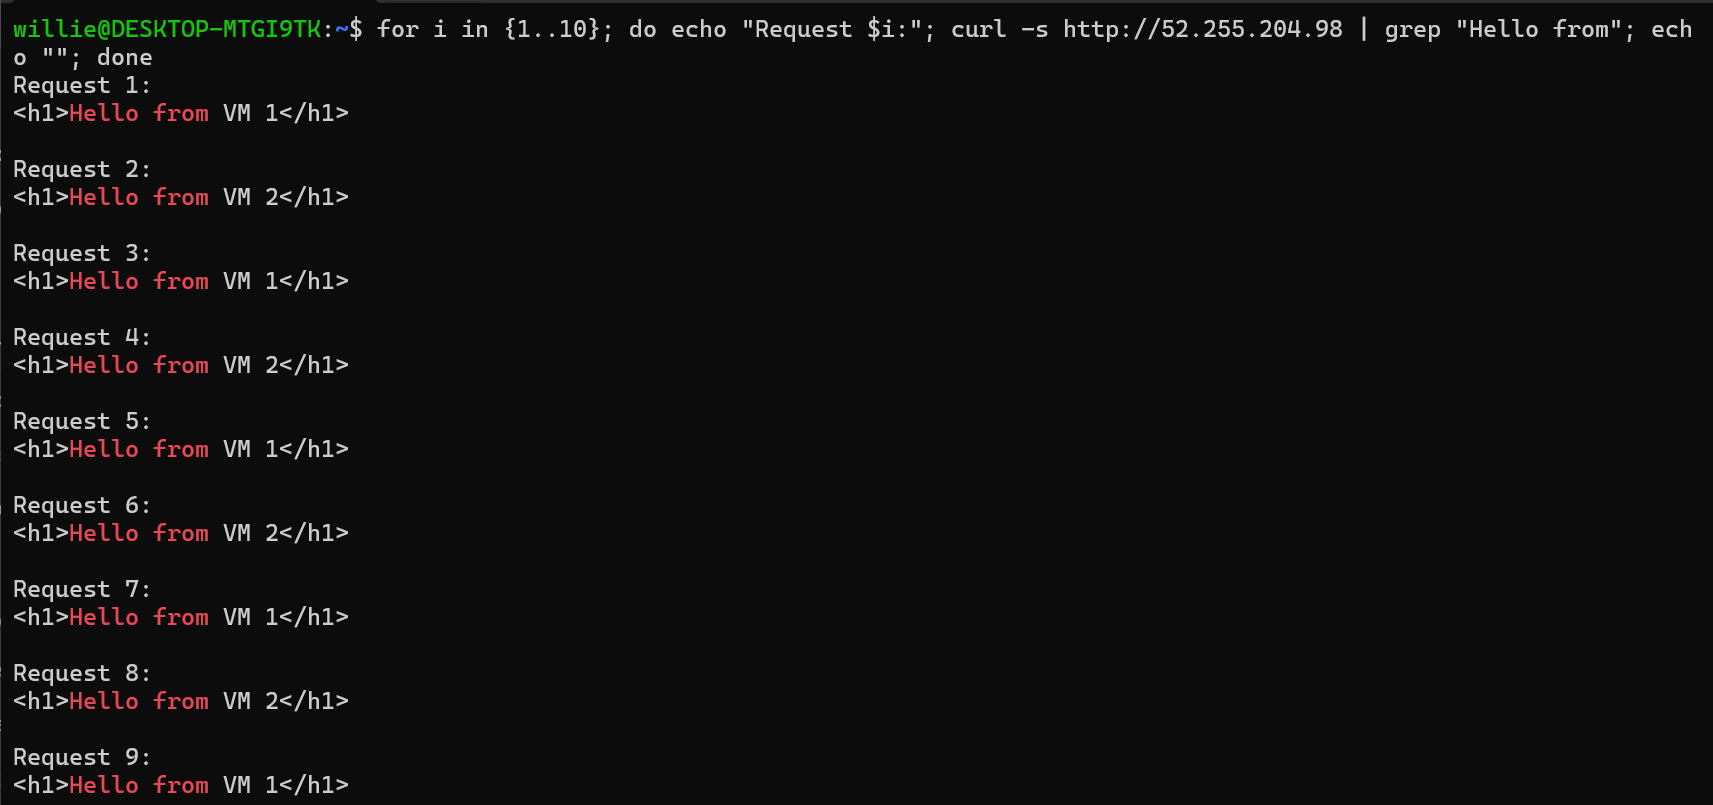
Test 2: Continuous Traffic (See Distribution)
Let’s generate continuous traffic to see the pattern:
On Windows (PowerShell):
# Run this 10 times
for ($i=1; $i -le 10; $i++) {
    $response = Invoke-WebRequest -Uri "http://20.30.40.50"
    Write-Host "Request $i - $($response.Content)"
}


On Mac/Linux (Terminal):
# Run this 10 times
for i in {1..10}; do
    echo "Request $i:"
    curl -s http://20.30.40.50 | grep "Hello from"
    echo ""
done
```

**Expected output:**
```
Request 1: Hello from VM 1
Request 2: Hello from VM 2
Request 3: Hello from VM 1
Request 4: Hello from VM 2
Request 5: Hello from VM 1
Request 6: Hello from VM 2
...
```

**Perfect distribution!** Each VM handles 50% of requests.
Conclusion
Today, I didn’t just build infrastructure;
I built confidence in my design, my automation, and my understanding of why high availability matters.
“Uptime isn’t an accident it’s a decision you make at the architecture level.”
As I continue my Azure DevSecOps challenge, this project reminded me that reliability is as important as scalability.


Leave a comment