
There’s a moment in every engineer’s life when a secret shows up in a repo and your stomach drops.
For me, that was the day I realized automation must be secure by default not an afterthought. Today’s project is about making secrets invisible to humans and auditable to systems.
Why This Actually Matters
When I started learning DevOps, I thought security was something you add later. “Let’s just get it working first, then we’ll make it secure.”
That’s backwards.
In FinTech (banks, payment processors, investment platforms), secrets are everywhere:
- Database passwords that unlock customer financial data
- API keys that connect to payment gateways
- Signing keys that prove transactions are legitimate
One leaked secret can:
- Cost your company millions in fines
- Expose customer data to hackers
- Get you fired (or worse, land you in legal trouble)
So the rule is simple: secrets should be invisible to humans, but auditable by systems. You, the engineer, should never see the production database password. But the audit log should show exactly when and how your pipeline accessed it.
The Build: Step by Step
Part 1: Creating the Vault with Terraform
Remember how we’ve been using Terraform in previous projects to create Azure resources? We’re doing the same here, but this time we’re building something extra secure. You can create a directory structure this project like we have in earlier Posts
first let’s set up the variables we will use in variables.tf below
variable "project_name" {
description = "Project name used for resource naming"
type = string
default = "finops"
}
variable "environment" {
description = "Environment (dev, staging, prod)"
type = string
default = "dev"
validation {
condition = contains(["dev", "staging", "prod"], var.environment)
error_message = "Environment must be dev, staging, or prod."
}
}
variable "location" {
description = "Azure region for resources"
type = string
default = "eastus"
}
variable "resource_group_name" {
description = "Resource group name (if using existing RG, otherwise will be created)"
type = string
default = ""
}
variable "kv_name" {
description = "Key Vault name (must be globally unique, 3-24 chars, alphanumeric and hyphens)"
type = string
default = ""
}
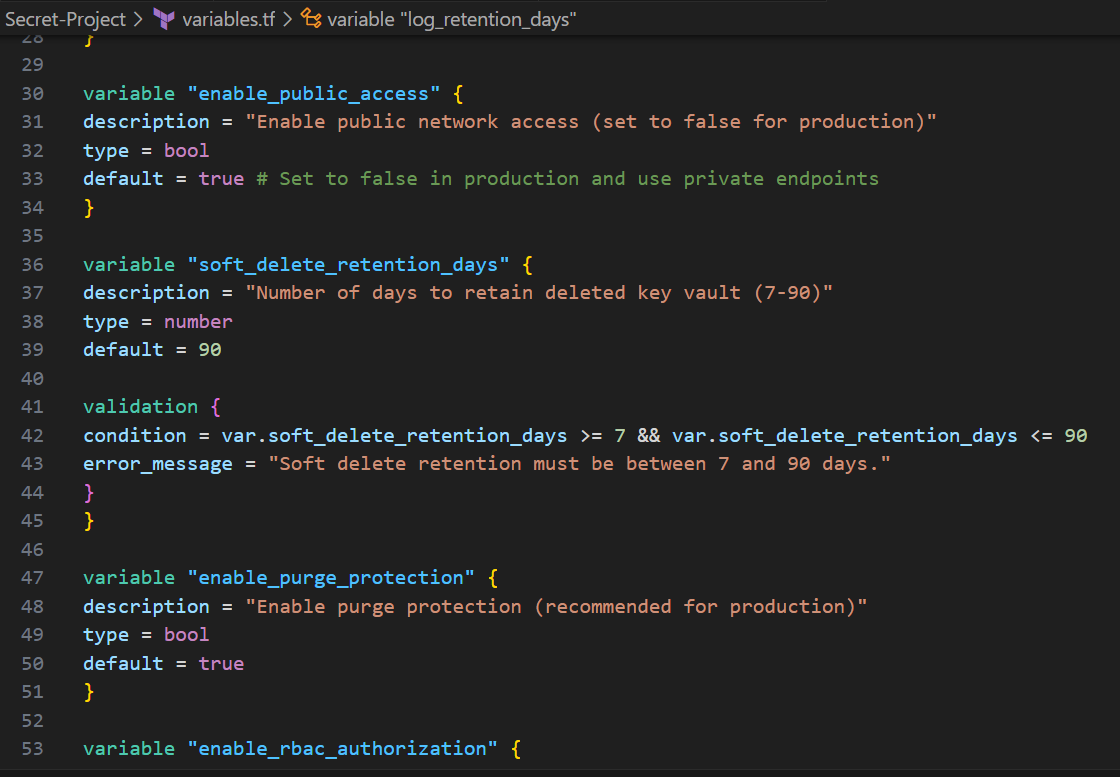
variable "enable_public_access" {
description = "Enable public network access (set to false for production)"
type = bool
default = true # Set to false in production and use private endpoints
}
variable "soft_delete_retention_days" {
description = "Number of days to retain deleted key vault (7-90)"
type = number
default = 90
validation {
condition = var.soft_delete_retention_days >= 7 && var.soft_delete_retention_days <= 90
error_message = "Soft delete retention must be between 7 and 90 days."
}
}
variable "enable_purge_protection" {
description = "Enable purge protection (recommended for production)"
type = bool
default = true
}
variable "enable_rbac_authorization" {
description = "Use Azure RBAC for authorization instead of access policies"
type = bool
default = false # Set to true for modern RBAC approach
}
variable "allowed_ip_ranges" {
description = "List of IP ranges allowed to access Key Vault when public access is enabled"
type = list(string)
default = [] # Empty means all IPs allowed (not recommended for prod)
}
variable "initial_secrets" {
description = "Map of initial secrets to create (for demo/dev only - never use in prod)"
type = map(string)
#sensitive = true
default = {}
}
variable "tags" {
description = "Tags to apply to all resources"
type = map(string)
default = {
ManagedBy = "Terraform"
Project = "FinOps-Platform"
}
}
variable "create_log_analytics_workspace" {
description = "Create a new Log Analytics workspace for diagnostics"
type = bool
default = true
}
variable "log_analytics_workspace_id" {
description = "Existing Log Analytics workspace ID (if not creating new one)"
type = string
default = ""
}
variable "log_retention_days" {
description = "Number of days to retain logs"
type = number
default = 30
}
Here’s the code for the vault (don’t worry, I’ll explain every line):
# Get current Azure client config (for tenant ID and object ID)
data "azurerm_client_config" "current" {}

# Generate unique suffix for globally unique names
resource "random_string" "suffix" {
  length  = 6
  special = false
  upper   = false
}

# Local variables for computed values
locals {
  resource_group_name = var.resource_group_name != "" ? var.resource_group_name : "${var.project_name}-${var.environment}-rg"
  kv_name             = var.kv_name != "" ? var.kv_name : "${var.project_name}-${var.environment}-kv-${random_string.suffix.result}"

  # Merge default tags with custom tags
  common_tags = merge(
    var.tags,
    {
      Environment = var.environment
      CreatedDate = timestamp()
    }
  )
}

# Create Log Analytics Workspace for diagnostics
resource "azurerm_log_analytics_workspace" "main" {
  count = var.create_log_analytics_workspace ? 1 : 0

  name                = "${var.project_name}-${var.environment}-law-${random_string.suffix.result}"
  location            = azurerm_resource_group.rg.location
  resource_group_name = azurerm_resource_group.rg.name
  sku                 = "PerGB2018"
  retention_in_days   = var.log_retention_days

  tags = local.common_tags
}

# Create the Key Vault
resource "azurerm_key_vault" "main" {
  name                = local.kv_name
  location            = azurerm_resource_group.rg.location
  resource_group_name = azurerm_resource_group.rg.name
  tenant_id           = data.azurerm_client_config.current.tenant_id

  sku_name = "standard"

  # Security settings
  soft_delete_retention_days    = var.soft_delete_retention_days
  purge_protection_enabled      = var.enable_purge_protection
  public_network_access_enabled = var.enable_public_access

  # Use RBAC or Access Policies
  rbac_authorization_enabled = var.enable_rbac_authorization

  # Network rules
  dynamic "network_acls" {
    for_each = var.enable_public_access && length(var.allowed_ip_ranges) > 0 ? [1] : []
    content {
      default_action = "Deny"
      bypass         = "AzureServices"
      ip_rules       = var.allowed_ip_ranges
    }
  }

  tags = local.common_tags
}
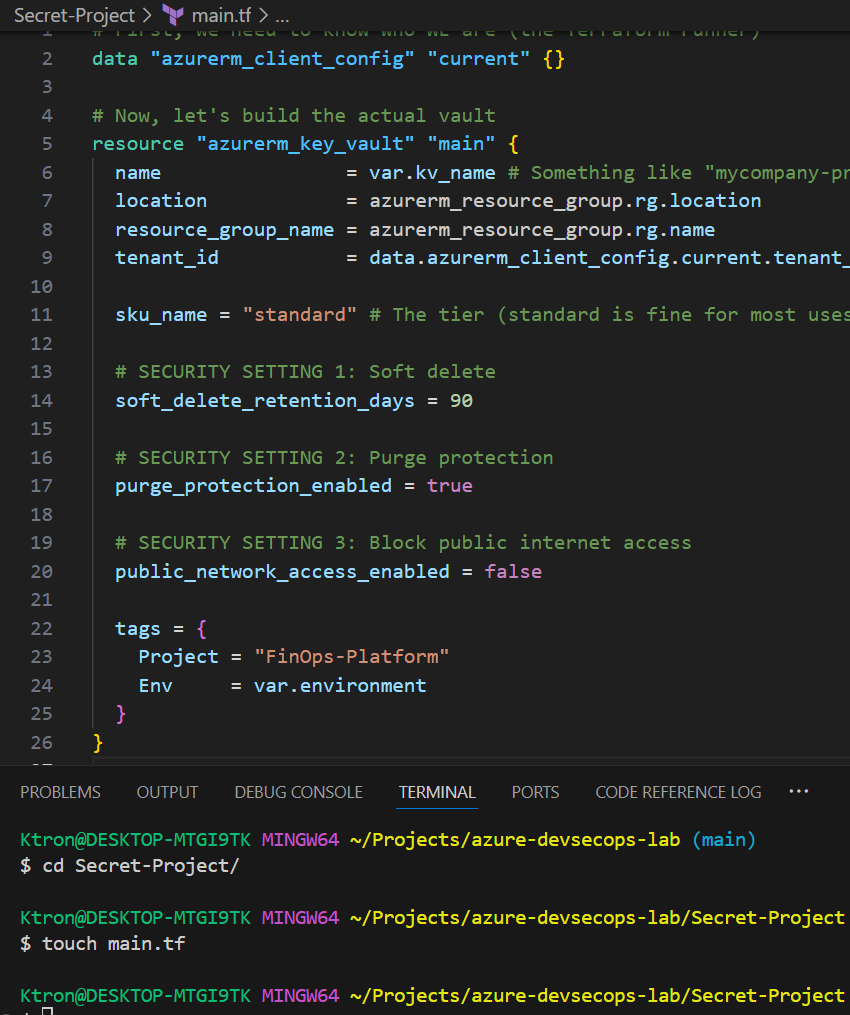
Let’s break down those security settings:
Soft Delete (90 days): If someone accidentally deletes the vault, it’s not really gone for 90 days. It’s like the “Recycle Bin” on your computer, you can recover it if you realize the mistake quickly.
Purge Protection: Even after those 90 days, you can’t force delete the vault immediately. This prevents a hacker (or angry ex-employee) from destroying your secrets permanently.
No Public Access: This vault can ONLY be accessed from within your Azure network, not from the open internet. It’s like a bank vault that doesn’t have a street-facing door , you have to go through the building’s secure entrance first.
Note: Before we continue , the resource group Block is very important as we’ve always pointed out, at this point you should be able to add that by now right?

Part 2: Creating a Digital “Employee Badge”
In Azure, we use something called a Managed Identity, it’s basically a digital ID card for your applications and pipelines.
Think of it this way:
- You log into Azure with your email/password
- Your pipeline logs in with a Managed Identity
Here’s how we create one:
resource "azurerm_user_assigned_identity" "app_identity" {
  name                = "${var.prefix}-app-id"  # Like "finops-prod-app-id"
  resource_group_name = azurerm_resource_group.rg.name
  location            = azurerm_resource_group.rg.location
}
resource "azurerm_role_assignment" "app_rbac" {
  count = var.enable_rbac_authorization ? 1 : 0

  scope                = azurerm_key_vault.main.id
  role_definition_name = "Key Vault Secrets User"
  principal_id         = azurerm_user_assigned_identity.app_identity.principal_id
}
That’s it! We now have a digital identity that our pipeline can use.

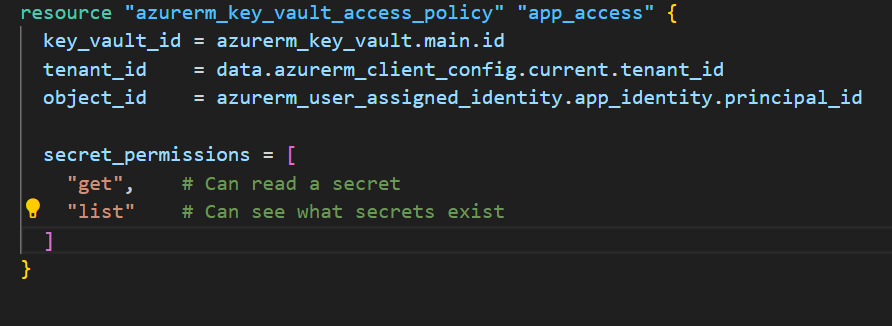
Part 3: Giving the Badge Access to the Vault
Now we need to tell the vault: “This identity is allowed to read secrets, but only read them, not delete or modify them.”
This is called least privilege giving the minimum permissions needed to do the job.
resource "azurerm_key_vault_access_policy" "app_access" {
  key_vault_id = azurerm_key_vault.main.id
  tenant_id    = data.azurerm_client_config.current.tenant_id
  object_id    = azurerm_user_assigned_identity.app_identity.principal_id

  secret_permissions = [
    "get",    # Can read a secret
    "list"    # Can see what secrets exist
  ]
  # Notice what's NOT here: "set", "delete", "purge"
}
Part 4: Storing a Secret
Let’s store a fake database password to test everything:
resource "azurerm_key_vault_secret" "db_password" {
  name         = "db-password"
  value        = var.initial_db_password  # This comes from a Terraform variable
  key_vault_id = azurerm_key_vault.main.id
}
Important Reality Check: In a real production system, you’d NEVER put the actual password in Terraform code. Instead, you’d:
- Have a human admin set it manually in the portal, OR
- Use a secure onboarding script that injects it during setup, OR
- Generate it randomly and email it to the right person
For this demo, we’re using a placeholder to prove the concept works.

Part 5: Setting Up Audit Logs (Who Opened the Vault?)
Here’s where we get serious about accountability. We want to log every time someone (or something) accesses a secret:
resource "azurerm_resource_group" "rg" {
  name     = var.resource_group_name
  location = var.location

  tags = {
    Project = "FinOps-Platform"
    Env     = var.environment
  }
}
resource "azurerm_monitor_diagnostic_setting" "kv_diag" {
  name                       = "kv-diag"
  target_resource_id         = azurerm_key_vault.main.id
  log_analytics_workspace_id = azurerm_log_analytics_workspace.main.id

  enabled_log {
    category = "AuditEvent" # This logs every access
  }
}
This is like having security cameras on the vault. Later, if someone asks “Who accessed the database password on Tuesday?”, you can search the logs and find out.
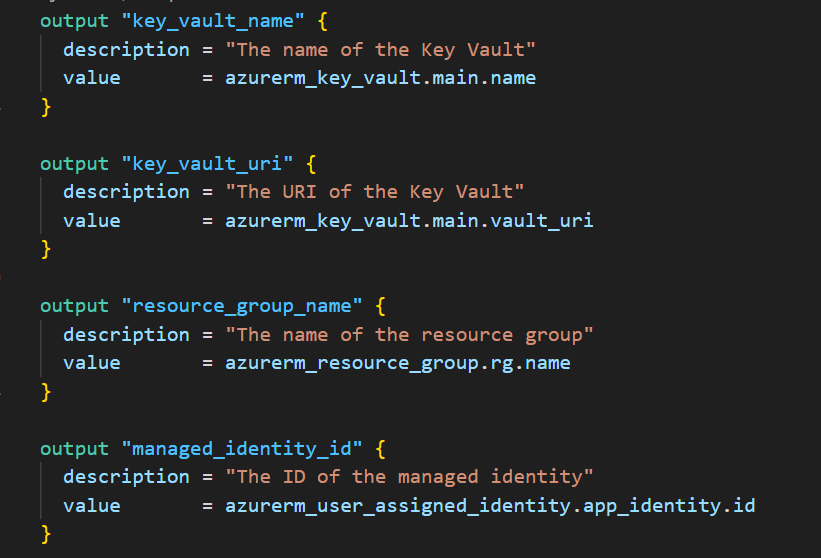
Create outputs.tf
This file tells Terraform what information to show after deployment.
Create outputs.tf:
output "key_vault_name" {
  description = "The name of the Key Vault"
  value       = azurerm_key_vault.main.name
}

output "key_vault_uri" {
  description = "The URI of the Key Vault"
  value       = azurerm_key_vault.main.vault_uri
}

output "resource_group_name" {
  description = "The name of the resource group"
  value       = azurerm_resource_group.rg.name
}

output "managed_identity_id" {
  description = "The ID of the managed identity"
  value       = azurerm_user_assigned_identity.app_identity.id
}

output "managed_identity_client_id" {
  description = "The client ID of the managed identity"
  value       = azurerm_user_assigned_identity.app_identity.client_id
}
Create terraform.tfvars
This file contains your actual configuration values.
Create terraform.tfvars:
project_name = "myfinops"
environment  = "dev"
location     = "eastus"

# For learning/testing, allow public access
enable_public_access = true

# Demo secrets (NEVER put real passwords here!)
initial_secrets = {
  "db-password" = "DemoPassword123!"
  "api-key"     = "demo-key-abc123"
}

tags = {
  ManagedBy = "Terraform"
  Owner     = "YourName"
  Project   = "KeyVault-Learning"
}
NOTE: This file should already be in your .gitignore. NEVER commit real secrets here. These are just dummy values for learning.
Part 6: Deploy the Infrastructure (10 minutes)
Now let’s actually create the Key Vault!
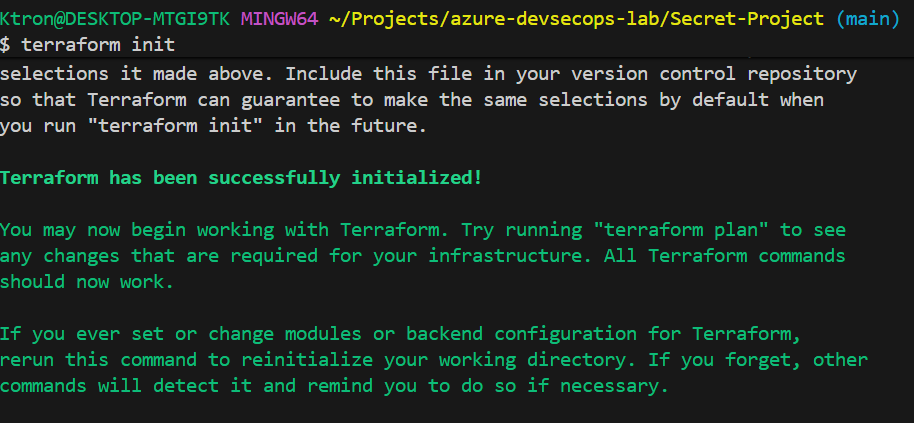
Initialize Terraform
terraform init
You should see:
Terraform has been successfully initialized!
Preview What Will Be Created
terraform plan
This shows you everything Terraform will create. You should see:
- Resource group
- Log Analytics workspace
- Key Vault
- Managed identity
- Access policies
- Secrets
- Diagnostic settings
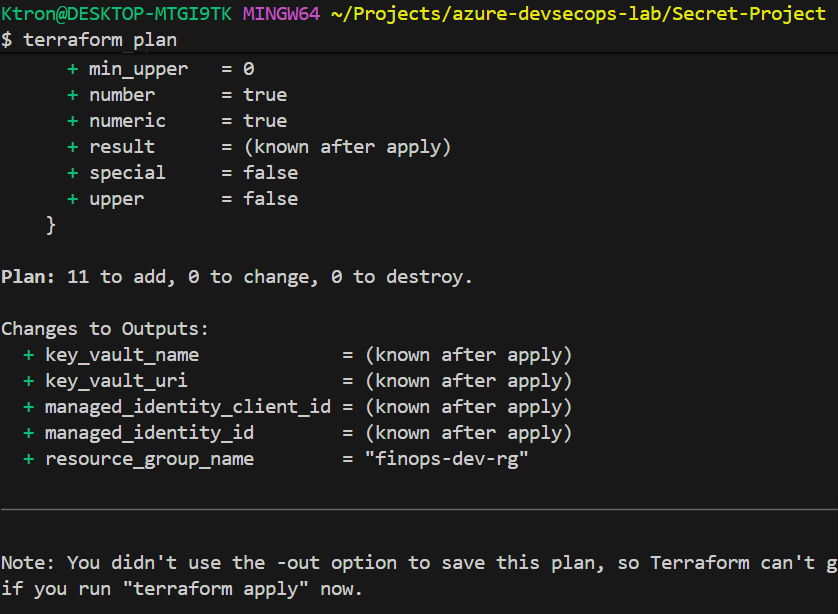
Take a moment to read through it. This is your chance to catch mistakes before they happen.
Create Everything
terraform apply
Terraform will ask: Do you want to perform these actions?
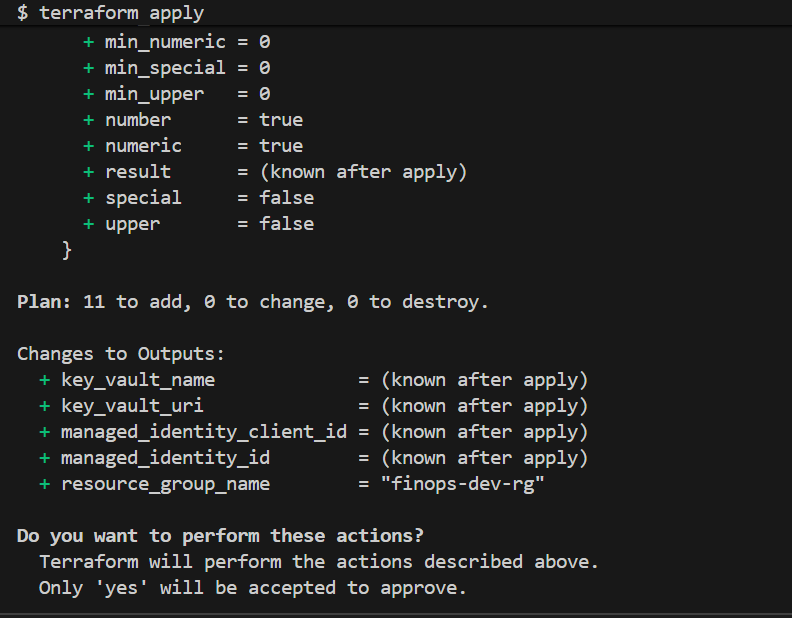
Type yes and press Enter.
This will take 2-3 minutes. You’ll see a progress bar as each resource is created.
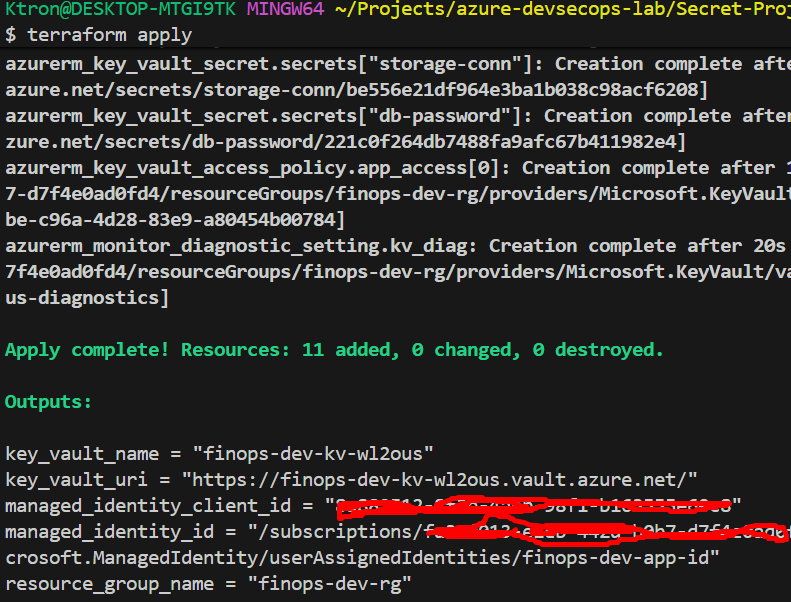
Save the Outputs
When it’s done, you’ll see output like:
Outputs:

key_vault_name = "myfinops-kv-a1b2c3"
key_vault_uri = "https://myfinops-kv-a1b2c3.vault.azure.net/"
managed_identity_id = "/subscriptions/.../myfinops-app-identity"
resource_group_name = "myfinops-dev-rg"
Copy these somewhere! You’ll need them later.
Part 7: Verify Everything Works (10 minutes)
Let’s make sure our vault is working properly.
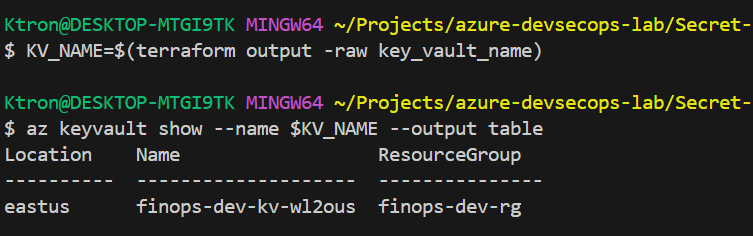
Check the Key Vault Exists
# Get the vault name from Terraform output
KV_NAME=$(terraform output -raw key_vault_name)

# Show vault details
az keyvault show --name $KV_NAME --output table
List the Secrets
# List secret NAMES (not values)
az keyvault secret list --vault-name $KV_NAME --output table

Read a Secret
# Read the db-password secret
az keyvault secret show --vault-name $KV_NAME --name db-password --query value -o tsv

You should see: DemoPassword123!
It works! Your vault is storing and retrieving secrets!
Part 8: Using Secrets in Azure Pipelines
Using Secrets in a Pipeline (The Magic Part)
Now for the payoff: teaching your Azure Pipeline to fetch secrets without ever printing them in logs.
Here’s the pipeline YAML:
trigger:
  - main

pool:
  vmImage: 'ubuntu-latest'

variables:
  # Replace with YOUR Key Vault name from Terraform output
  kvName: 'myfinops-kv-a1b2c3'

steps:
  # Step 1: Fetch secrets from Key Vault
  - task: AzureKeyVault@2
    displayName: 'Fetch secrets from Key Vault'
    inputs:
      azureSubscription: 'YOUR-SERVICE-CONNECTION-NAME'  # You'll create this
      KeyVaultName: '$(kvName)'
      SecretsFilter: 'db-password,api-key'
      RunAsPreJob: true

  # Step 2: Verify secrets loaded (without printing them)
  - script: |
      echo "Testing secret availability..."

      if [ -n "$(db-password)" ]; then
        echo "✓ db-password loaded successfully"
      else
        echo "✗ db-password is empty"
        exit 1
      fi

      if [ -n "$(api-key)" ]; then
        echo "✓ api-key loaded successfully"
      else
        echo "✗ api-key is empty"
        exit 1
      fi

      echo ""
      echo "All secrets loaded! They are masked in logs for security."
    displayName: 'Verify secrets are available'

  # Step 3: Use secrets in deployment (example)
  - script: |
      echo "Simulating deployment..."
      echo "Connecting to database (password is masked)"
      echo "Deployment completed!"
    displayName: 'Deploy application'
    env:
      DB_PASSWORD: $(db-password)
      API_KEY: $(api-key)
What’s happening here?
- The
AzureKeyVault@2task uses your pipeline’s service connection to authenticate to Azure - It fetches the secrets you specified (
db-password,api-key) - It makes them available as pipeline variables
- Crucially: It automatically MASKS them in logs — so if you accidentally try to print them, Azure shows instead
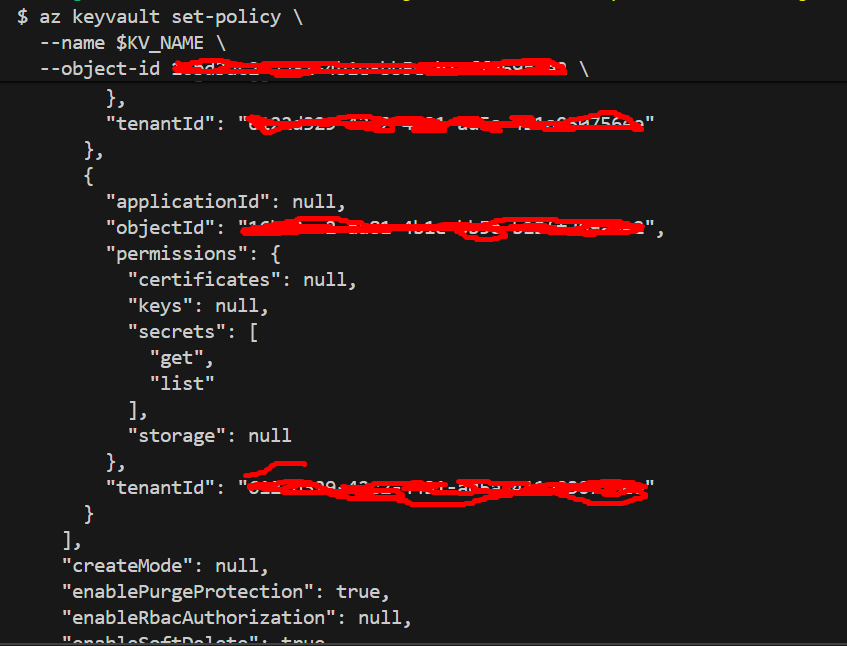
Grant Pipeline Access to Key Vault
# Get the service principal object ID from Azure DevOps
# (It's shown in the service connection details)

# Grant the service principal access to Key Vault
az keyvault set-policy \
  --name $KV_NAME \
  --object-id <SERVICE-PRINCIPAL-OBJECT-ID> \
  --secret-permissions get list
Push Your Code and Watch the Pipeline

The pipeline will automatically run! Go watch it in Azure DevOps.
You should see:
✅ Deployment completed successfully
✅ Secrets fetched from Key Vault
✅ Secret values masked as *** in logs
Cleanup (When You’re Done Learning)
To avoid Azure charges:
# Destroy all resources
terraform destroy

# When prompted, type 'yes'

# Purge the Key Vault (optional, frees up the name)
az keyvault purge --name $KV_NAME
Key Takeaways
Setting up this Key Vault was like finally installing a proper safe after keeping valuables in a drawer. It took an hour to set up, but now:
- No more secrets in code
- Full audit trail of who accessed what
- Easy secret rotation
- Pipelines work automatically
- I sleep better at night
The best part? Once it’s set up, you never think about it again. Your pipelines just fetch secrets when they need them. Your apps just work. And your secrets stay secret.
For anyone building FinTech applications (or any application with sensitive data), this isn’t optional it’s required. Regulators, customers, and your future self will thank you.


Leave a comment