
This marks the beginning of my preparation journey for the Microsoft Azure Administrator (AZ-104) certification exam. I strongly believe, as do many professionals, that an exam alone is not the true measure of one’s understanding or capability.
Therefore, I have decided to undertake 10 practical hands-on projects that comprehensively cover the core domains of the AZ-104 exam, which include:
Managing Azure Identities and Governance
Implementing and Managing Storage
Deploying and Managing Azure Compute Resources
Configuring and Managing Virtual Networking
Monitoring and Maintaining Azure Resources
Implementing Backup and Recovery Solutions
Configuring Load Balancing and High Availability
Managing Azure App Services and Security
Implementing Azure Policies and Governance Blueprints
Configuring Hybrid Networking and VPN Connections
I begin this journey with Project 1: Understanding Azure Identity and RBAC Setup, which focuses on user and group management, role assignments, and access control best practices within Azure.
Objective
In this project, We’ll learn how to:
- How to create users and groups in Microsoft Entra ID (formerly Azure AD).
- How to assign RBAC roles to control access to Azure resources.
- How to configure Conditional Access to enforce security policies.
Prerequisites
- An Azure subscription.
- Access to the Azure Portal.
- Optionally, Azure CLI is installed.
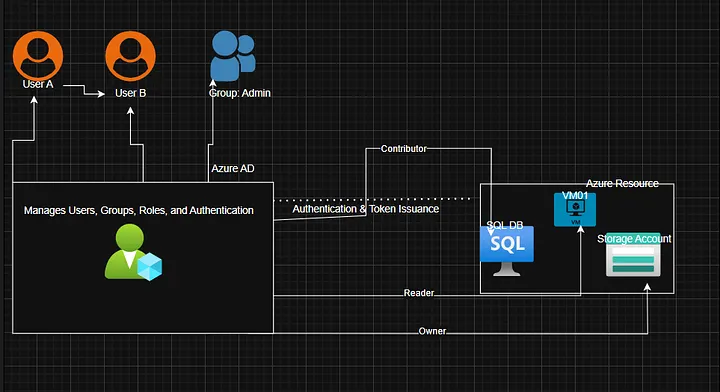
If you’re new to Entra ID, note that when you create an Azure account, Microsoft automatically gives you a default directory called Microsoft Entra ID. This directory is where all your users, groups, and permissions are managed. Think of it as the control center that decides who can sign in and what they can access in Azure. You can find and manage it directly from the Microsoft Entra ID section in the Azure Portal.
So, even if you’re new, you already have one directory set up and ready to use for identity management.
Architecture Analogy
To make this easy:
- User1 → a kid who can only watch others play.
- User2 → a kid who can play, but only after washing hands (MFA).
- Group → a classroom.
- Role → the rules about which toys (resources) can be touched.
Step-by-Step Implementation
Step 1: Create Users
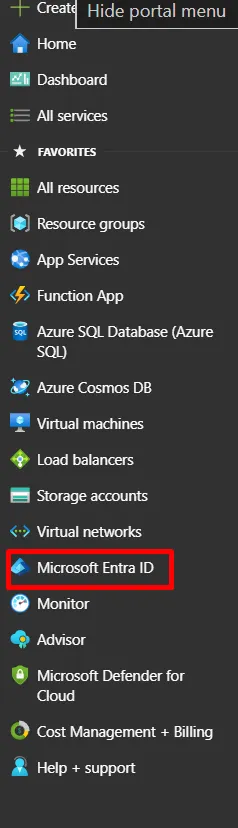
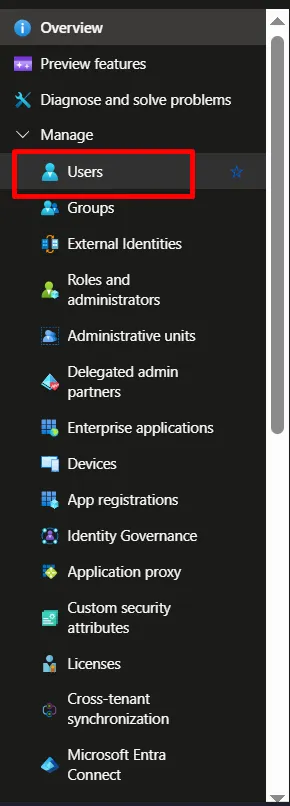
Go to Azure Portal → Microsoft Entra ID → Users → + New User.
Create:
testuser1testuser2testuser3
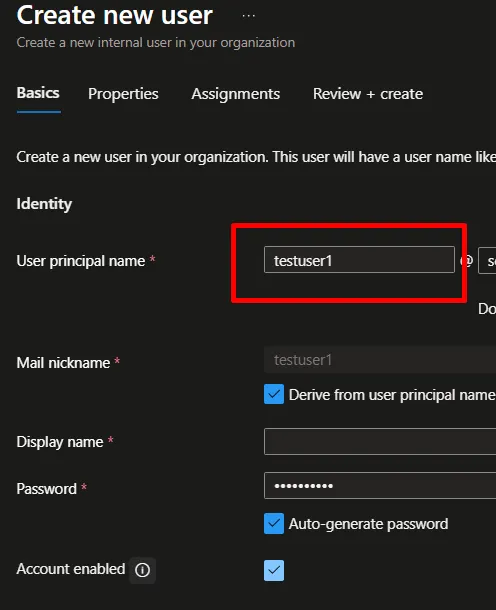
You can leave other tabs blank and complete the creation of the user for the other two users.

CLI alternative:
az ad user create \
— display-name “Test User 1” \
— user-principal-name testuser1@<yourdomain>.onmicrosoft.com \
— password “StrongP@ssw0rd!”
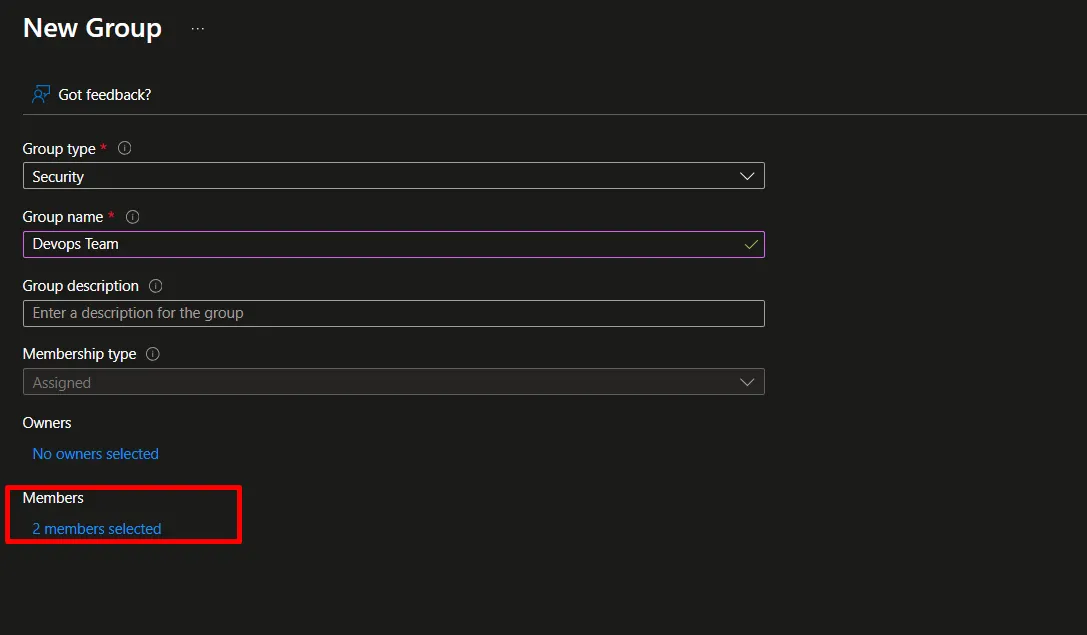
Step 2: Create a Group
Go to Groups → + New Group.
Choose:
- Group type: Security
- Name: DevOps-Team
- Membership type: Assigned
Add testuser1 and testuser2.
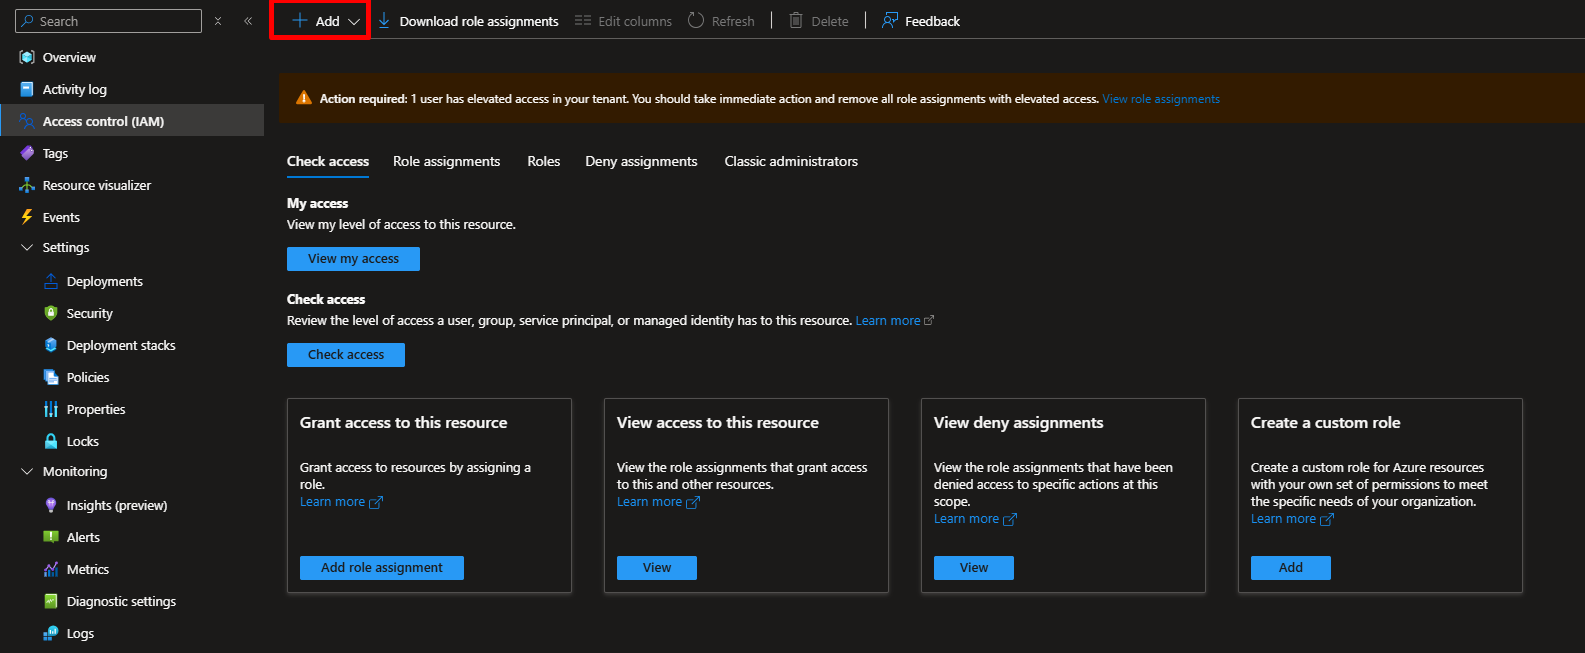
Step 3: Assign RBAC Roles
Navigate to Subscriptions → Access Control (IAM) → + Add Role Assignment.
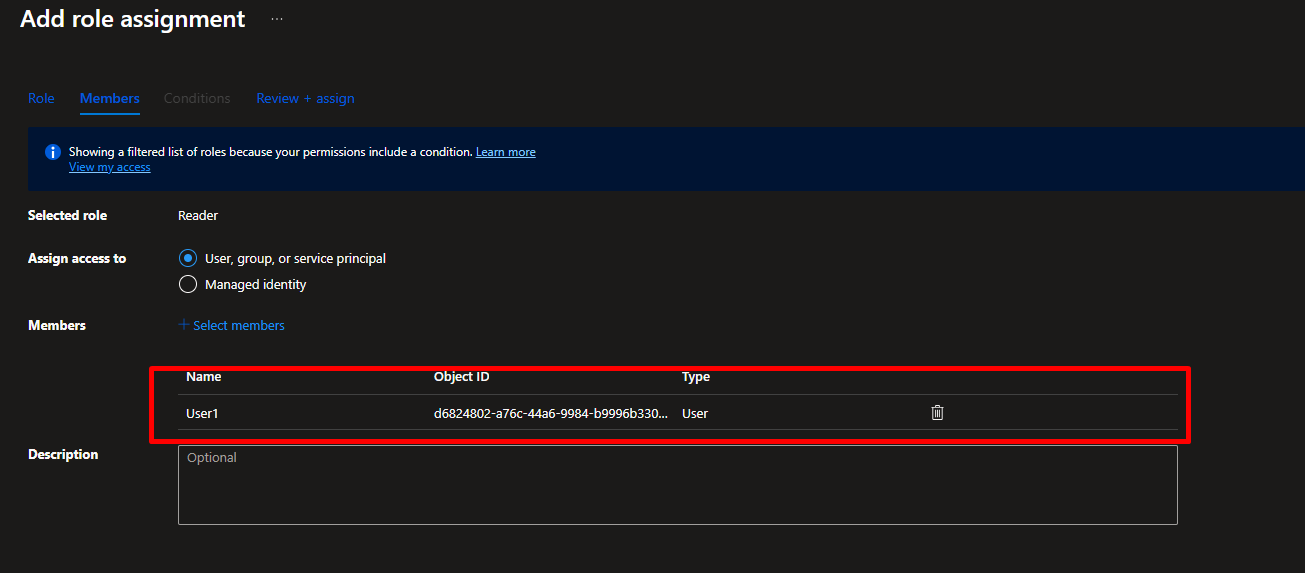
Assign:
- Reader →
testuser1 - Contributor →
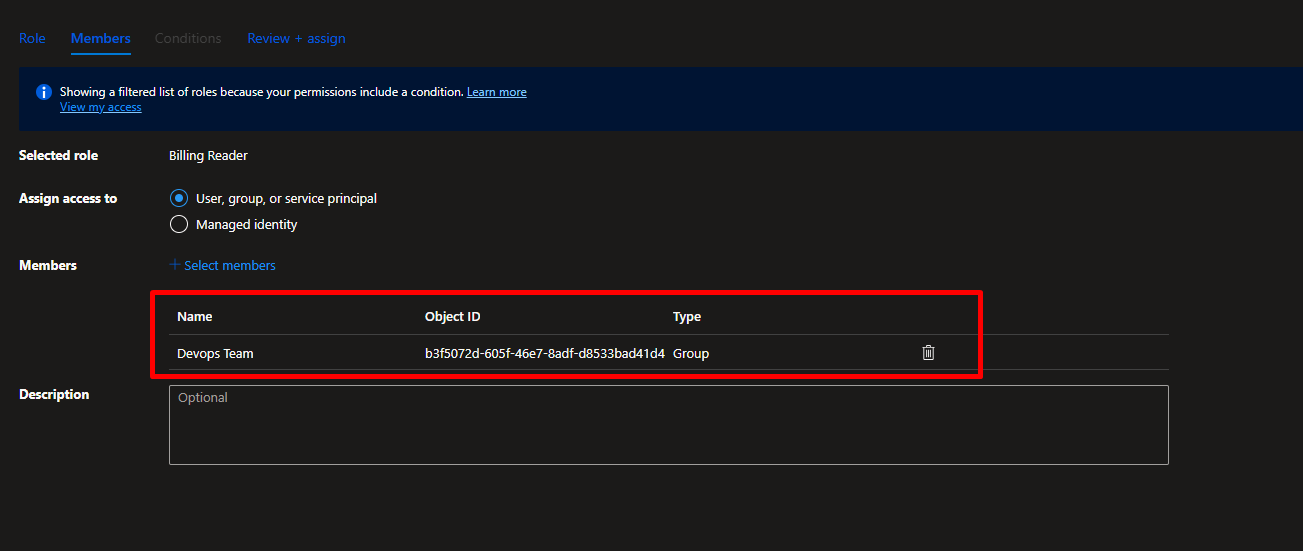
testuser2 - Billing Reader →
DevOps-Team - Custom Role for
testuser3(storage read-only)
Step 4: Configure Conditional Access
Go to Microsoft Entra ID → Security → Conditional Access → + New Policy.
- Name: MFA for Admins
- Assign to
testuser2and select All cloud apps. - Under Access controls, choose Grant → Require multi-factor authentication.
Enable the policy.
Step 5: Validation Summary
Each test user and group behaves according to their assigned roles:
- testuser1 — Read-only access.
- testuser2 — Can create resources; MFA enforced.
- testuser3 — Limited to Storage resources only.
- DevOps-Team — Can view billing information.
Testing:
Log in as each user (preferably in an incognito window) and try basic tasks like creating a VM or accessing Storage Accounts. Verify MFA for testuser2.
Expected Result:
RBAC roles and Conditional Access policies work correctly, enforcing least-privilege access and security best practices.
Conclusion
That’s Project 1 of 10 complete!
By the end of this series, I aim to not only pass AZ-104 but also build real-world confidence as an Azure Administrator.


Leave a comment