This third project introduces practical VM(Virtual Machine) management concepts used by real-world Azure Administrators. This involves deploying, configuring, and securing Azure Virtual Machines (VMs) using best practices, including network security groups (NSGs), public/private IPs, and Bastion access, while ensuring high availability and cost efficiency.
Objective
- How to deploy Linux and Windows VMs in Azure
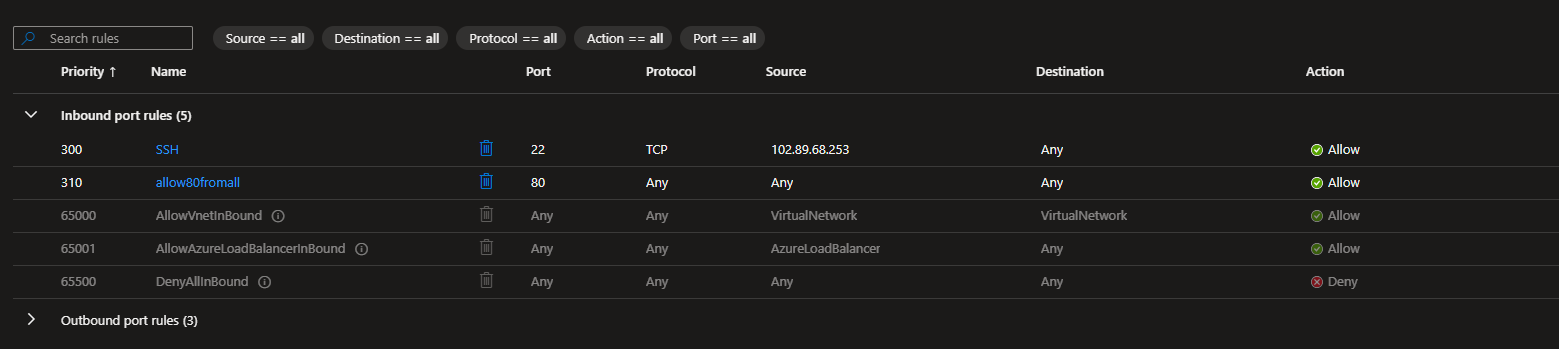
- How to configure NSG rules for inbound/outbound control
- How to connect securely to VMs using Azure Bastion
- How to manage VM sizes, availability options, and cost optimization
- How to take VM snapshots and create managed images
AZ-104 Skill Covered:
Manage Azure compute resources, configure networking, and implement security and backup.
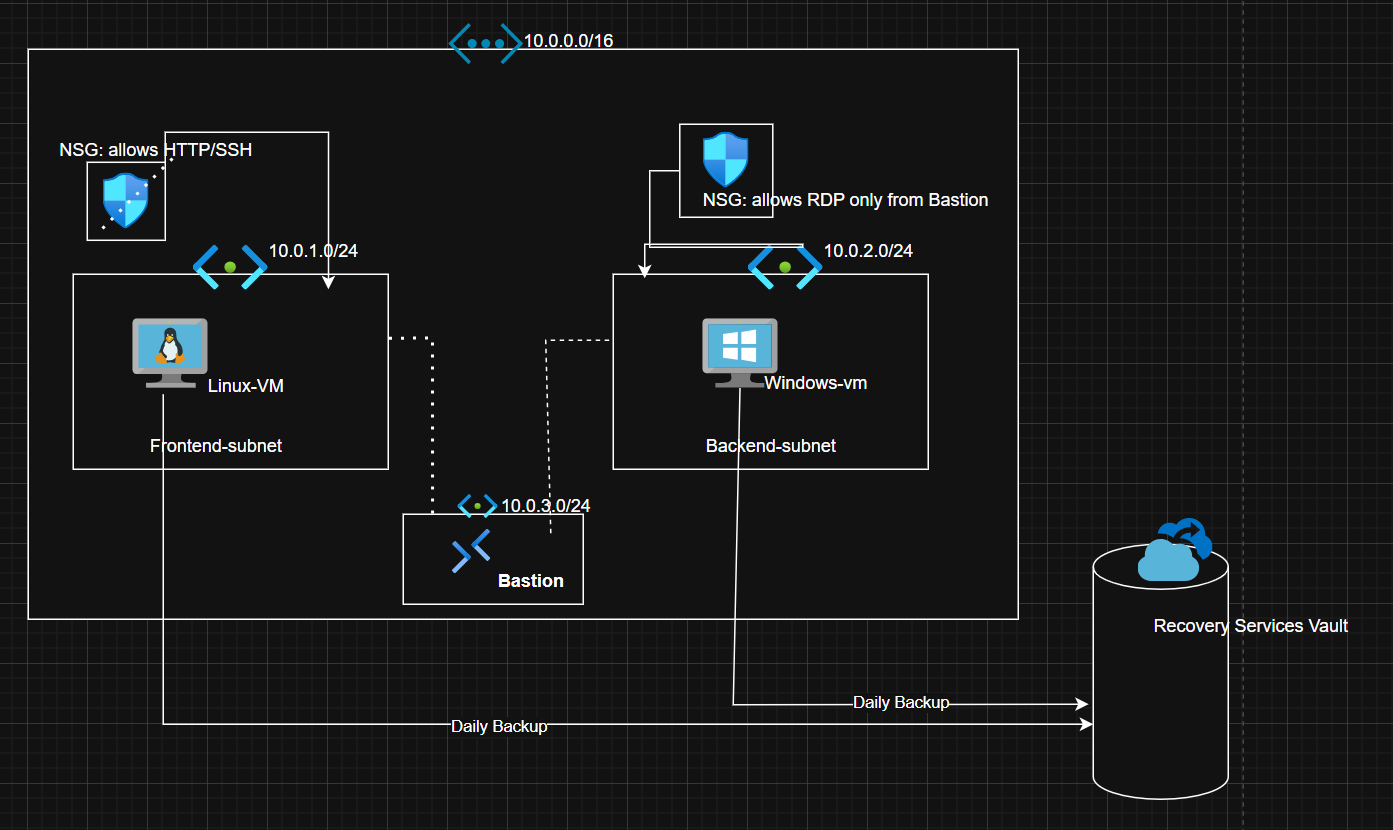
Architecture / Design Diagram
Concept Analogy:
Think of this like a secure digital neighborhood :
- Frontend VM → The shop where customers visit (public-facing).
- Backend VM → The warehouse storing important data (private).
- NSGs → The security guards controlling who enters which building.
- Azure Bastion → The security checkpoint for admins (no direct doors).
- Backup Vault → The safety box that stores copies of everything.
Implementation Steps
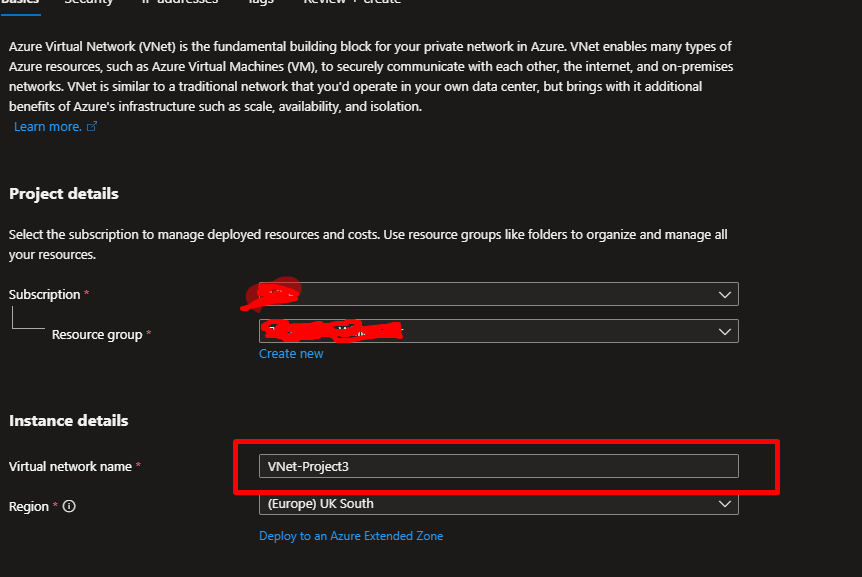
Step 1: Create the Virtual Network (VNet)
Every VM needs to “live” inside a network.
Think of the Virtual Network as your digital city, and subnets as different neighborhoods.
Azure Portal → Virtual Networks → + Create
- Name:
VNet-Project3
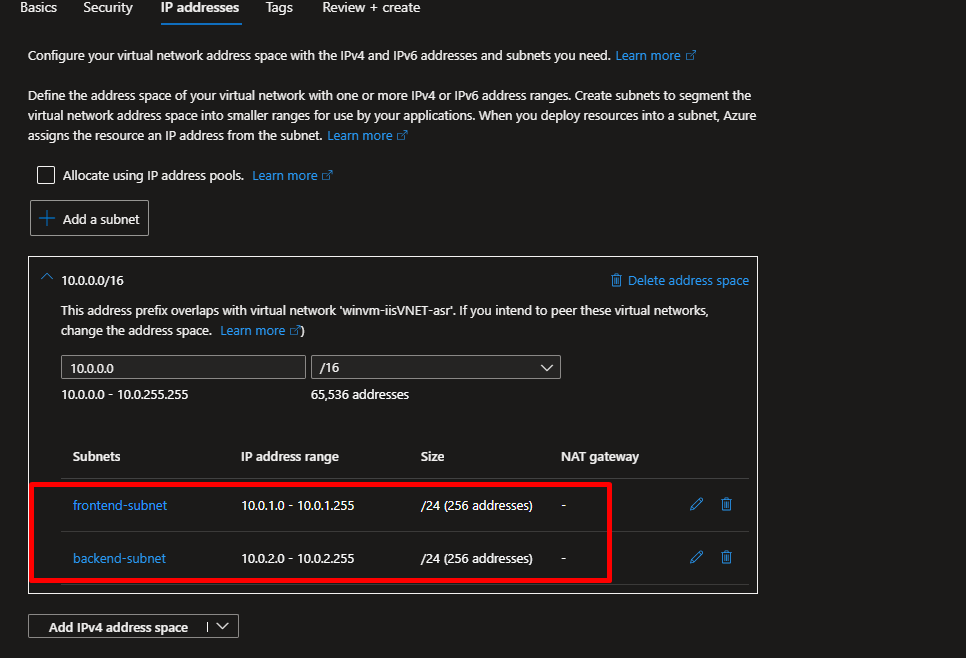
- Address space:
10.0.0.0/16
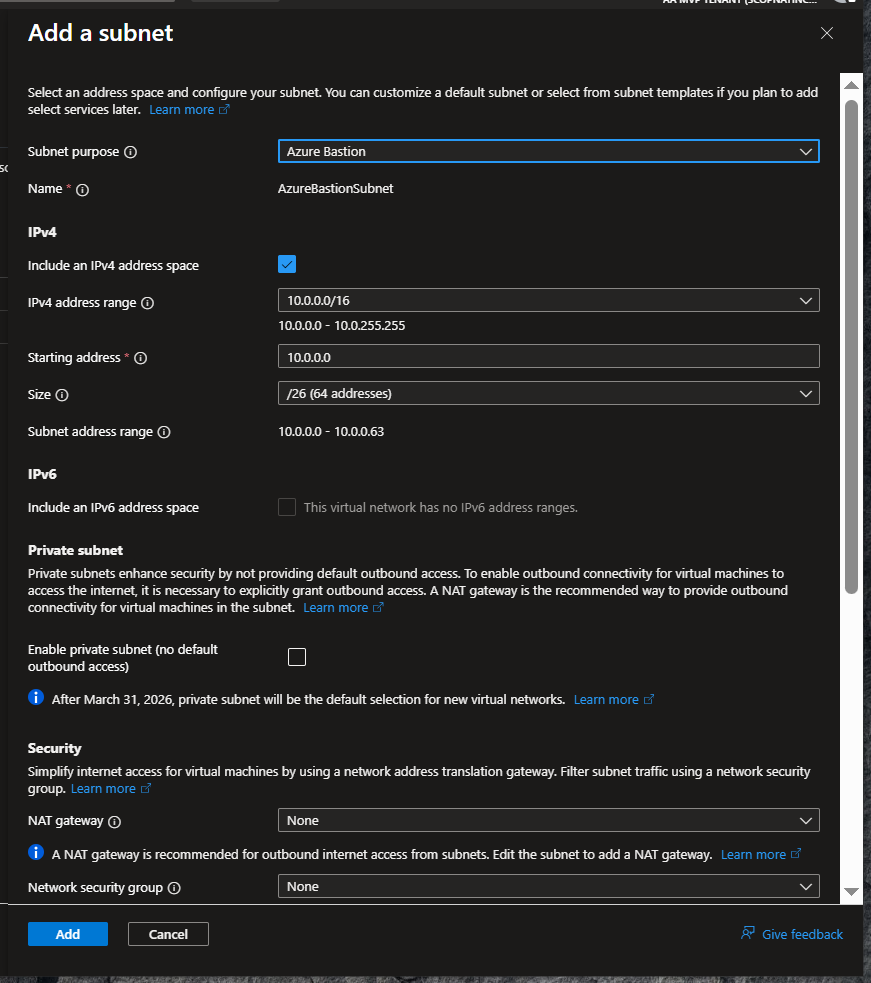
- Add subnets:
frontend-subnet (10.0.1.0/24)
backend-subnet (10.0.2.0/24)
Azure Bastion ( 10.0.0.0/26 )
Step 2: Deploy Virtual Machines
- Azure Portal → Virtual Machines → + Create
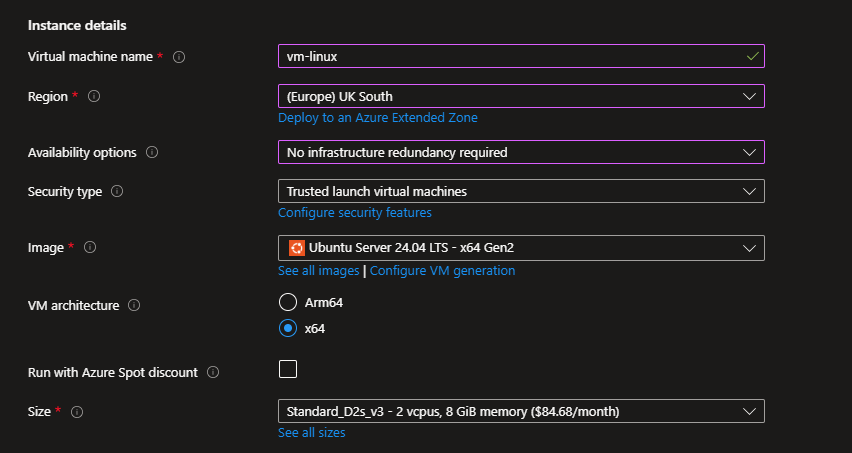
- In the Basics Tab
Here’s what you’ll fill out:
- Virtual machine name:
vm-linux - Region: Choose same region as your VNet.
- Availability options: Leave as default (No infrastructure redundancy).
- Image: Select Ubuntu Server 24.04 LTS
- Size: Choose B1s (cheap and enough for testing).
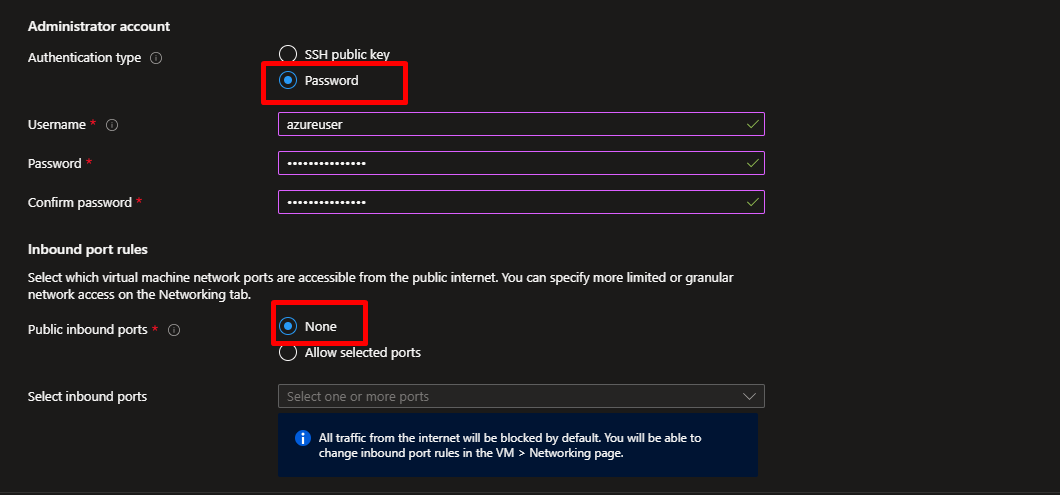
In Authentication Type
- Choose Password (for simplicity in labs).
- Enter:
- Username:
azureuser - Password: A strong password like
StrongP@ssw0rd!
- Username:
In the Networking Tab,
This is where we decide where the VM “lives.”
- Virtual network: Select
VNet-Project3 - Subnet: Select
frontend-subnet (10.0.1.0/24) - Public IP: Select None (since we’ll use Azure Bastion later).
This ensures your VM is isolated inside the frontend subnet.

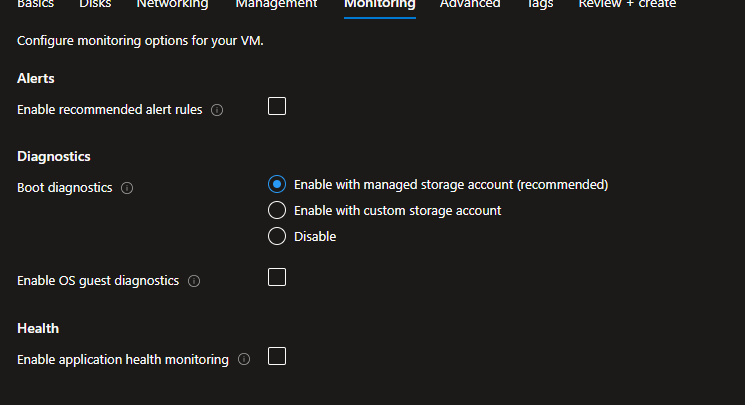
In the Management Tab
- Boot diagnostics: Turn On (creates a storage account automatically).
This helps you view startup logs if the VM fails to boot. - Leave other settings as default.
Then, under the Advanced tab in the Custom Data section, add the script below.
This script installs Nginx, a popular open-source web server used for serving web pages, load balancing, and reverse proxying requests efficiently.
#!/bin/bash
sudo apt update
sudo apt install nginx -y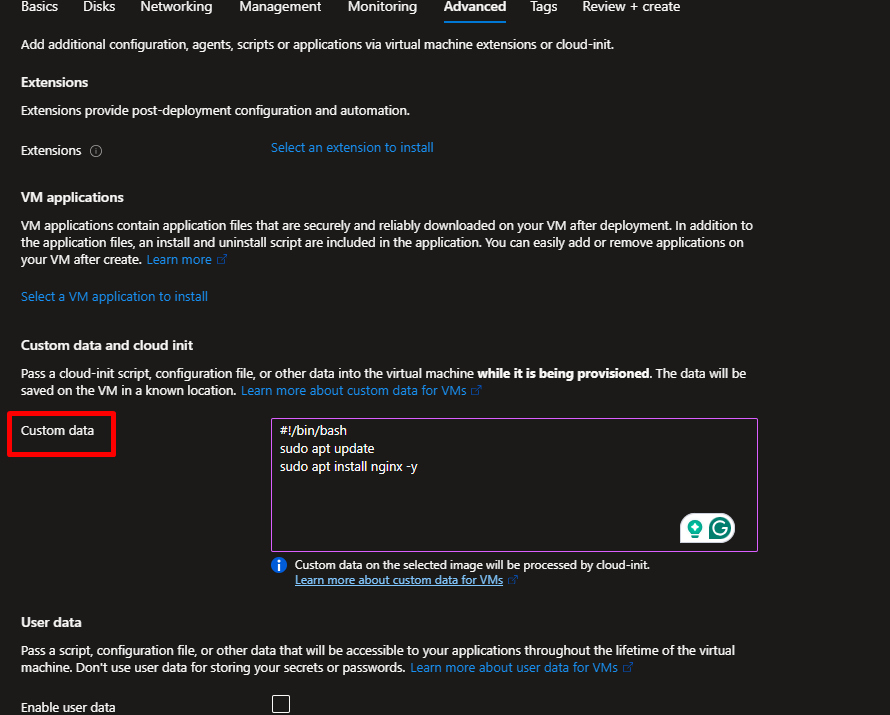
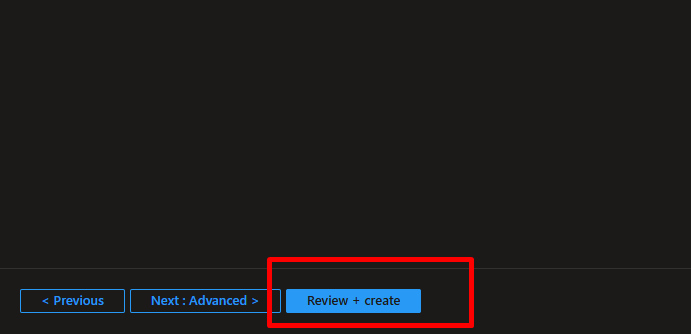
Click Review + create.
Azure will validate the configuration.
Click Create.
Wait for a few minutes until deployment completes.
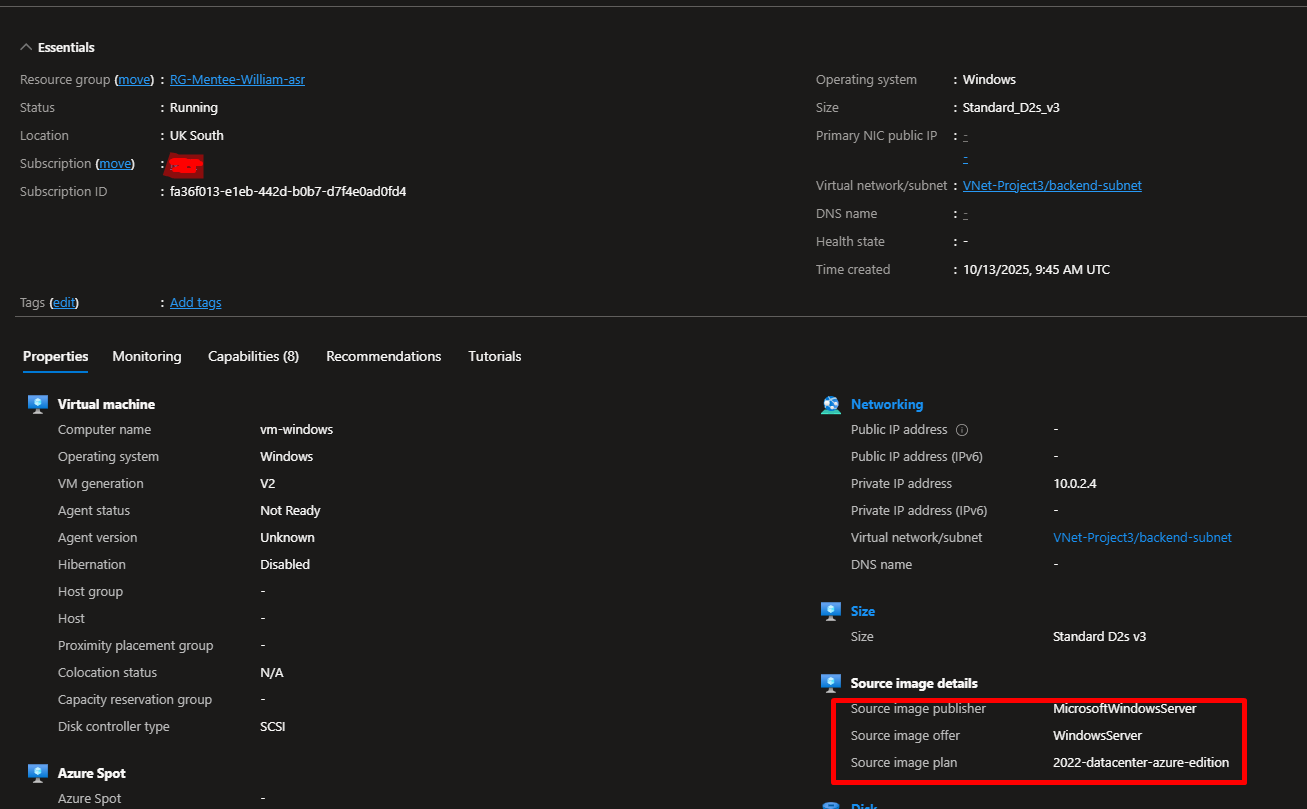
Repeat for Windows VM
Now create the backend server.
- VM Name:
vm-windows - Image:
Windows Server 2022 Datacenter - Subnet:
backend-subnet (10.0.2.0/24) - Public IP: None
- Size: B1s
- Authentication: Password
- Boot diagnostics: On
Click Review + create → Create.
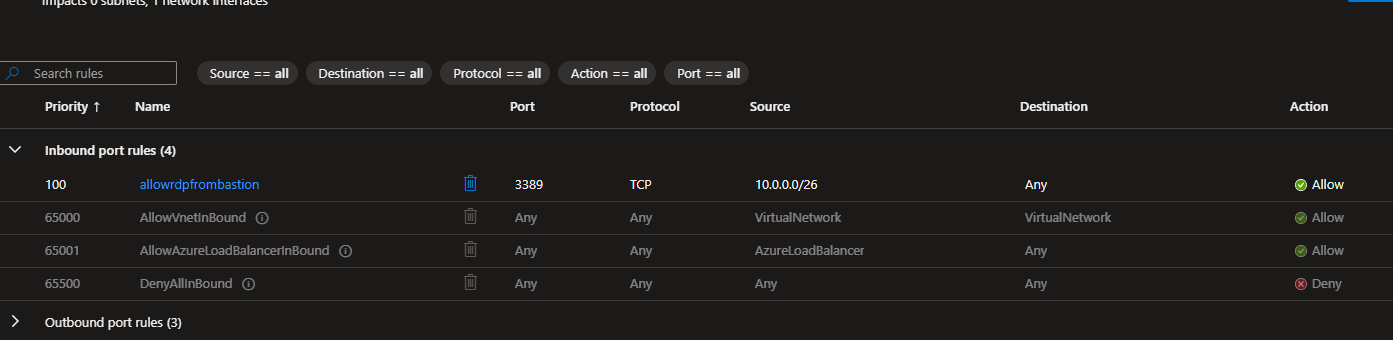
Step 3: Configure Network Security Groups
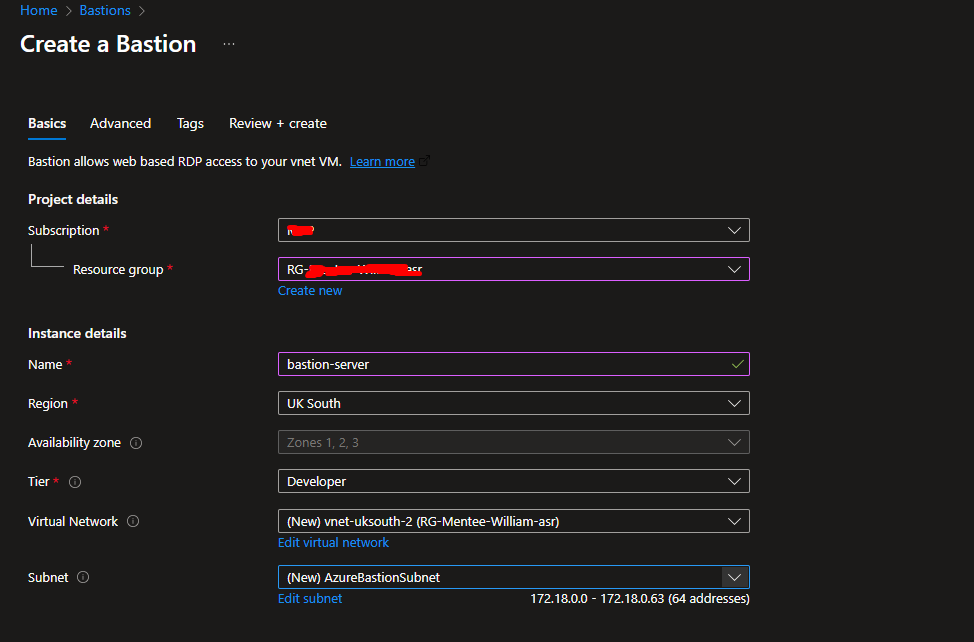
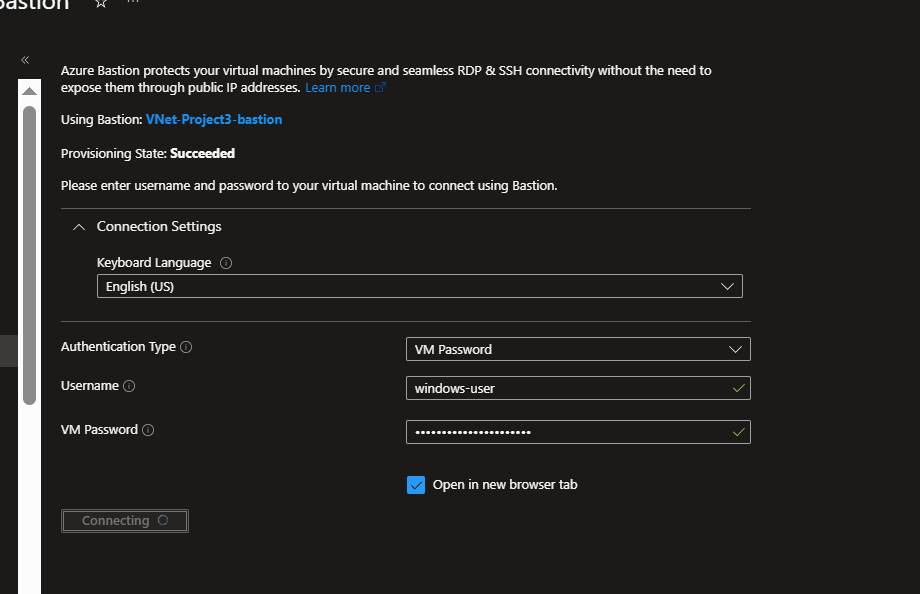
Step 4: Configure Azure Bastion
- Azure Portal → Bastion → + Create
- Subnet:
AzureBastionSubnet - Deploy inside same VNet.
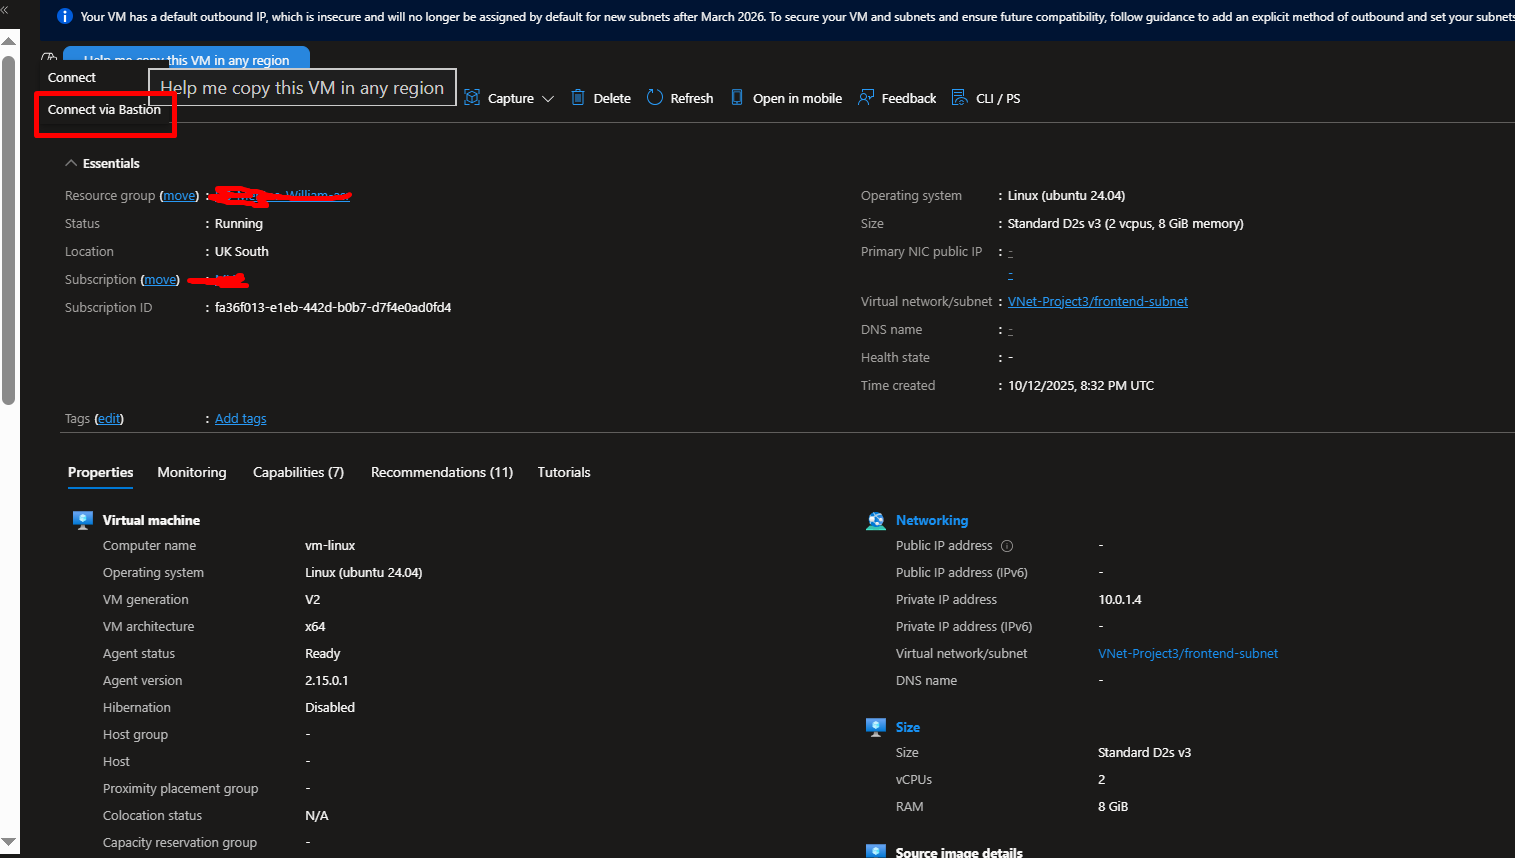
- Once deployed, connect to VMs securely without public IPs.
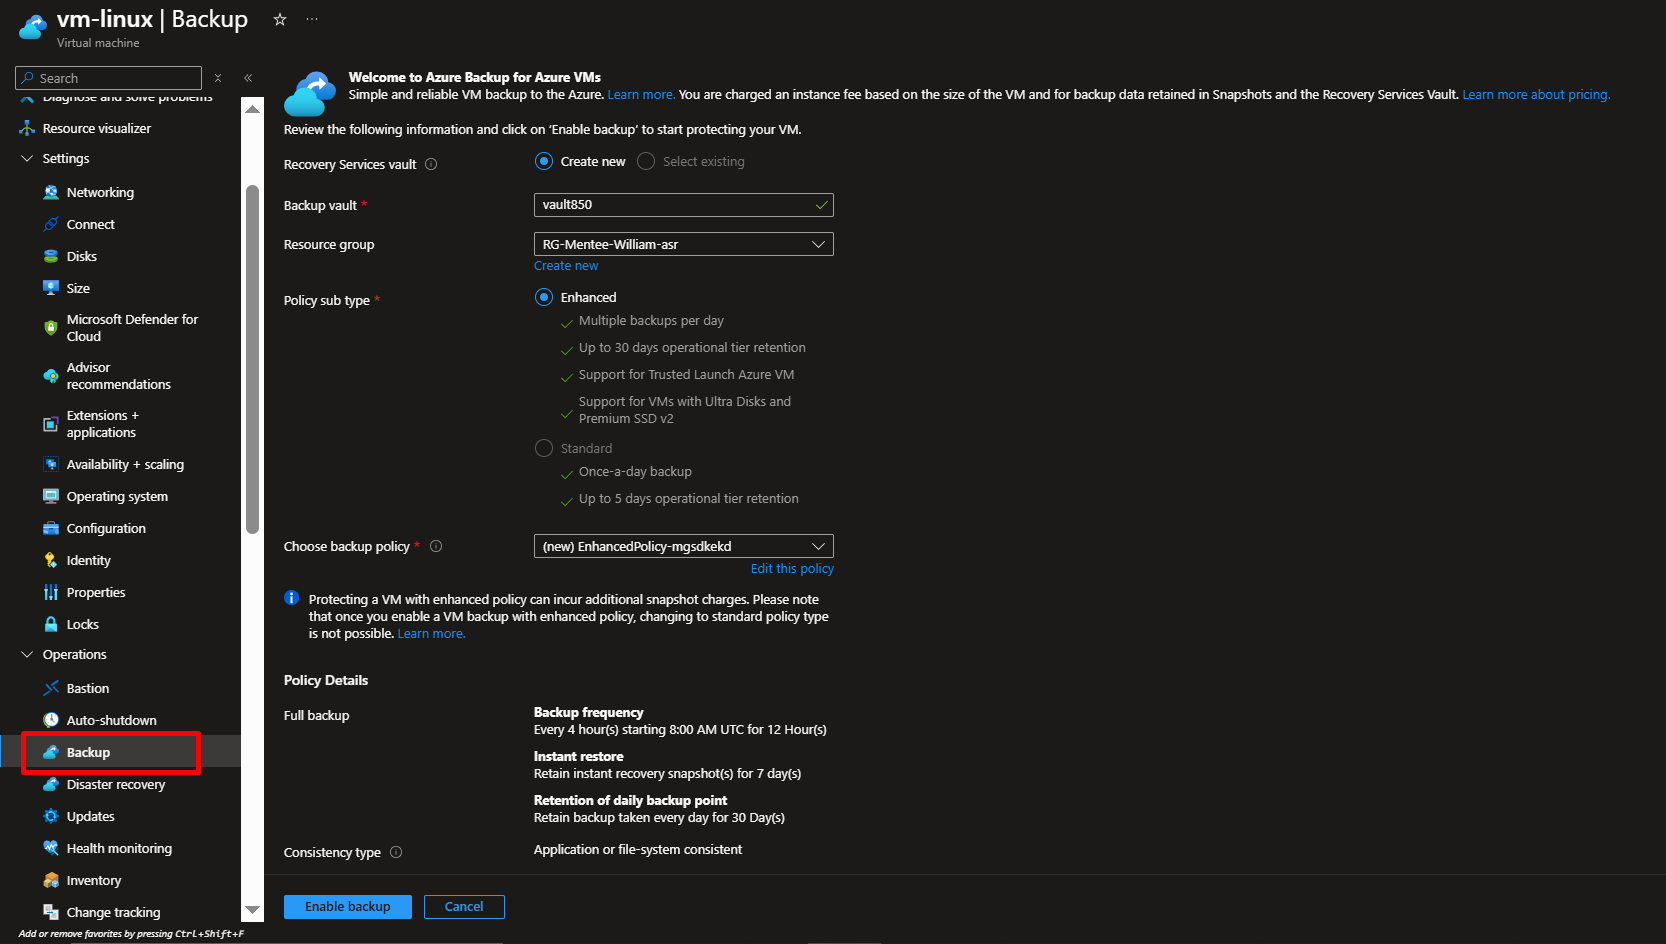
Step 5: Configure VM Backup
- Azure Portal → Recovery Services Vault → + Create
- After creating the vault, you enable backup for your VMs by selecting them as backup items and applying a retention policy (for example, keeping backups for 30 days). You can then run a manual backup to immediately create a copy of your VMs, and finally verify that the backup job completes successfully. This ensures your VMs can be quickly restored in case of failure or data loss.
Verification
To test our HTTP connection, we need to assign a Public IP address to the Network Interface (NIC) of our Virtual Machine (VM).
Follow the steps below:
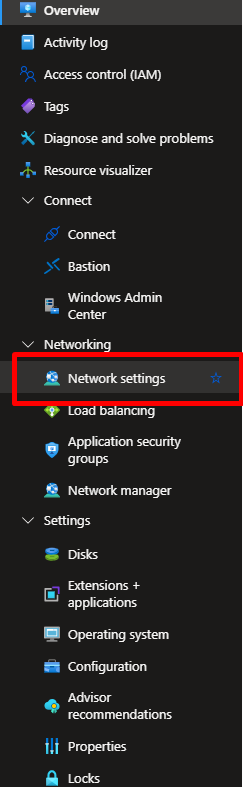
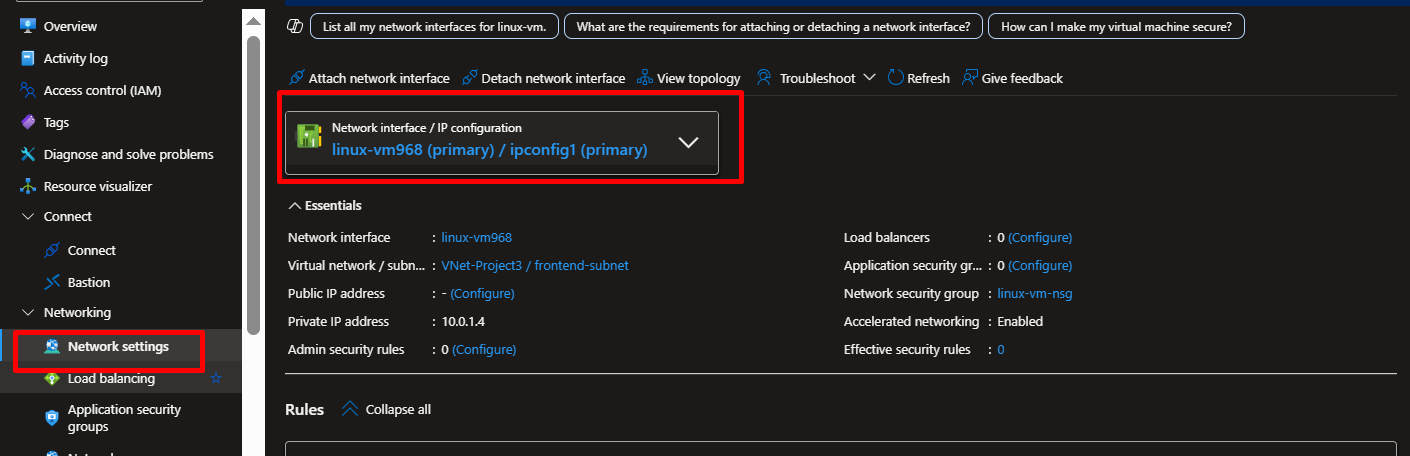
- Locate Your Virtual Machine (VM)
In the left-hand menu, select Virtual Machines, and click on the name of the VM you want to configure. - Open the Networking Settings
In the VM overview pane, select Networking under the Settings section. - Access the Network Interface (NIC)
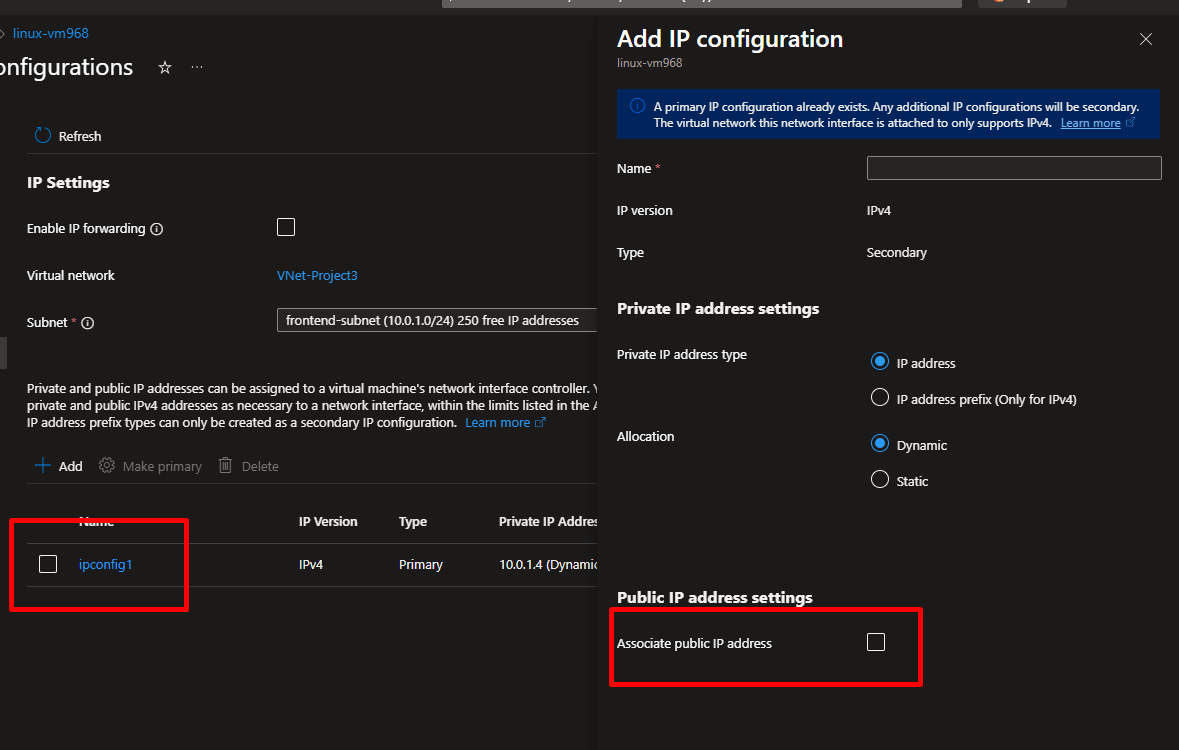
Click on the Network Interface name associated with the VM to open its configuration page. - Assign a Public IP
- Under the IP configurations tab, select the existing configuration (usually named
ipconfig1). - Click Associate a public IP address.
- Choose an existing public IP or click Create new to generate a new one.
- Click Save.
- Under the IP configurations tab, select the existing configuration (usually named
- Verify the Public IP Assignment
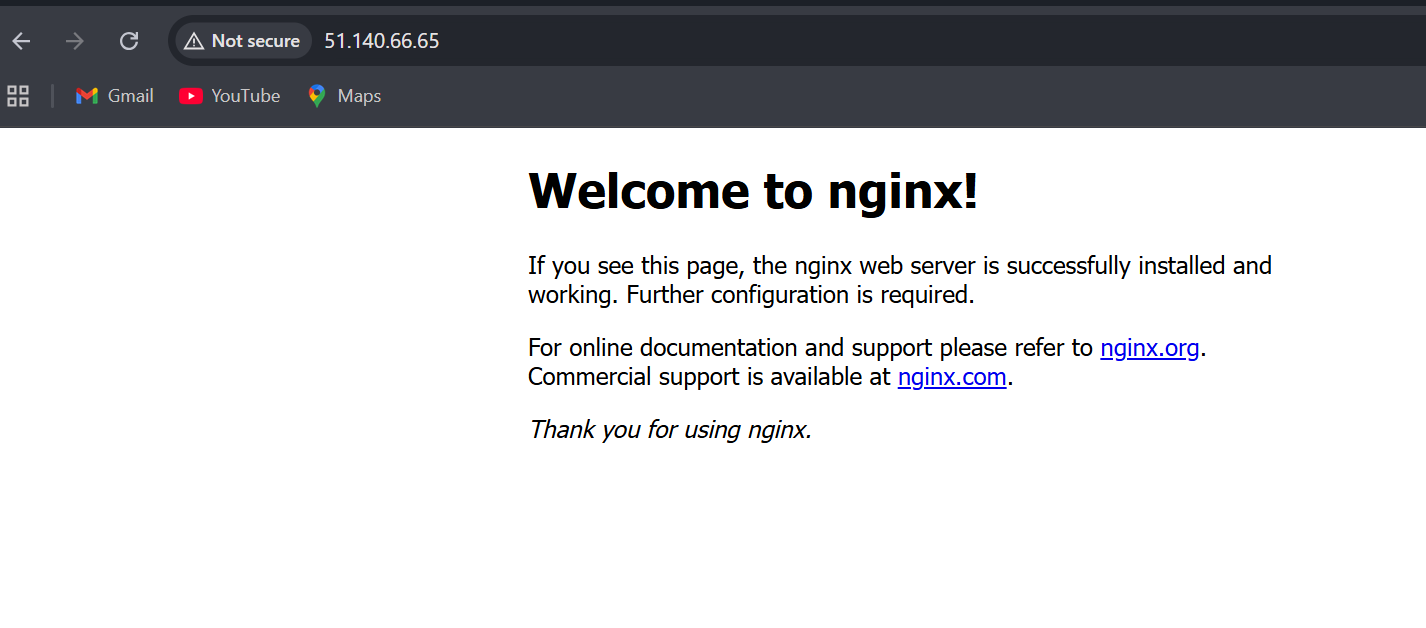
Once saved, return to the VM Networking tab. You should now see the Public IP address listed under Network interface. - Test the HTTP Connection
Copy the Public IP address and open it in your browser (e.g.,http://<your-public-ip>).
If Nginx was installed correctly, you should see the default Nginx welcome page.

NB: If the Public-IP is not attached, you might want to restart the VM
Conclusion
This project demonstrates secure VM deployment and management in Azure.
By applying RBAC, NSGs, Bastion, and Recovery Vault, you’re practicing the same design principles used in production-grade enterprise environments.


Leave a reply to williamtijesuni Cancel reply